
How to Shape your own Surfboard – Part 3
The Surfboard Glassing process
Let’s dive into our extensive tutorial on DIY surfboard shaping. In our previous episodes, we covered Part 1 Intro and Tools you need to shape your own Surfboard and Part 2 the process of shaping the surfboard yourself. Now, it’s time to move on to the next crucial step: Part 3 the glassing process.
Our focus will be on enhancing both the tightness and stability of the surfboard’s outer skin. To achieve this, we’ll be working with multiple layers of fiberglass mats and resin, effectively sealing the shaped blank. Typically, the bottom is laminated once, while the deck receives two layers of lamination.
The number of layers you choose will ultimately depend on your personal preference, taking into consideration factors such as the board’s shape, desired weight, and stability.
Should you have any inquiries on this matter, feel free to reach out to us or to Thierry André from Terry Surfboards at the Shaper House in Biarritz. But without further ado, let’s commence our glassing process.
Glassing is the process of adding layers of fiberglass cloth and resin to the shaped surfboard blank in order to provide strength and make it waterproof.
Here are the steps involved in the glassing process:
Preparation:
- Clean the working area from dust and dirt generated during shaping, or use a separate glassing room.
- Ensure good ventilation in the room or use an exhaust system to filter out fumes.
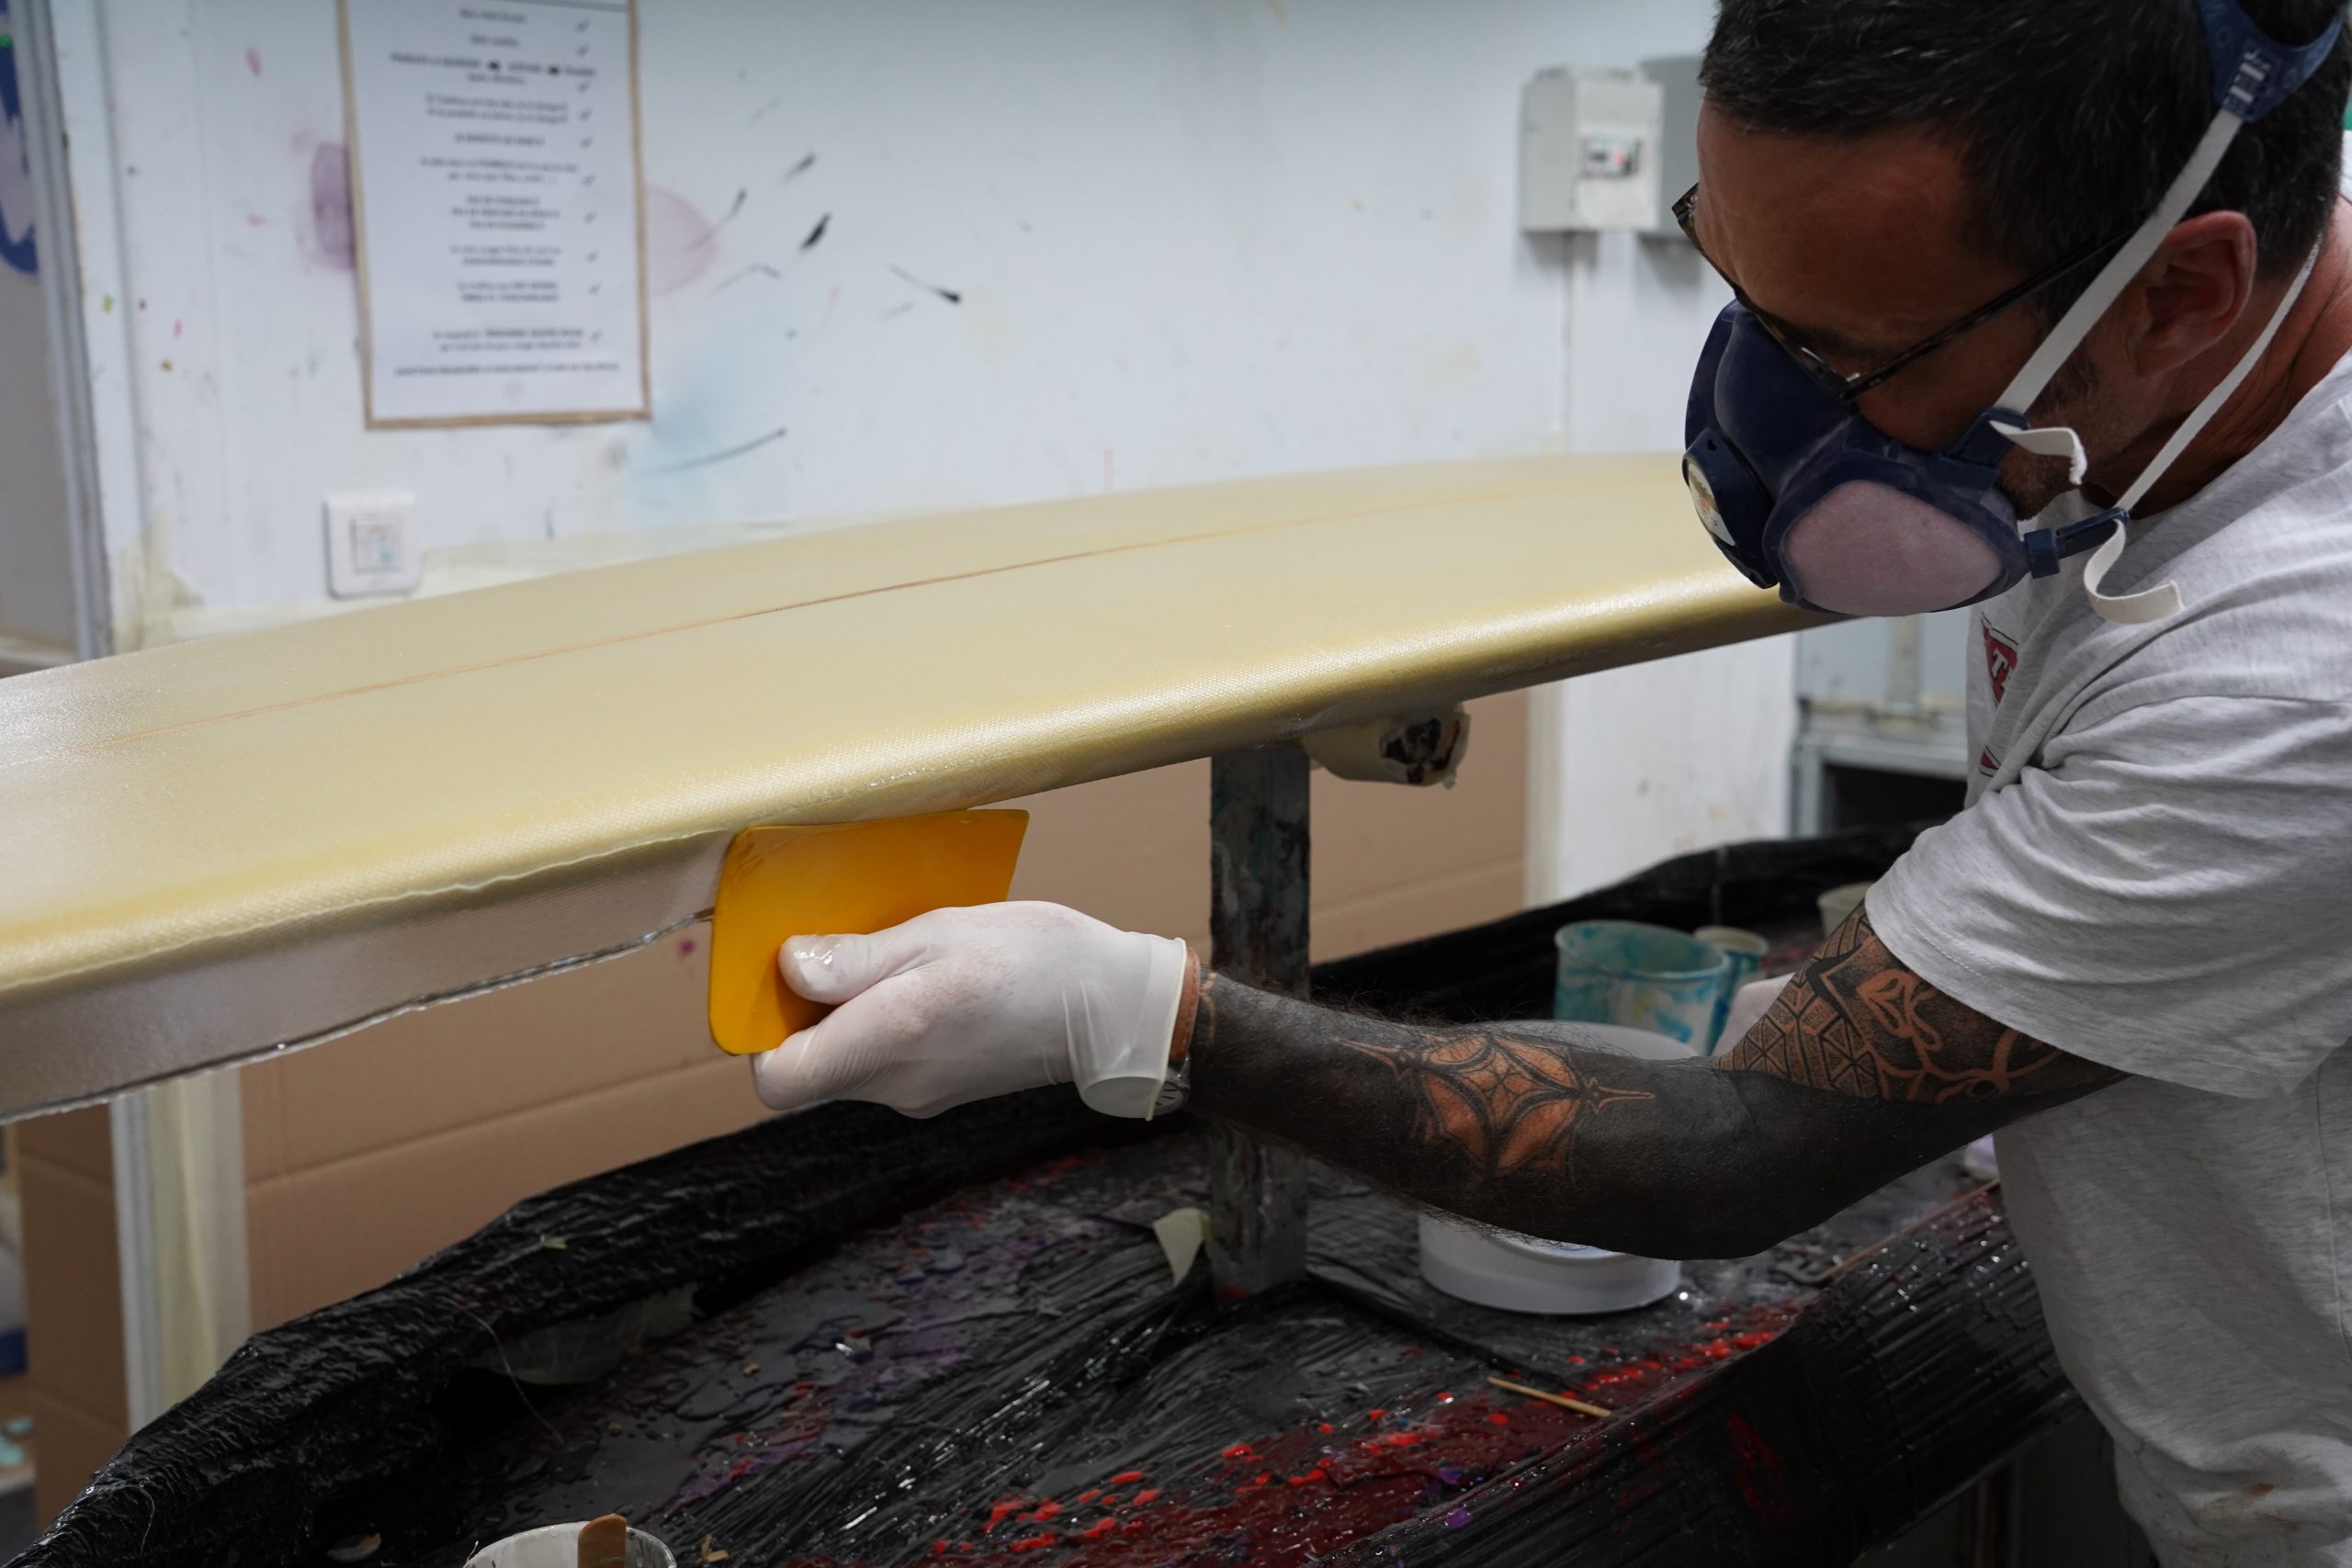
- Wear appropriate protective gear, including a respirator mask with the correct filter, safety glasses, and gloves.
- Use a glassing stand to hold the surfboard blank during the process.
Glassing the Bottom:
- Place the shaped blank bottom-up on the glassing stand.
- Remove any dust or debris from the surface using a hand broom or compressed air.
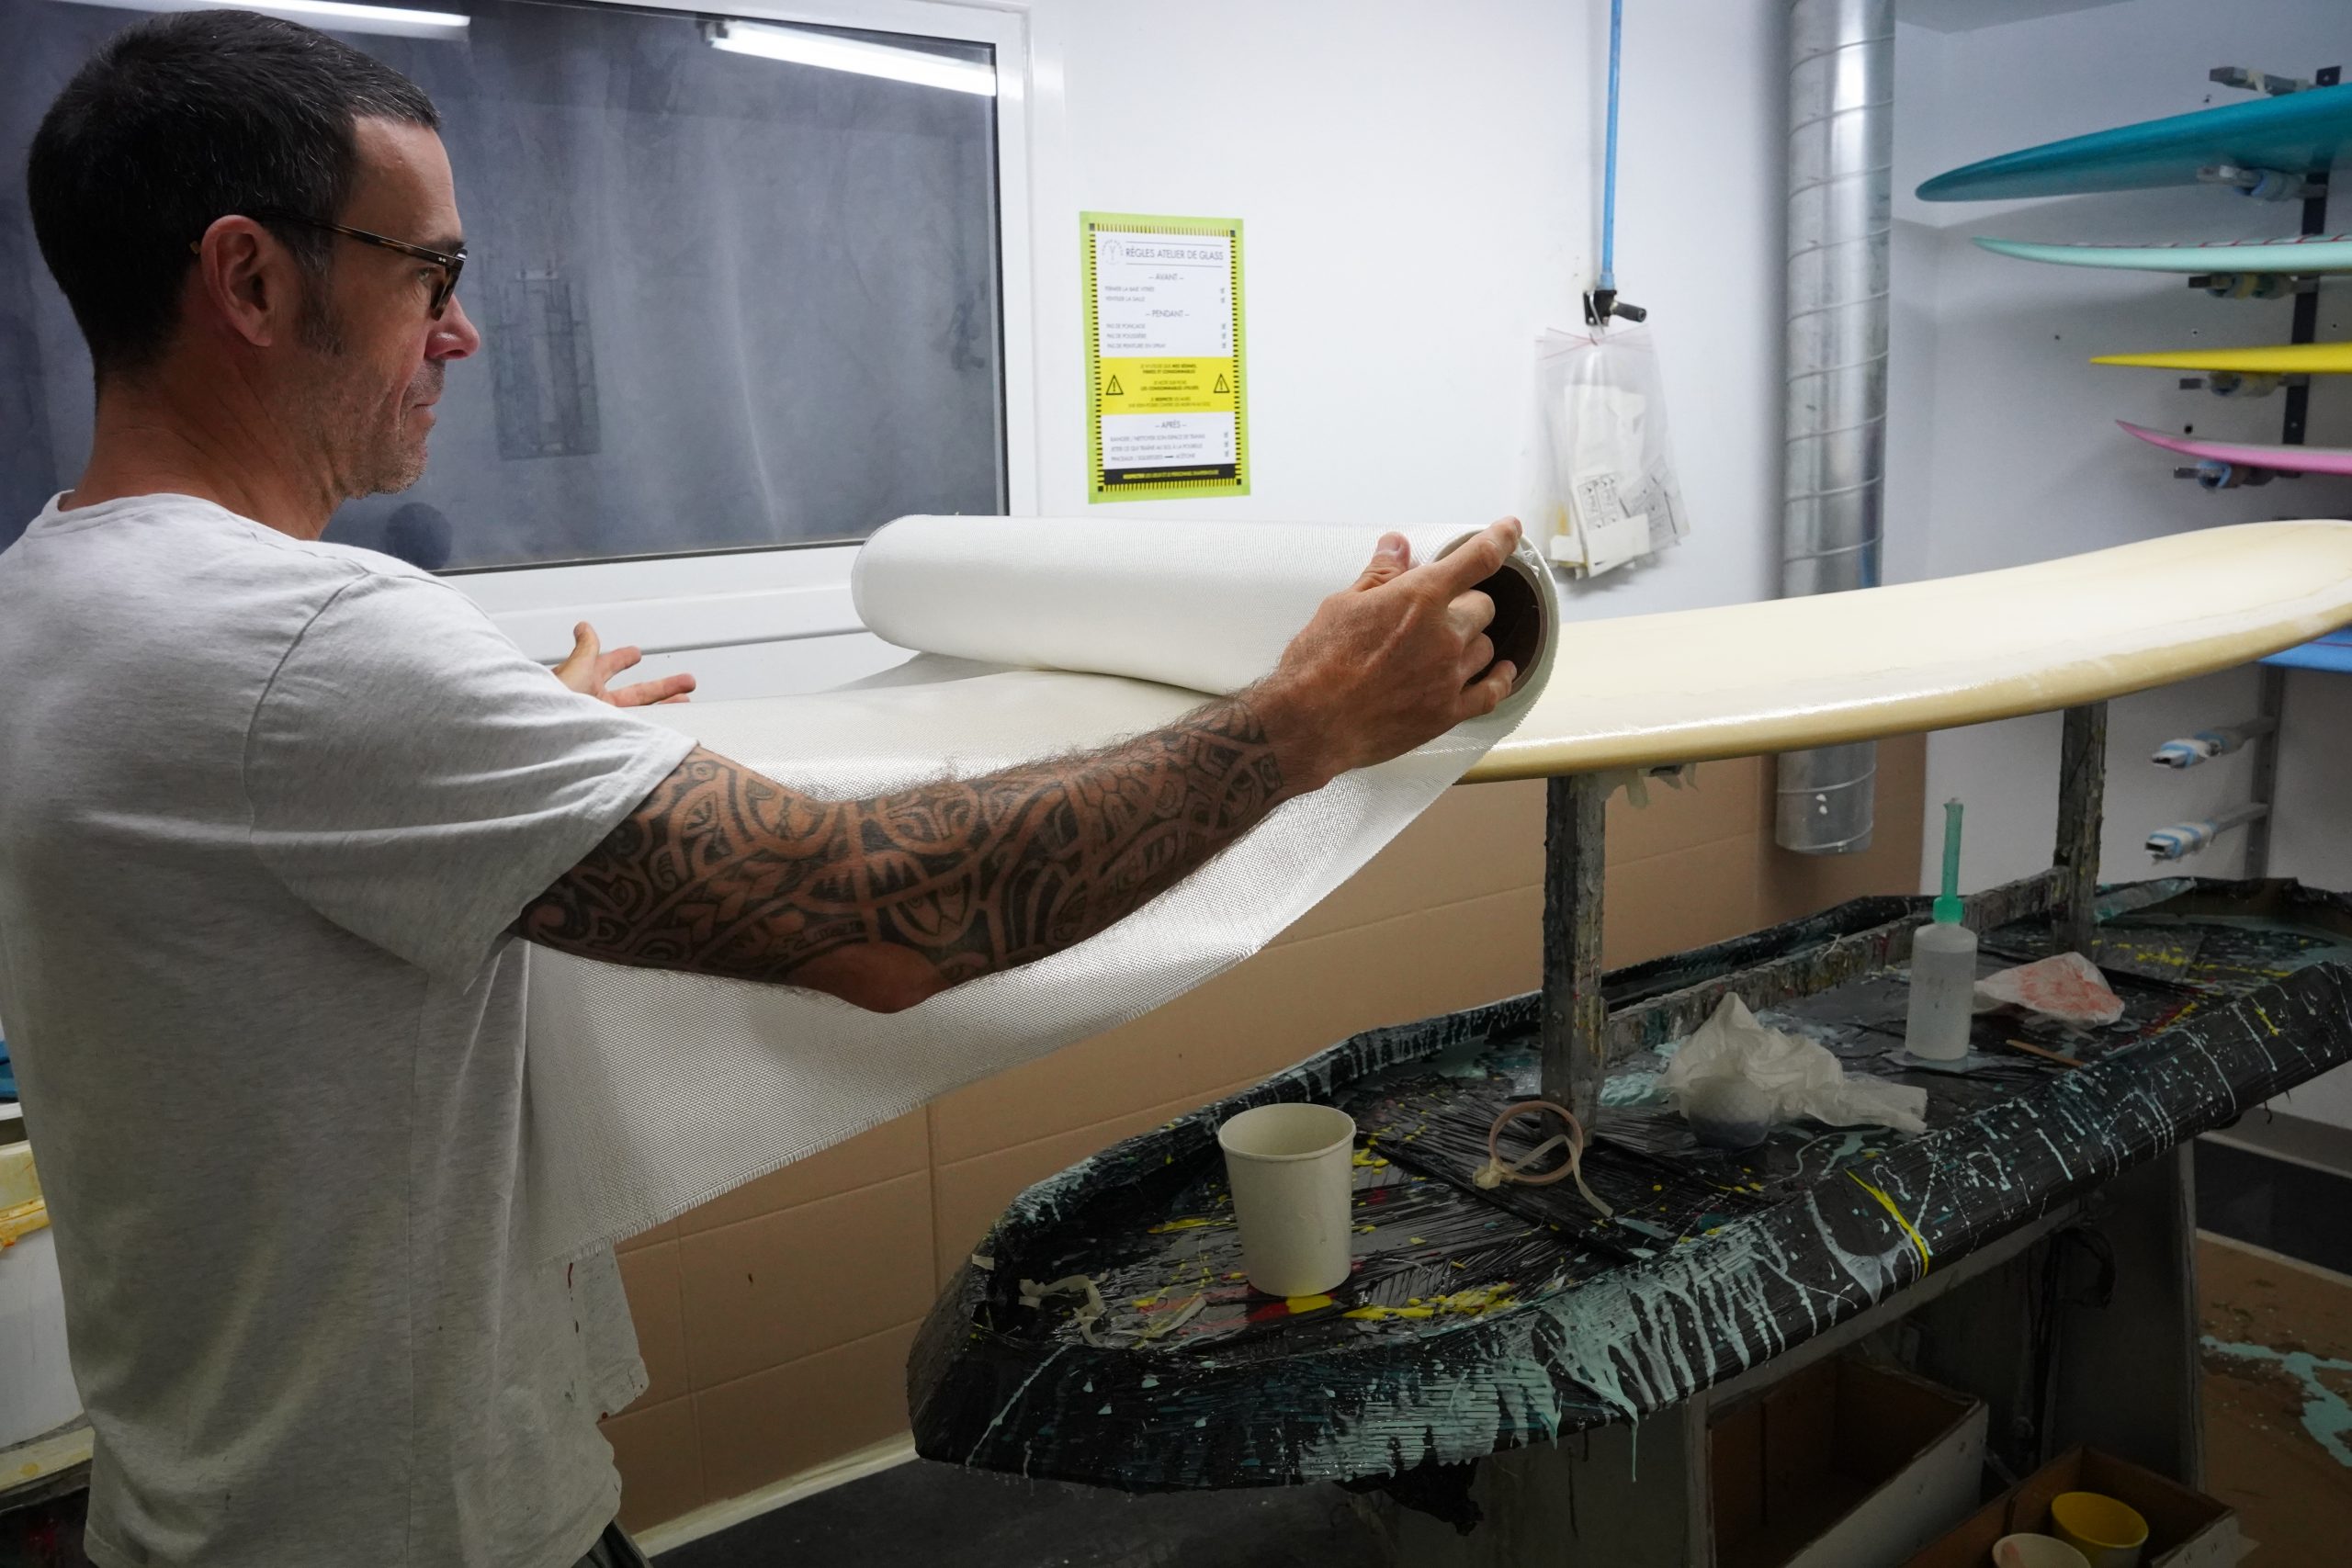
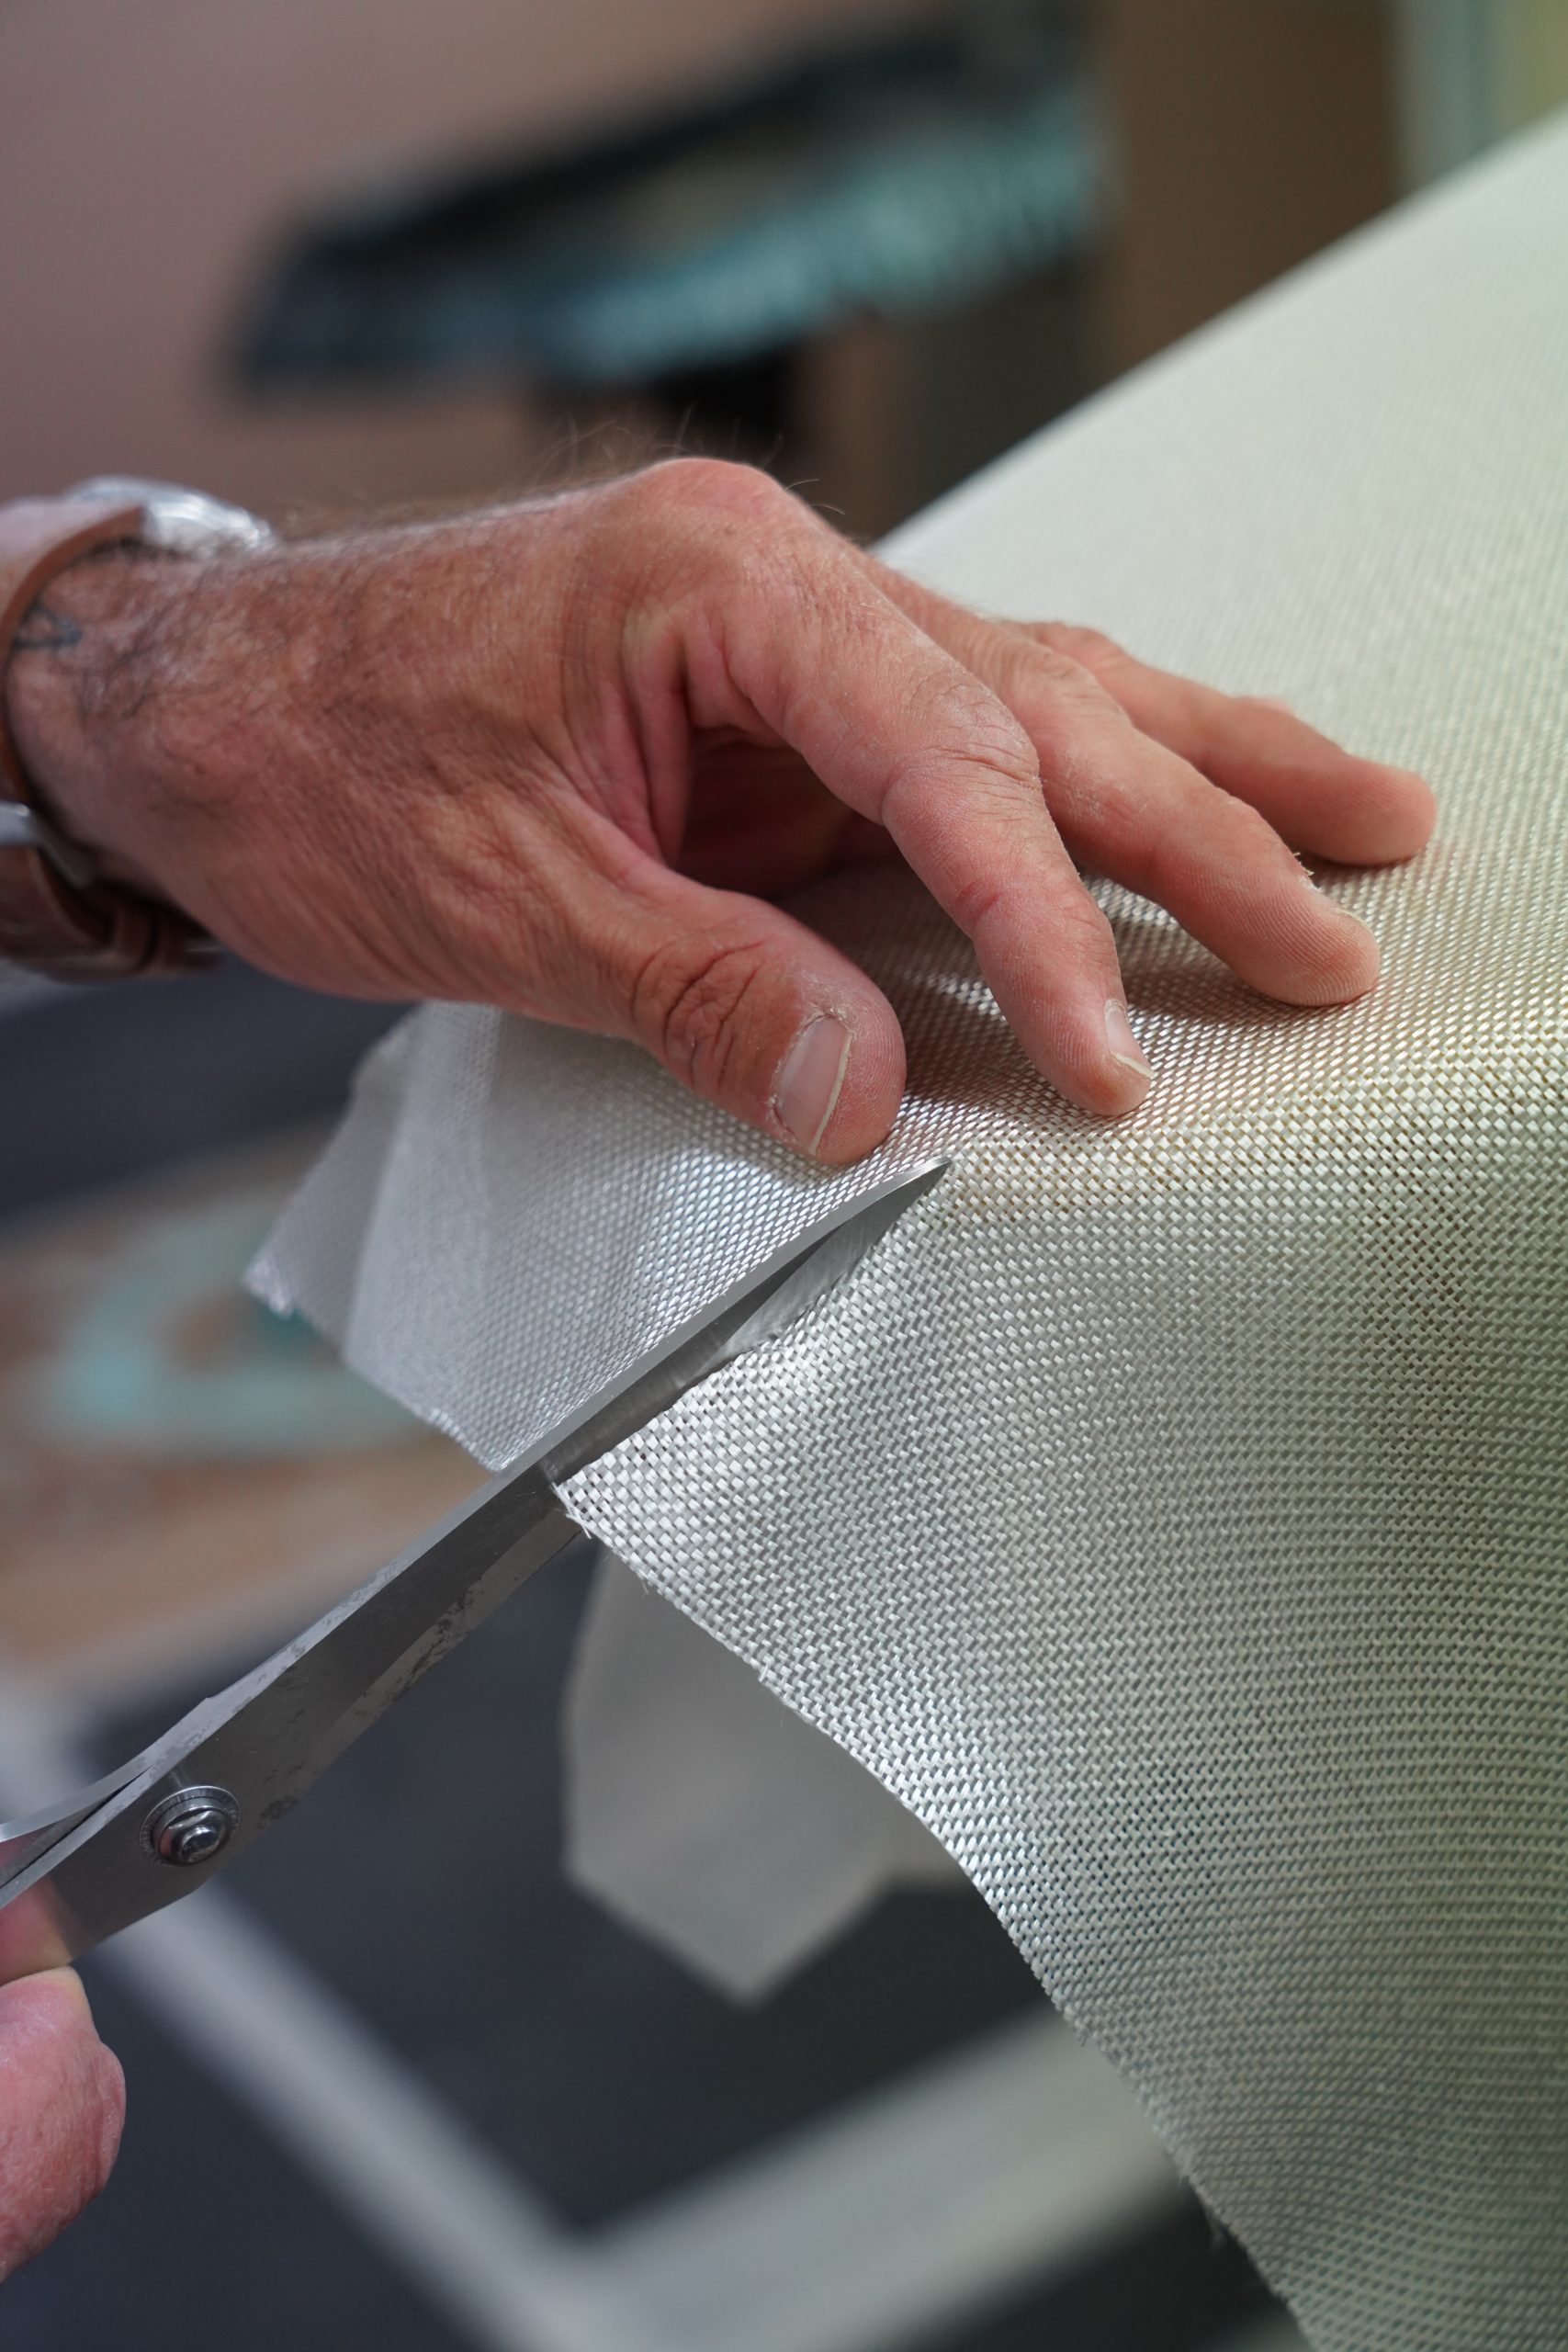
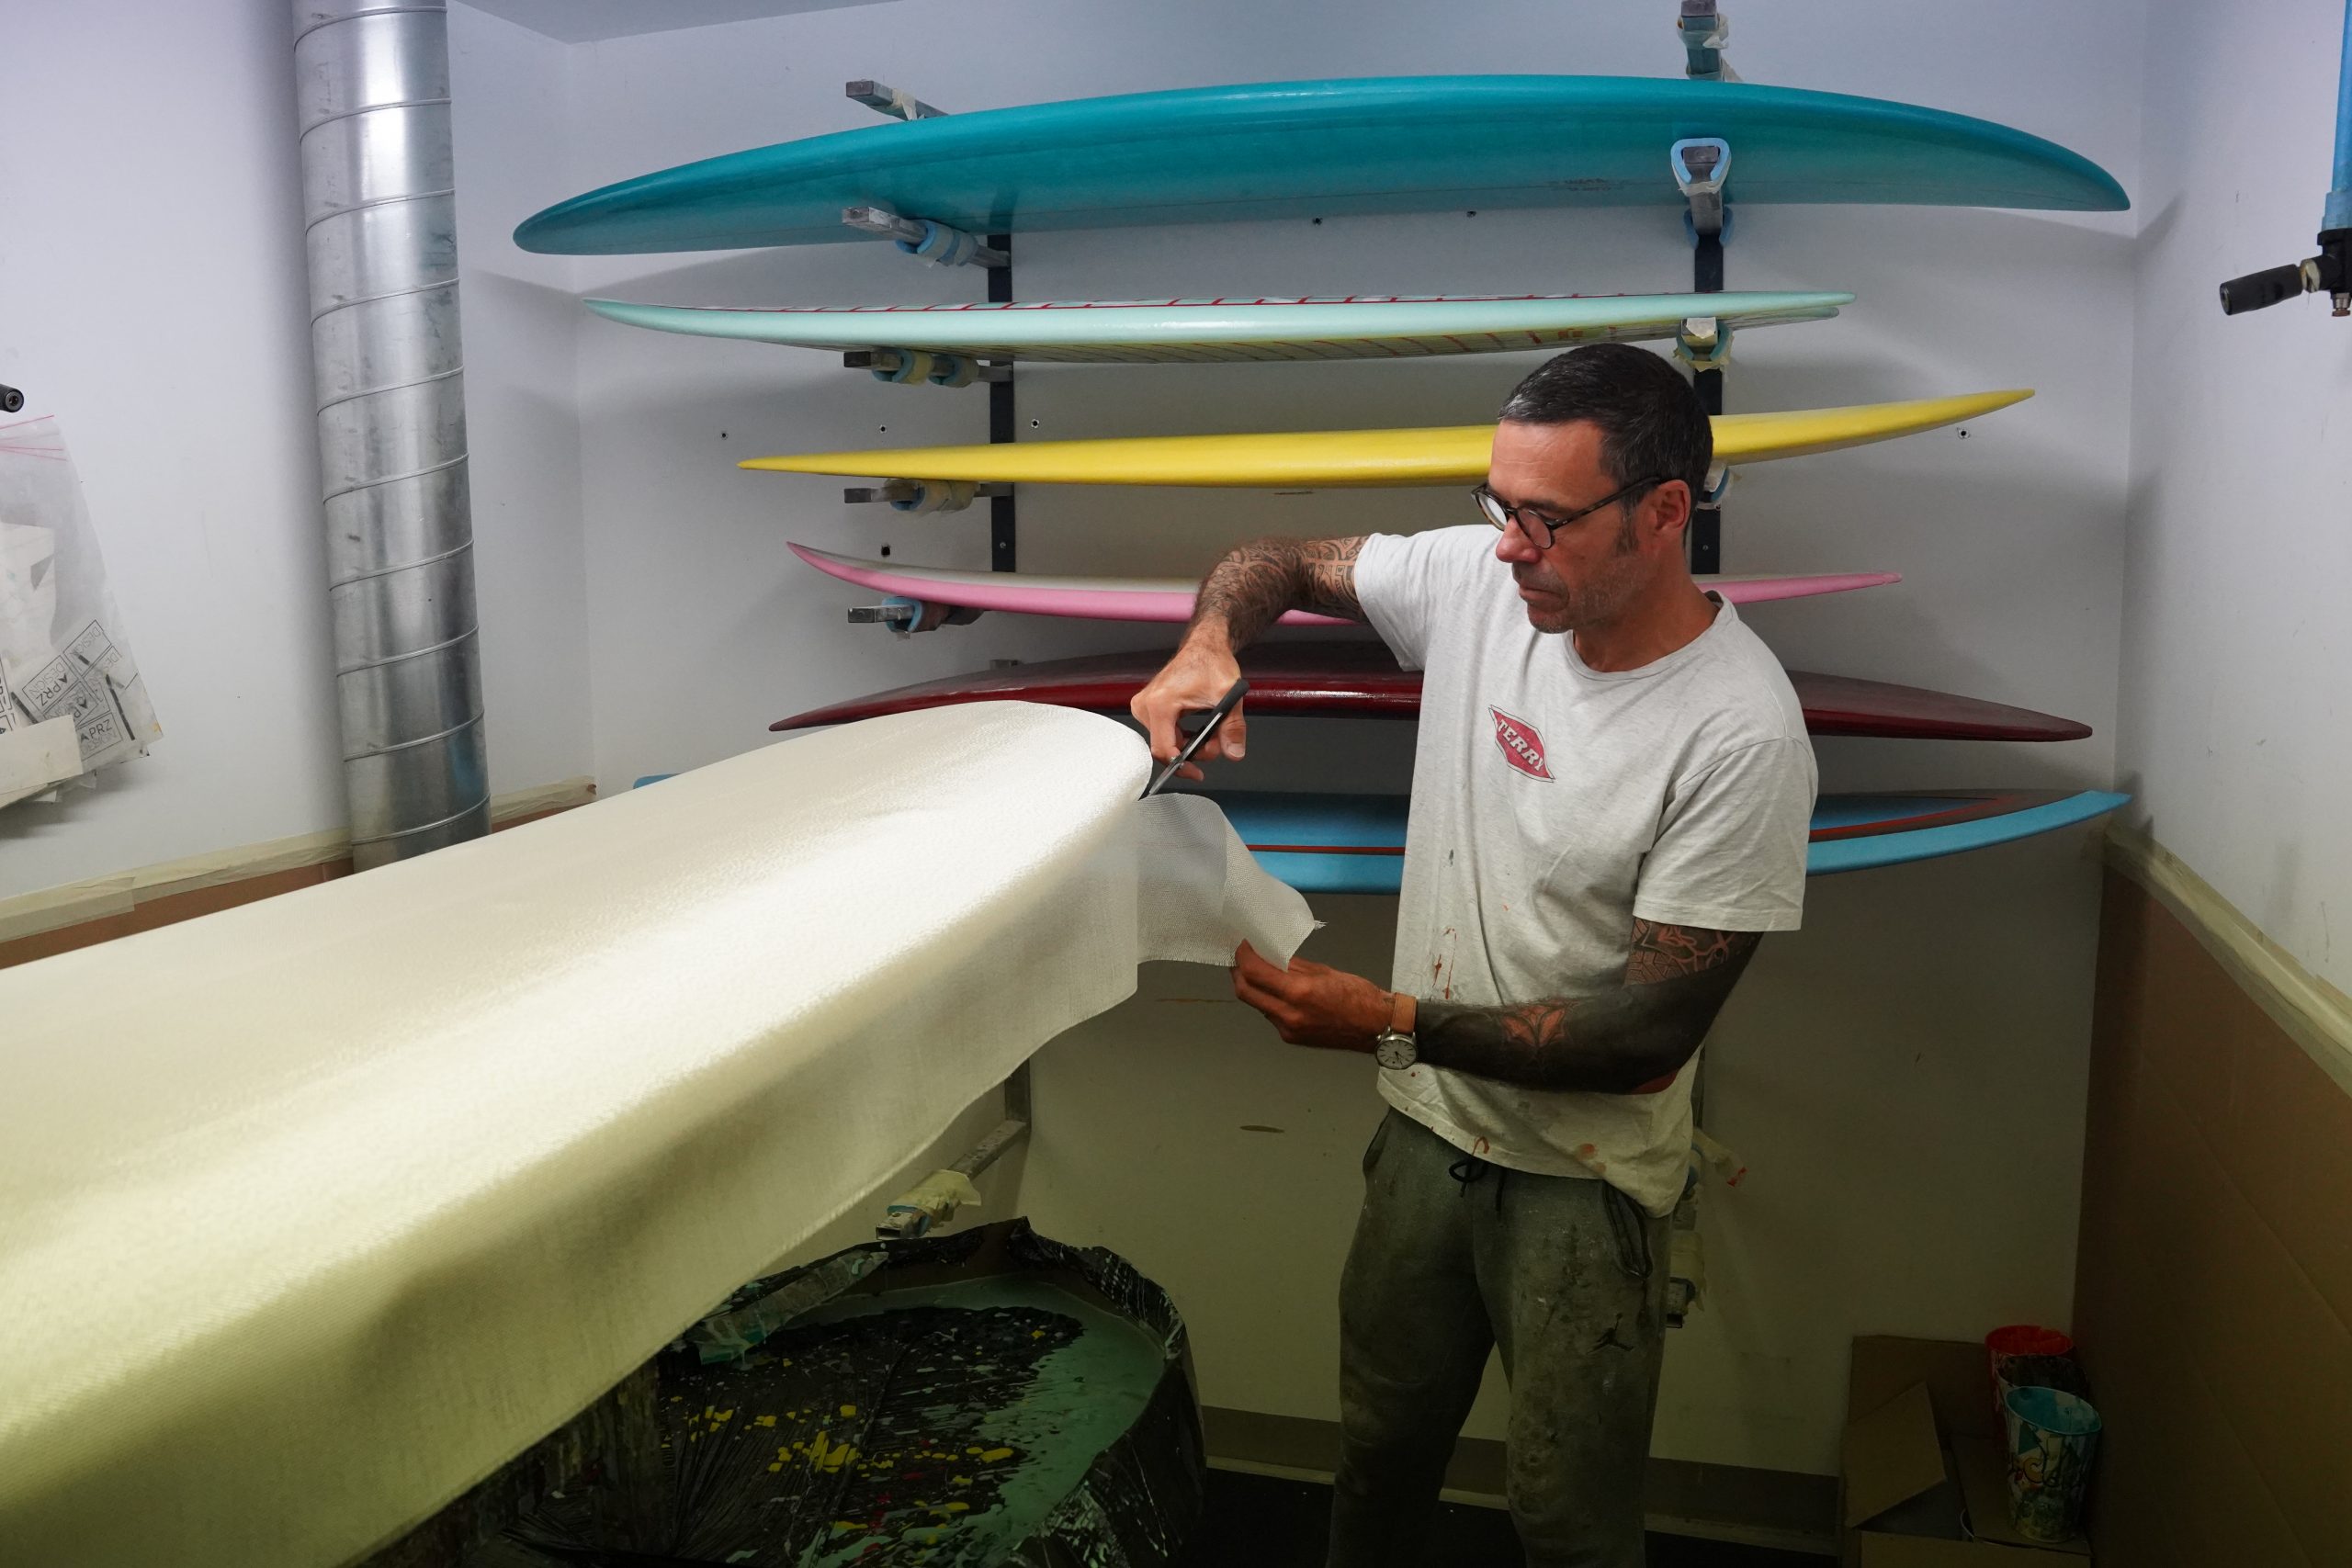
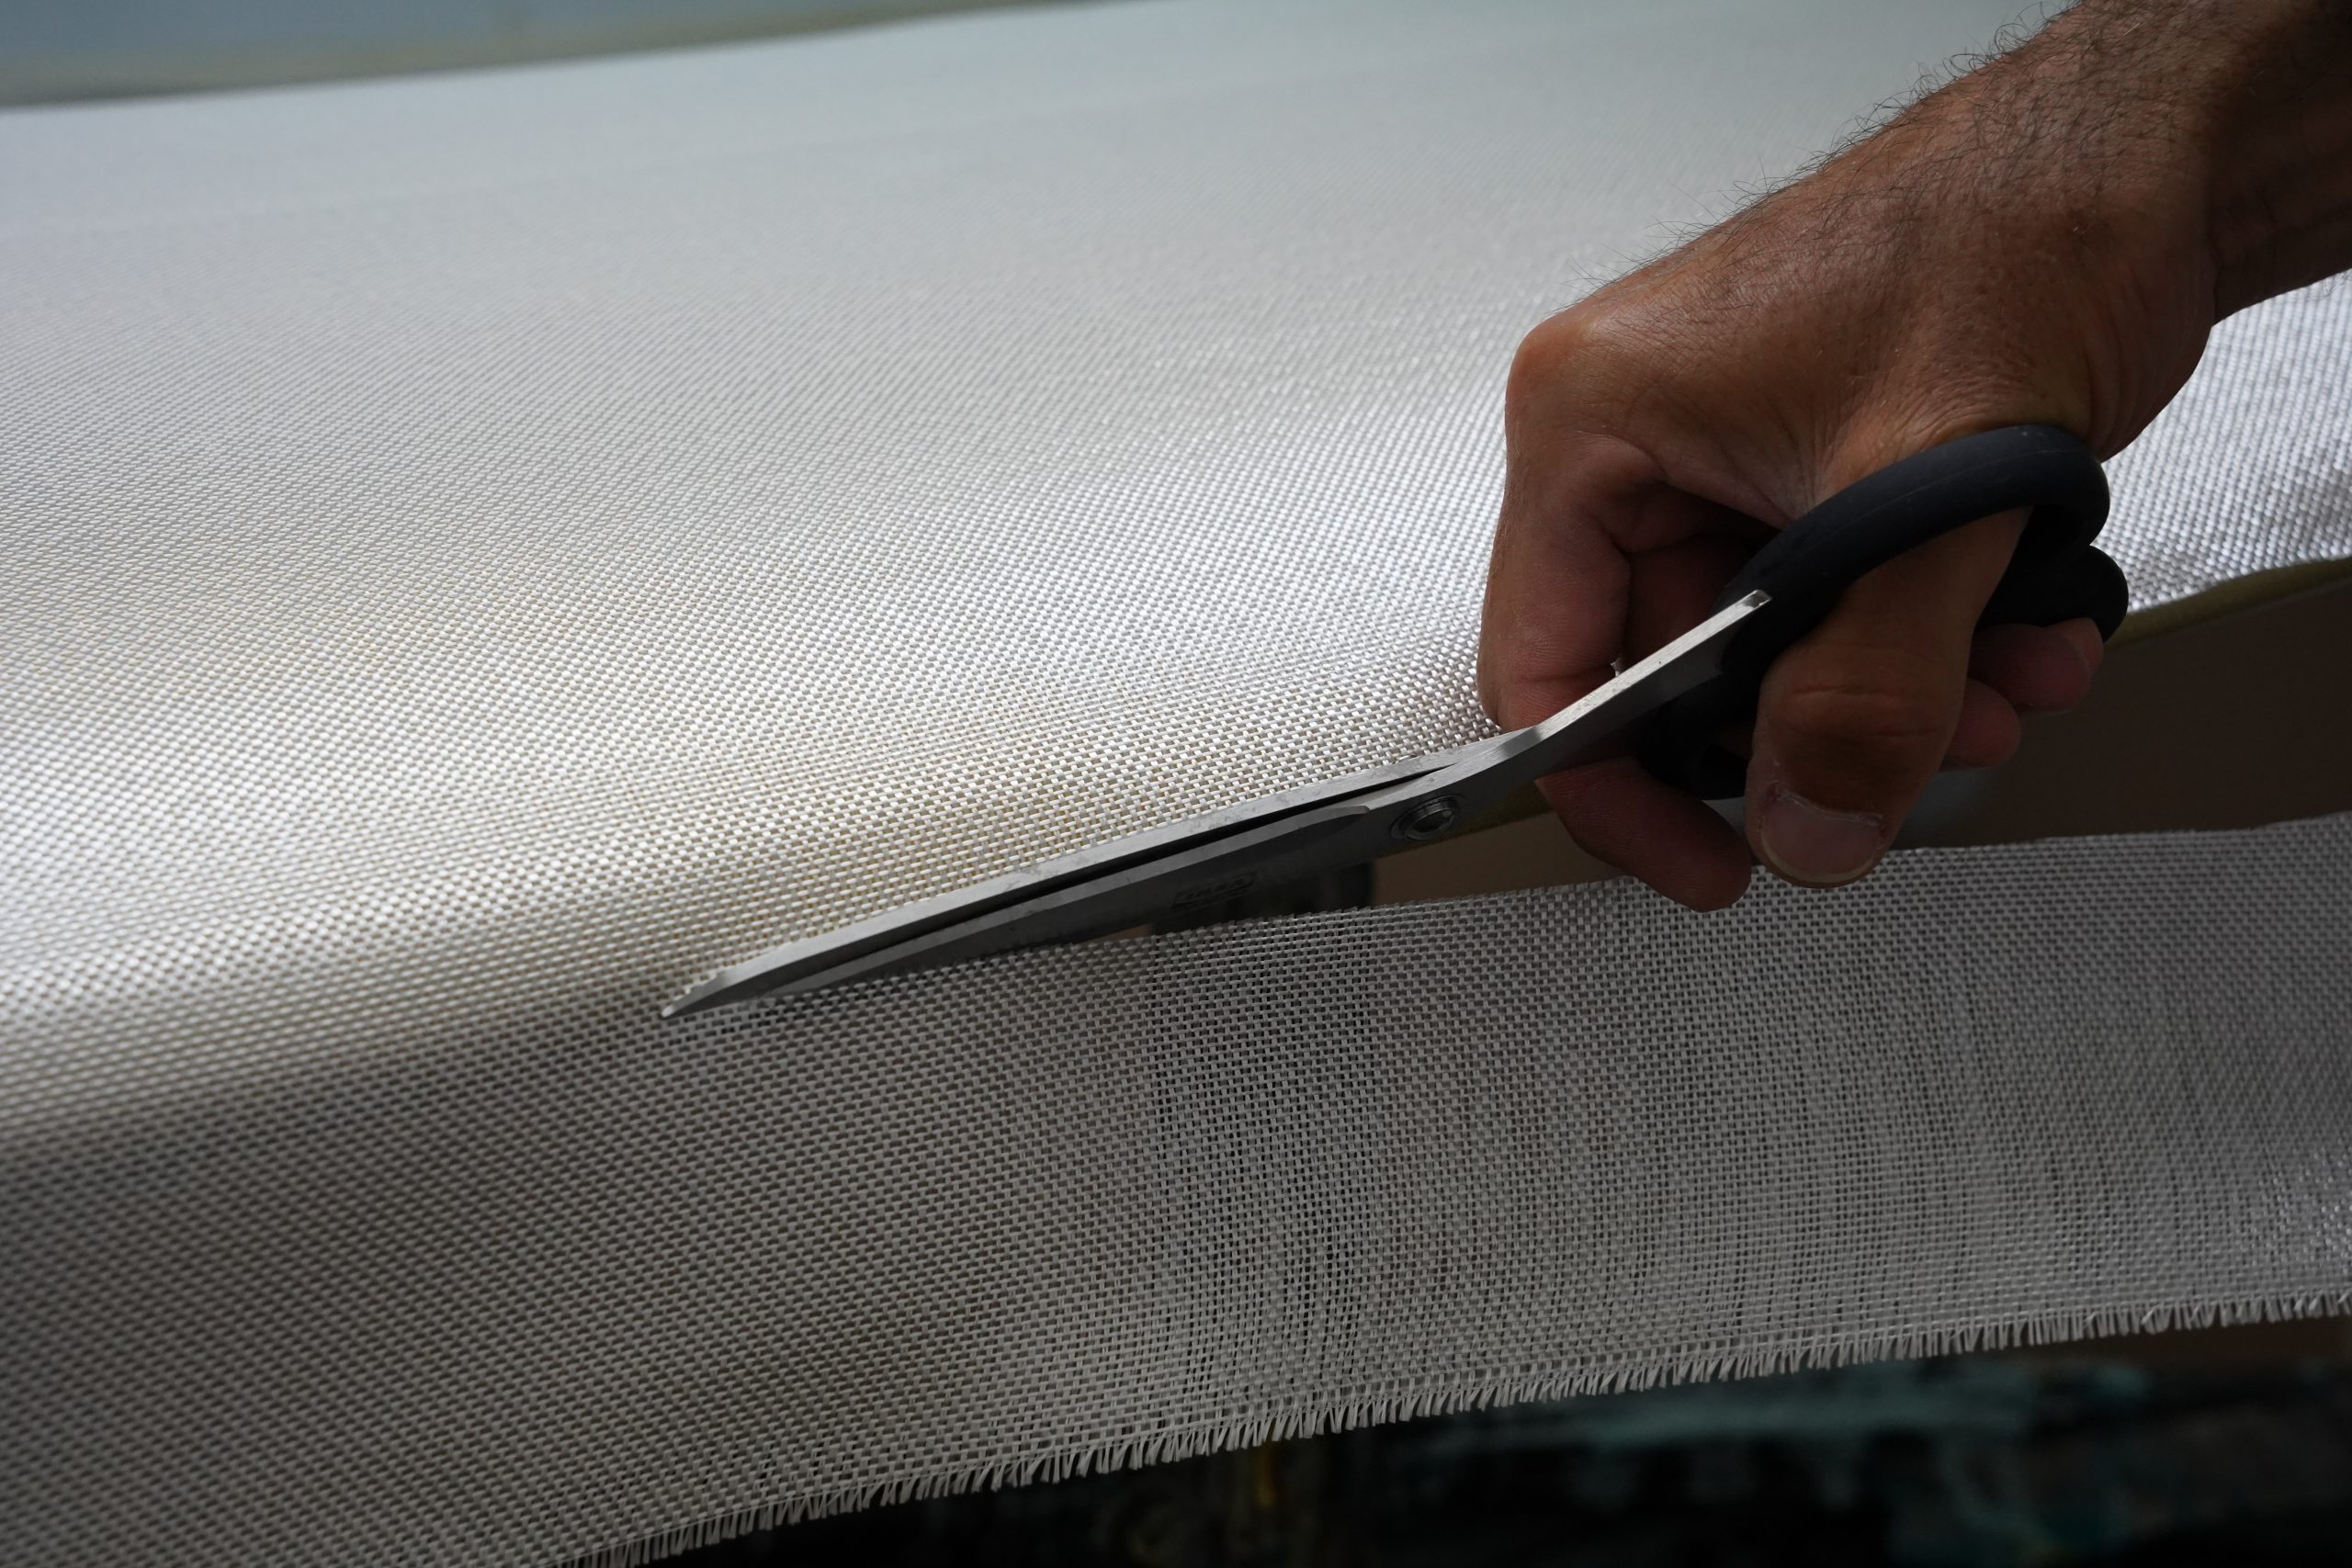
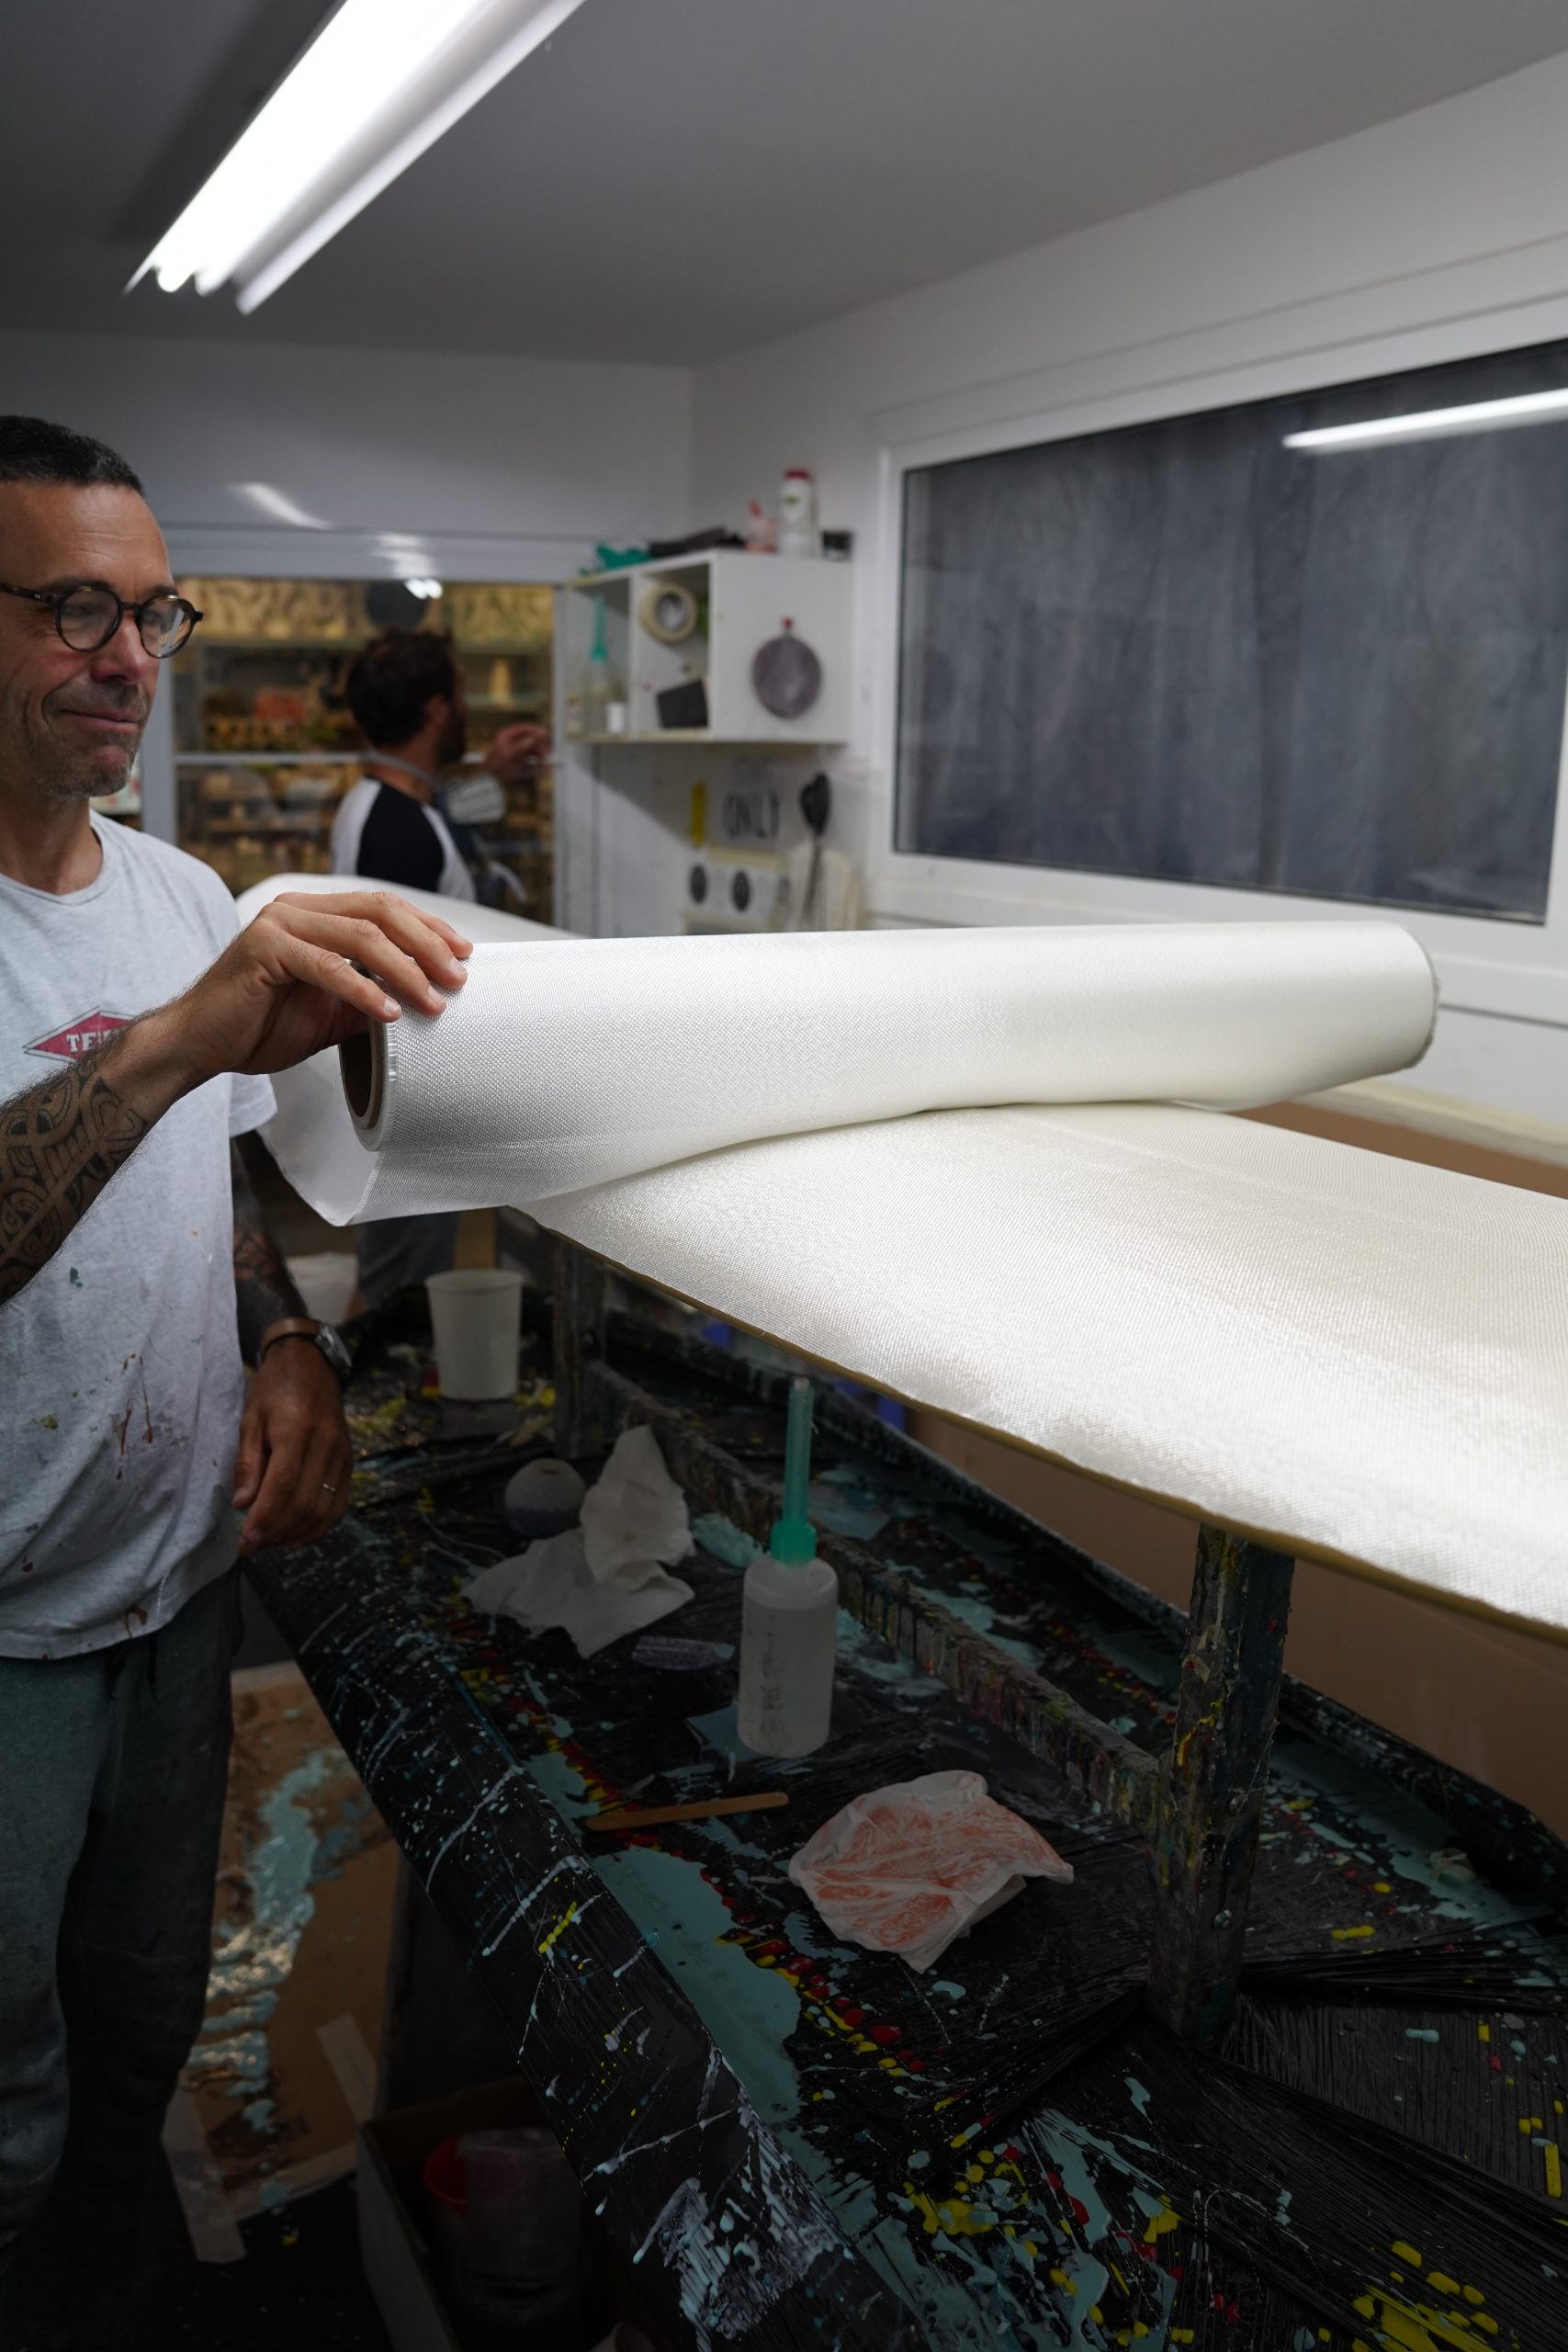
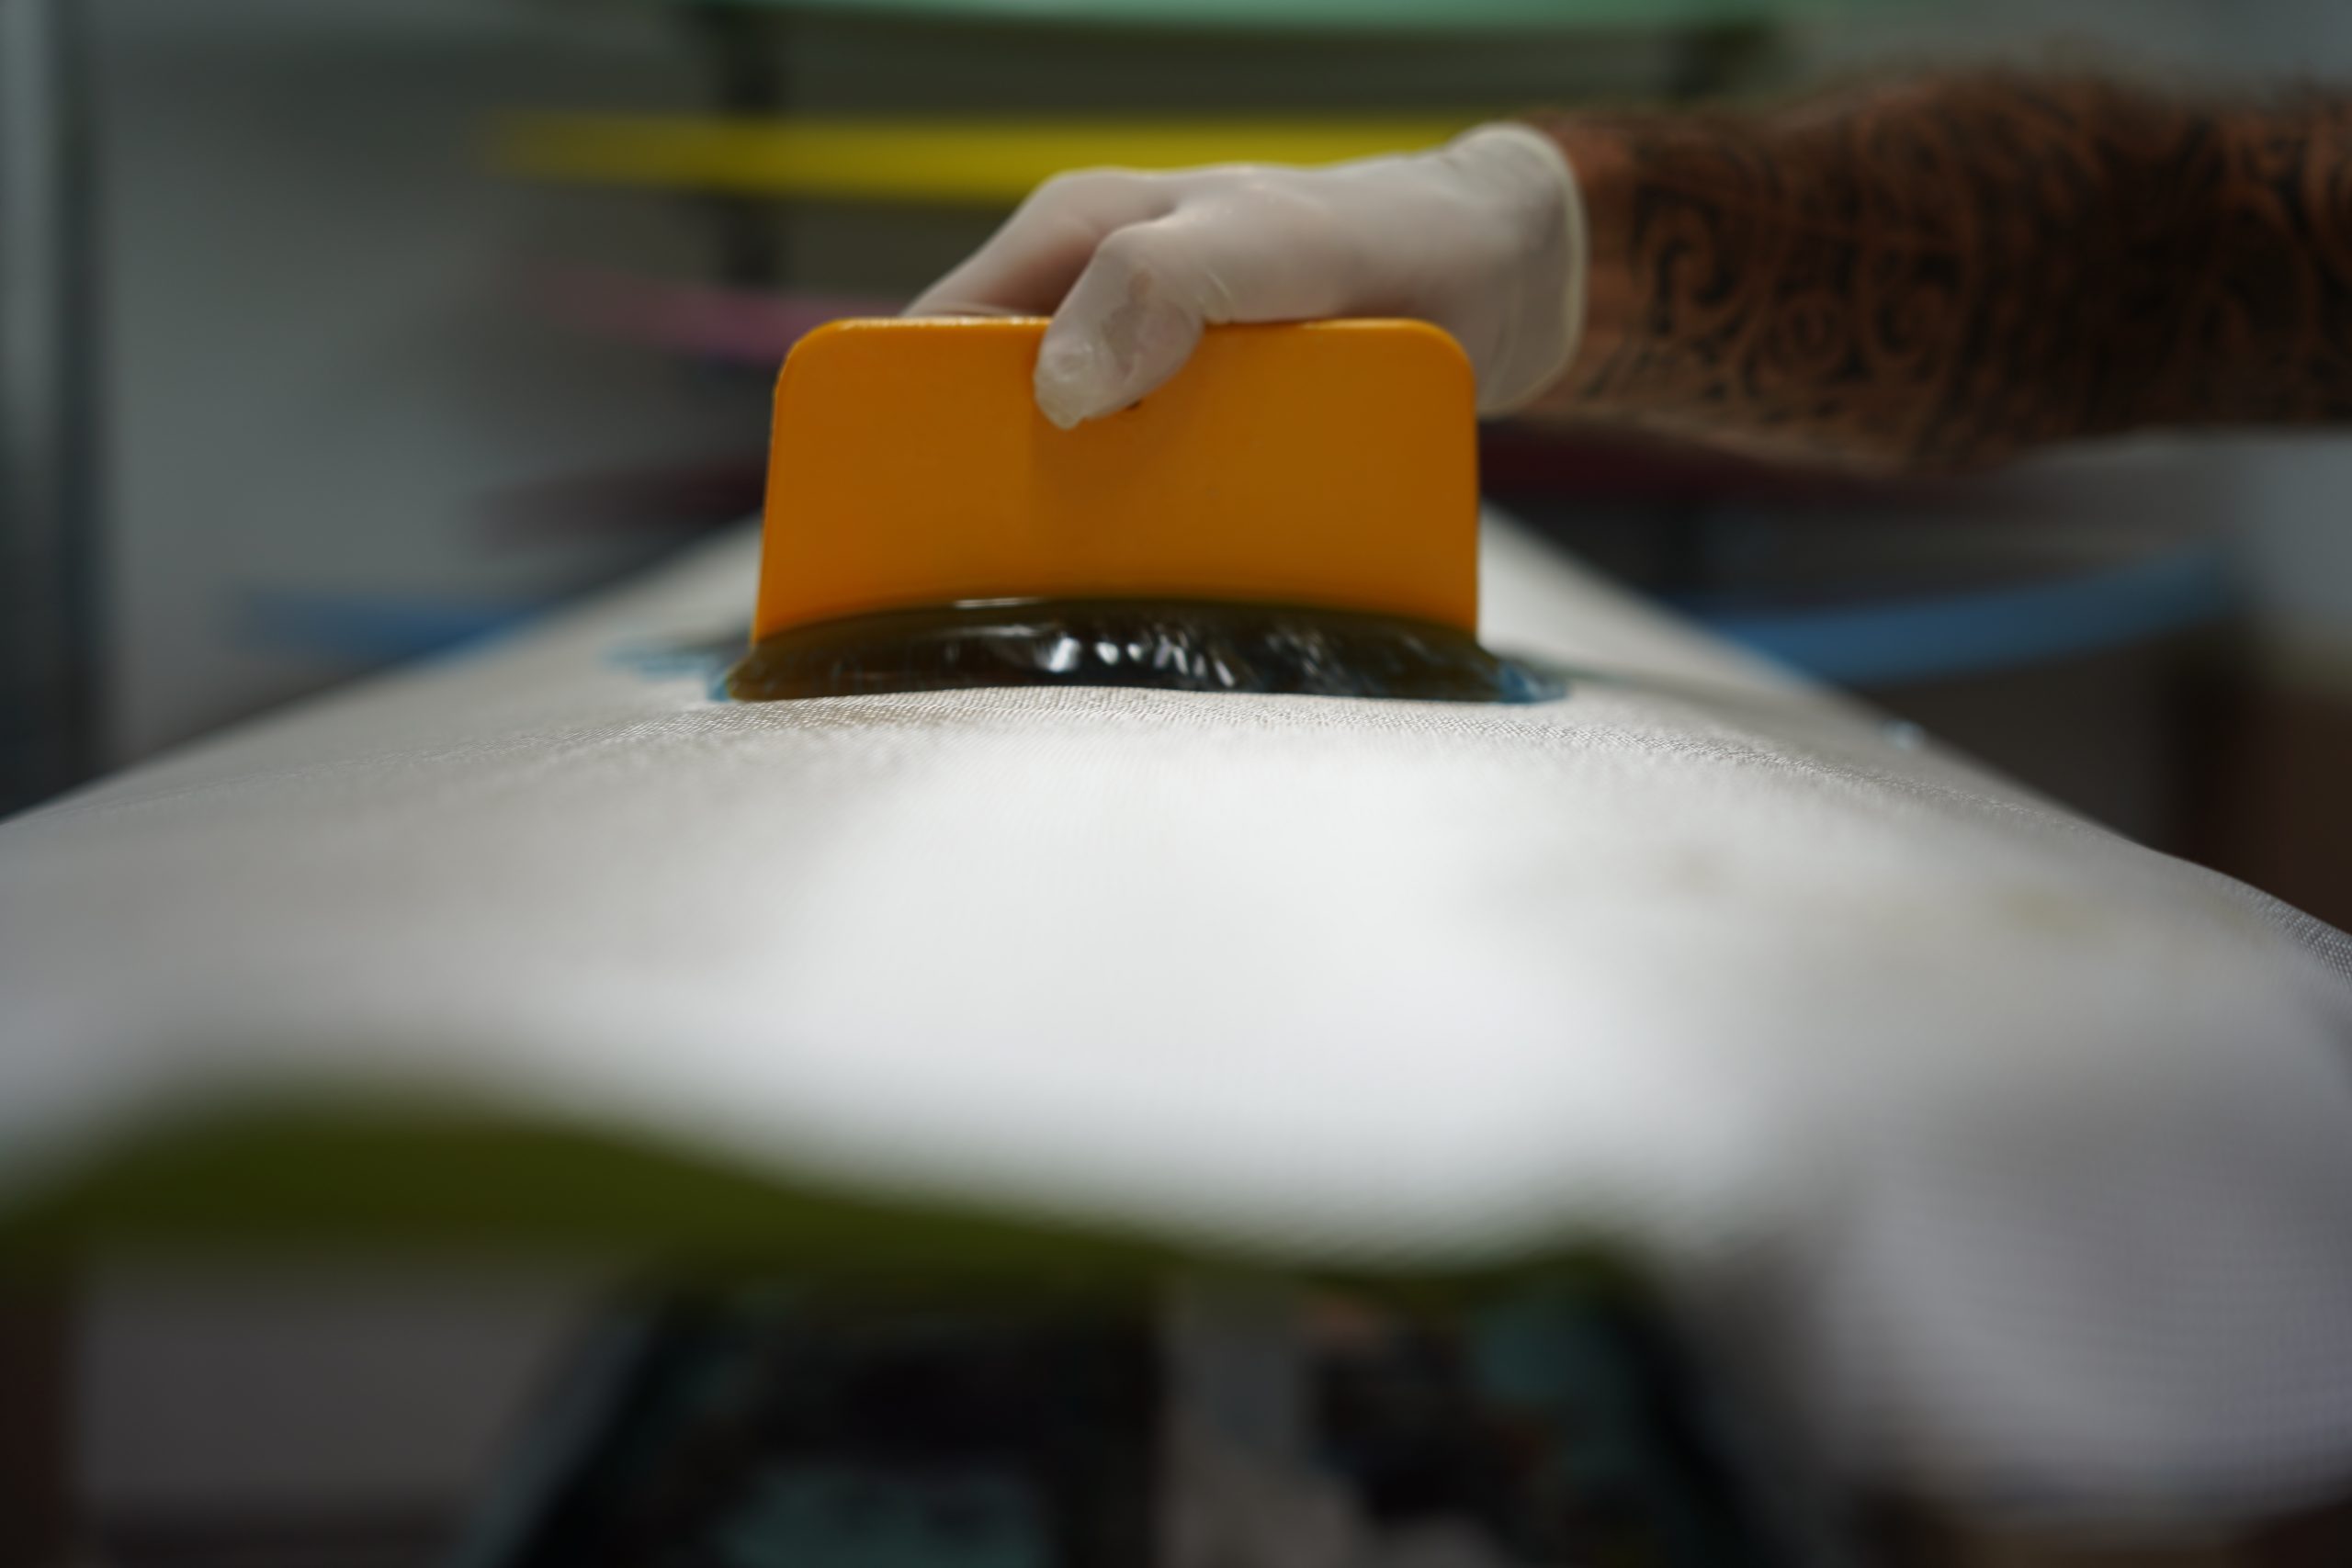
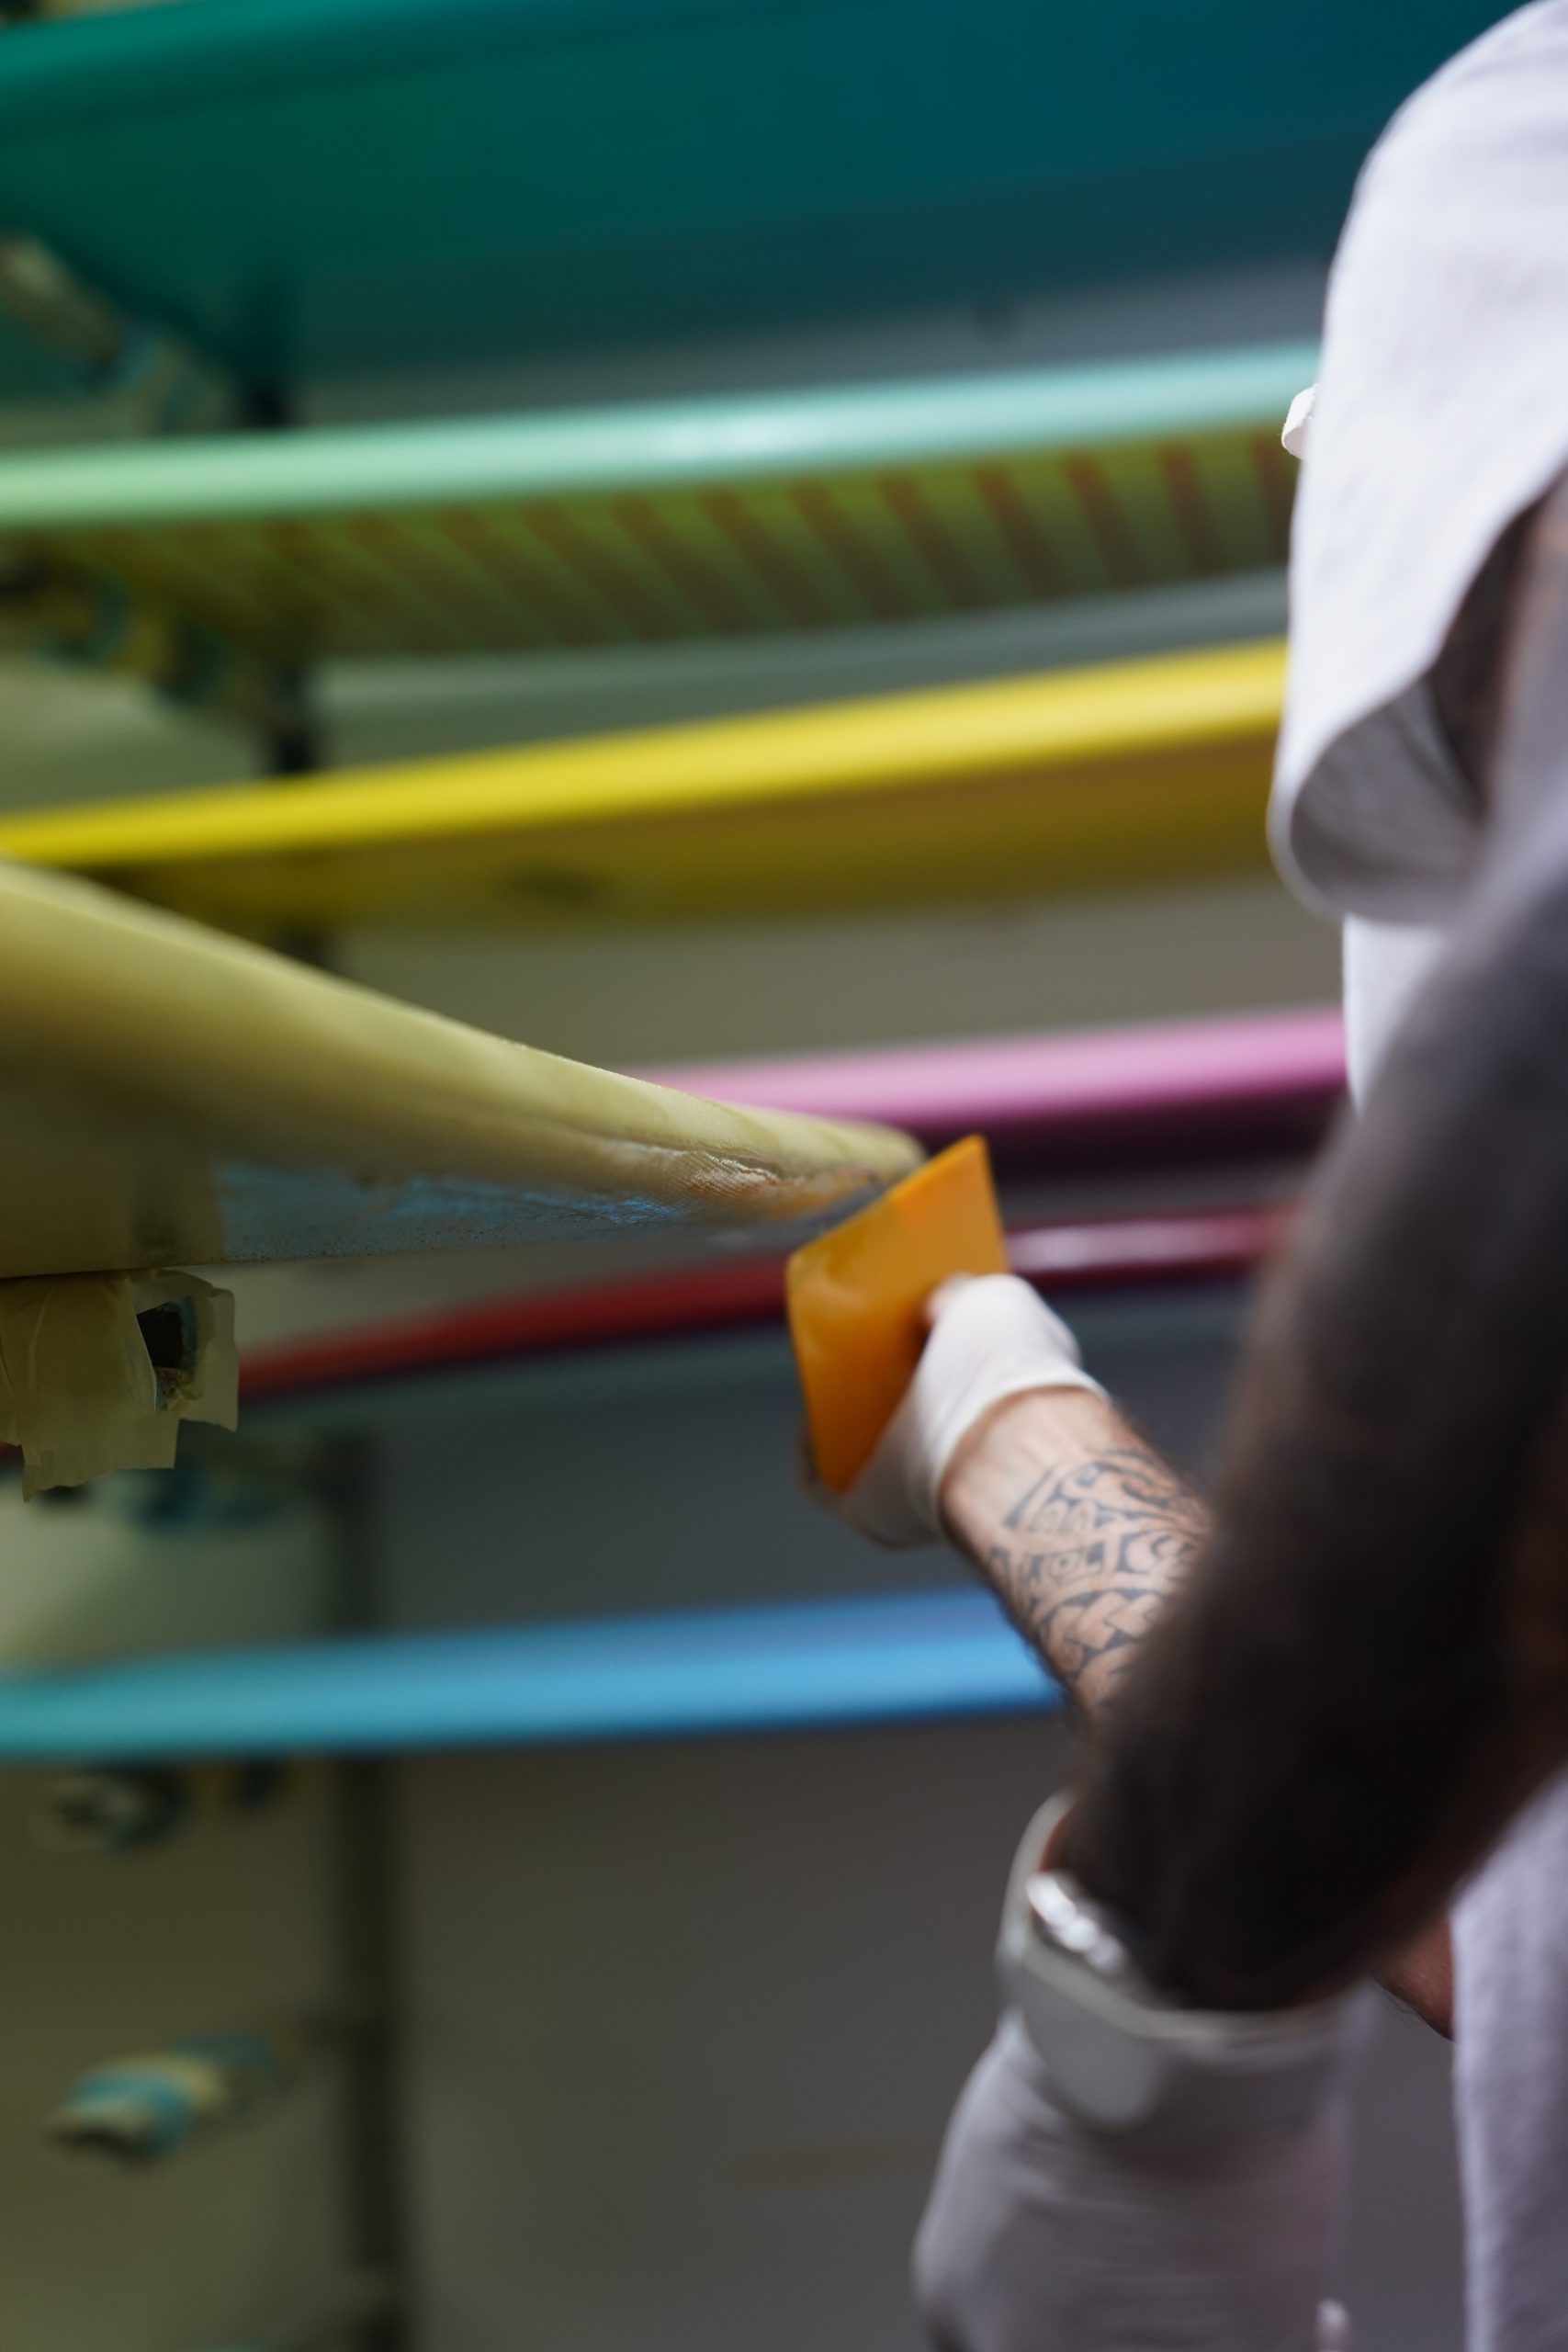
- Roll out a layer of fiberglass cloth over the bottom of the blank.
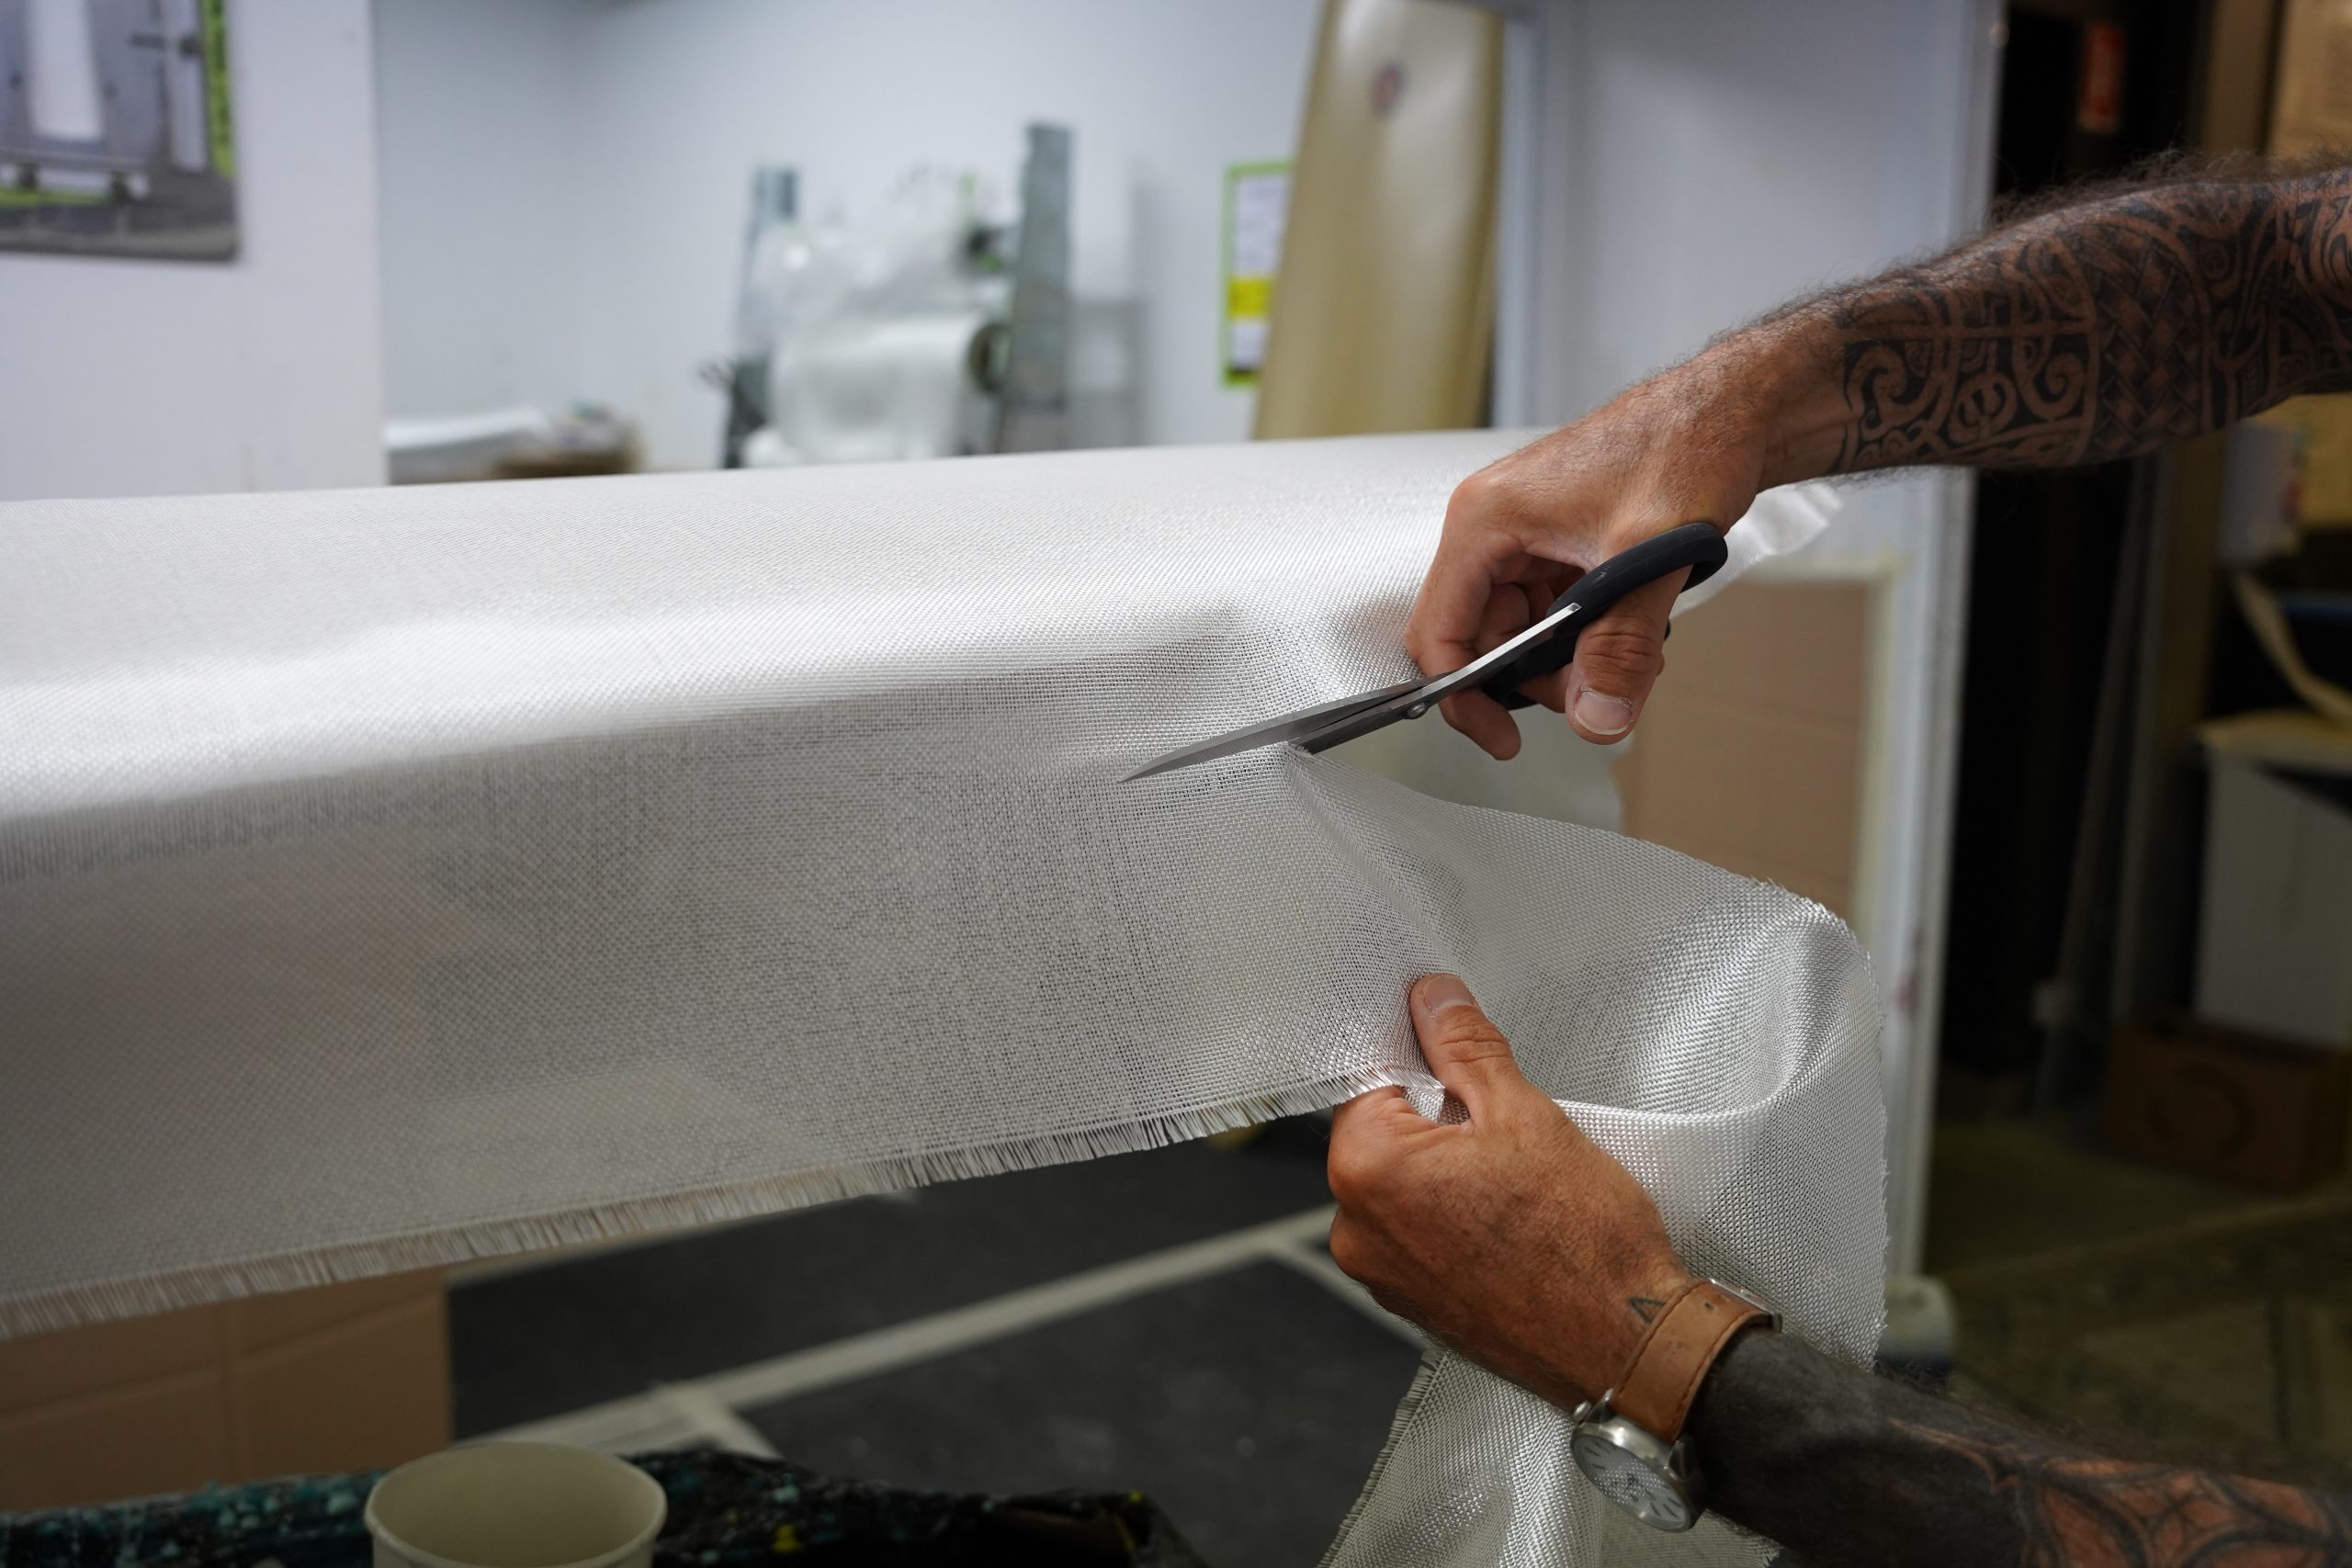
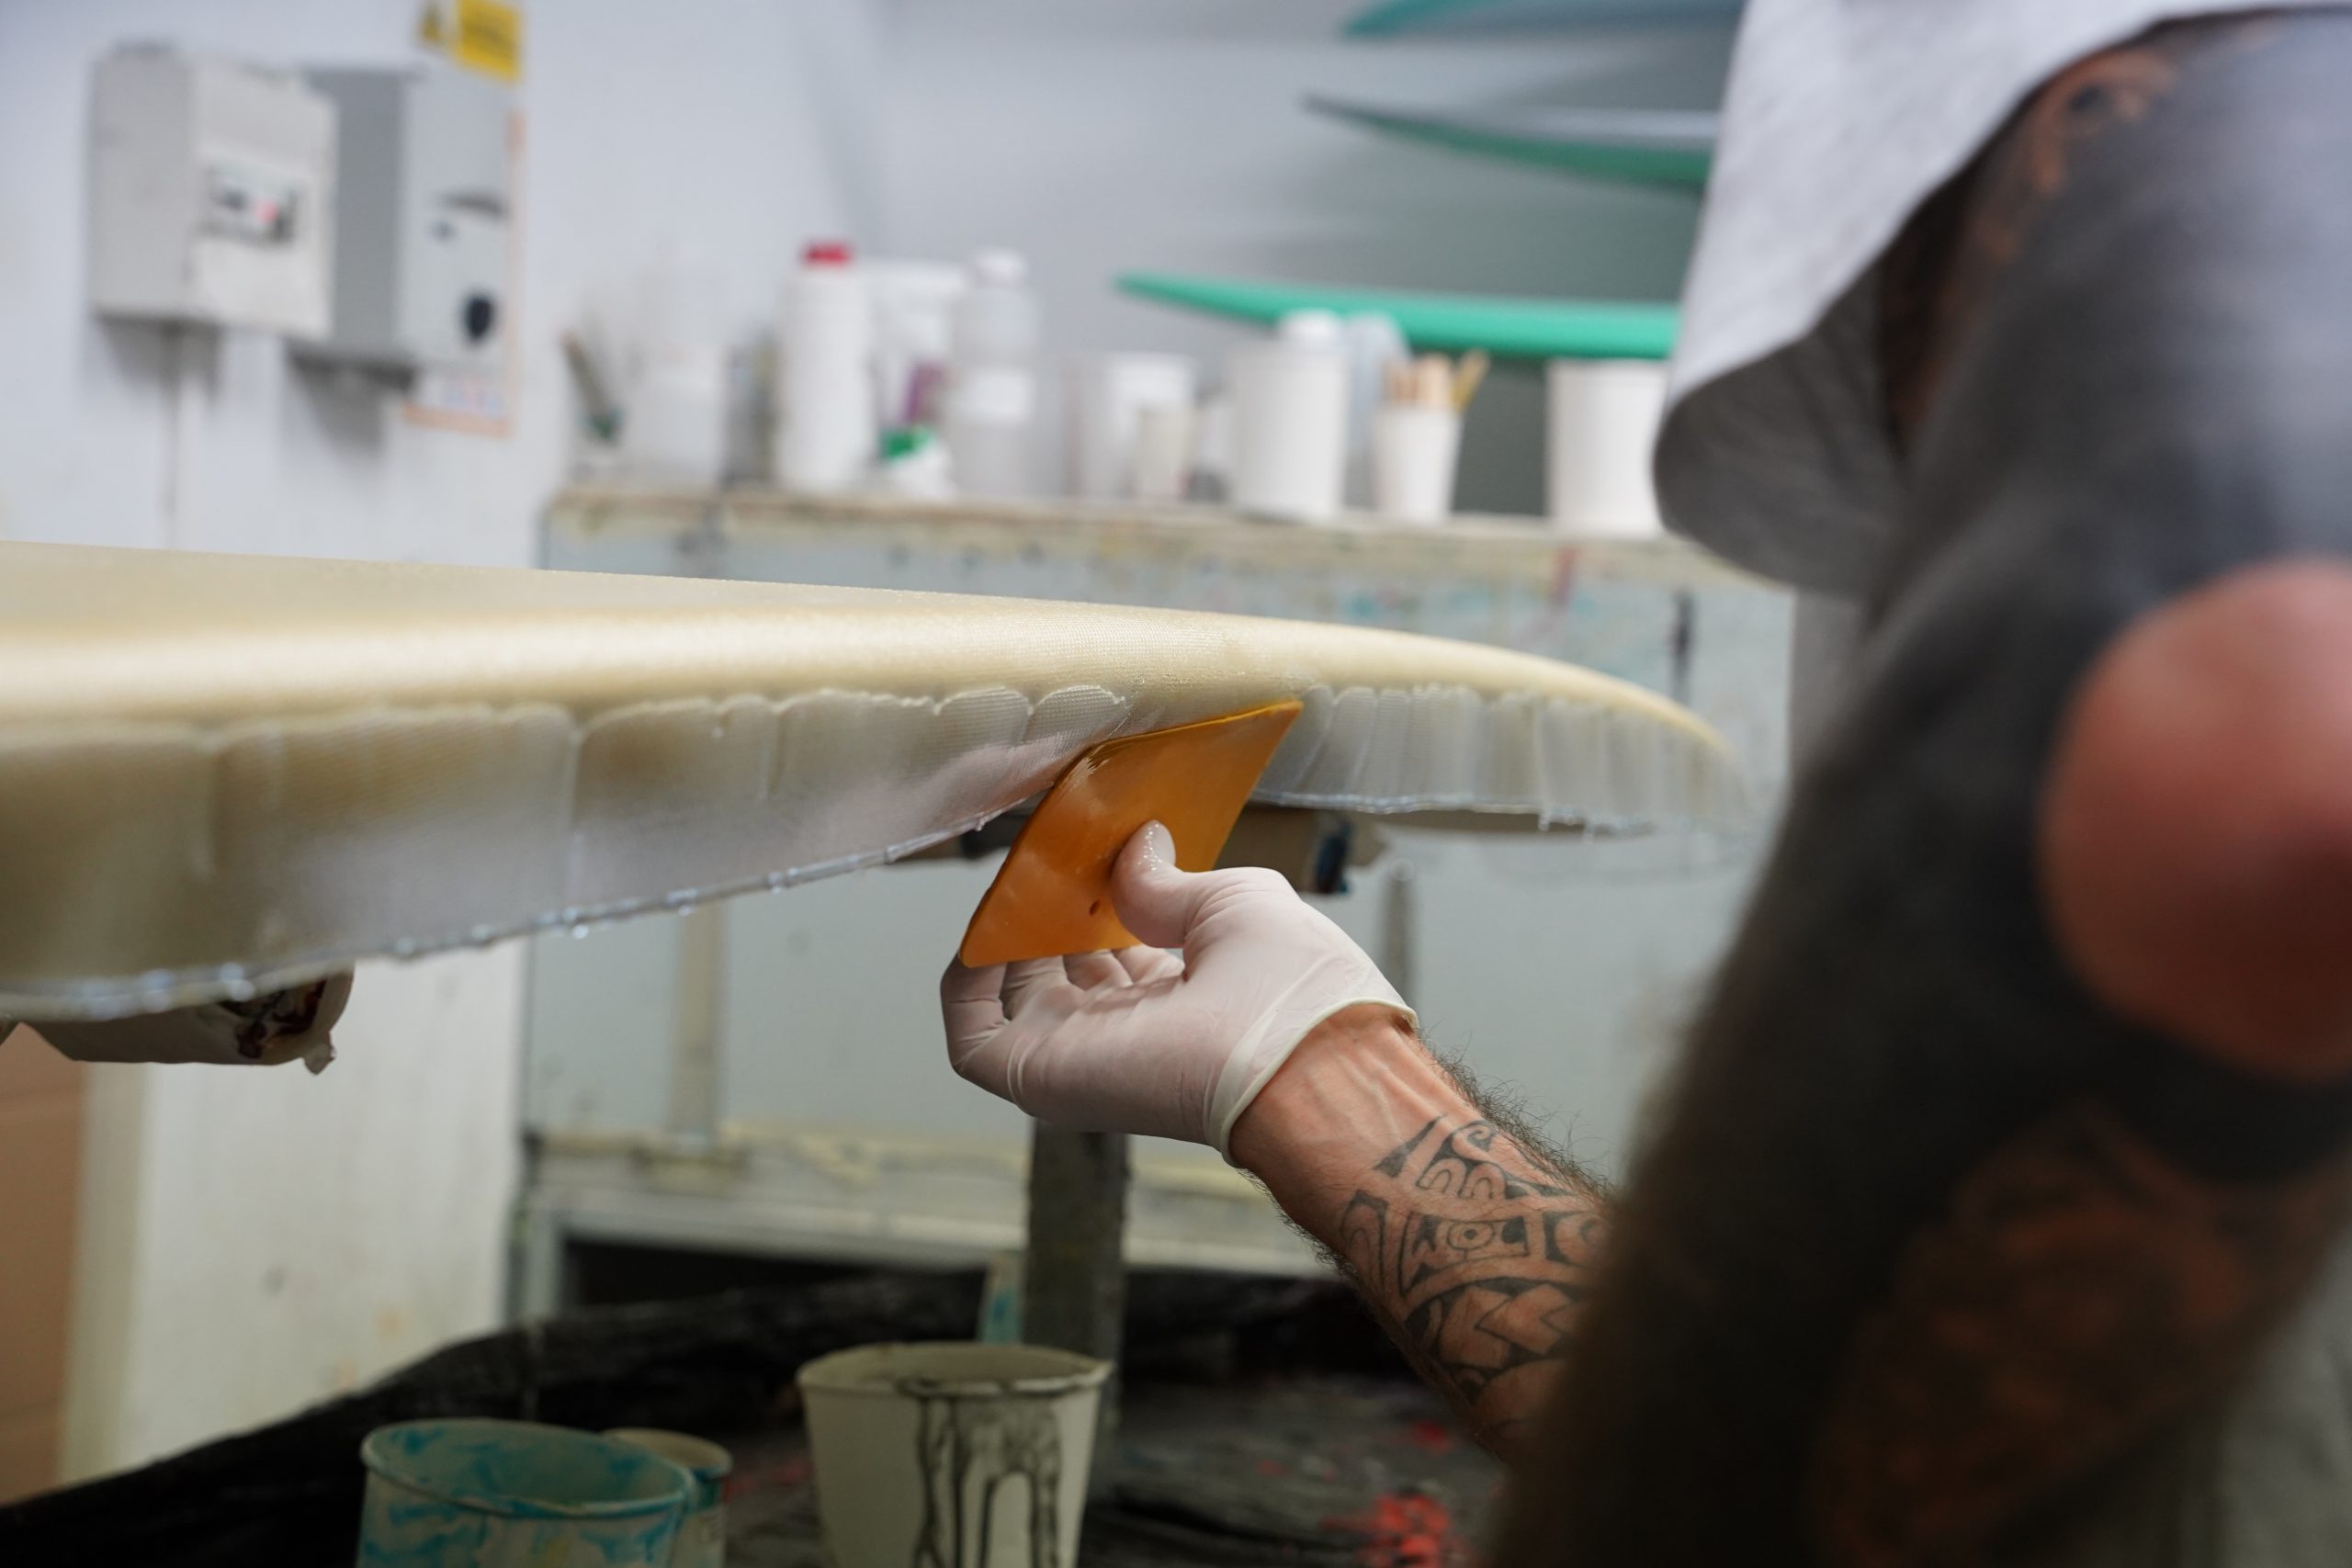
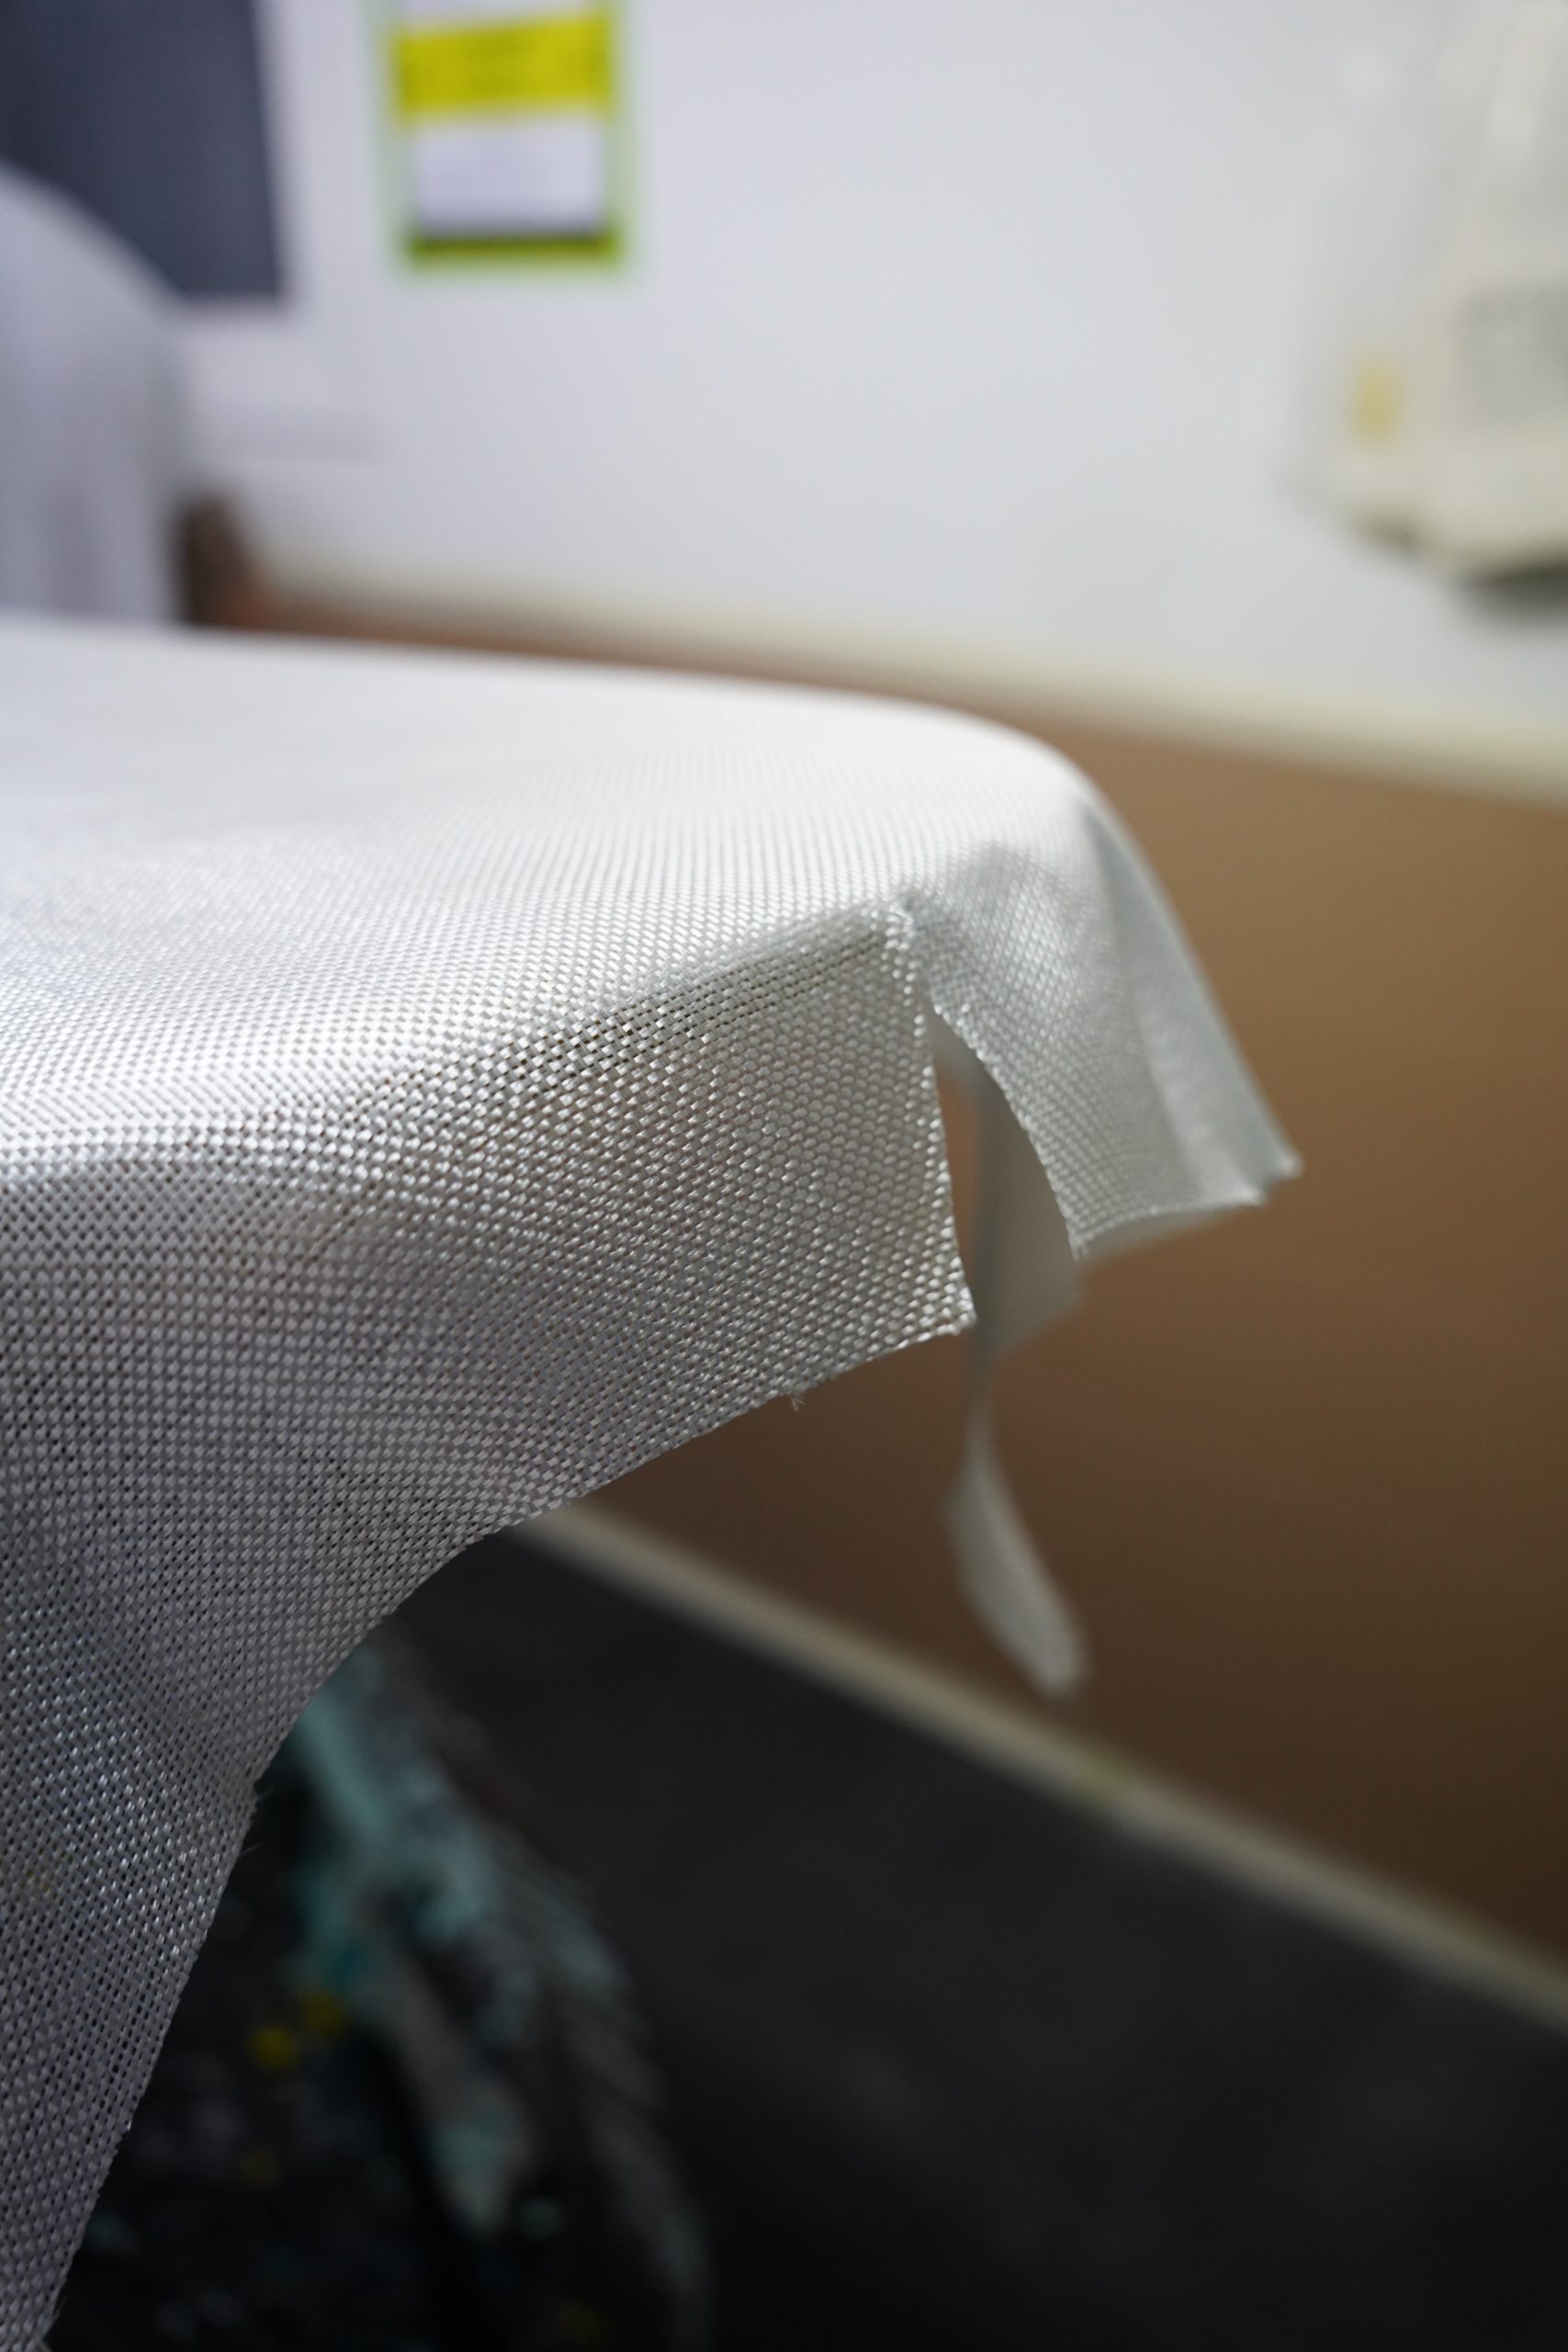
- Use sharp scissors to trim the excess fiberglass cloth, leaving at least 3-4 cm hanging over the edges to wrap around the rails, nose, and tail.
- Make a cut at the nose and tail towards the stringer, known as a “release cut,” to prevent the fiberglass from wrinkling in those areas during glassing.
- If desired, place printed logos or artwork under the fiberglass cloth using rice paper.
- Put on your respirator mask.
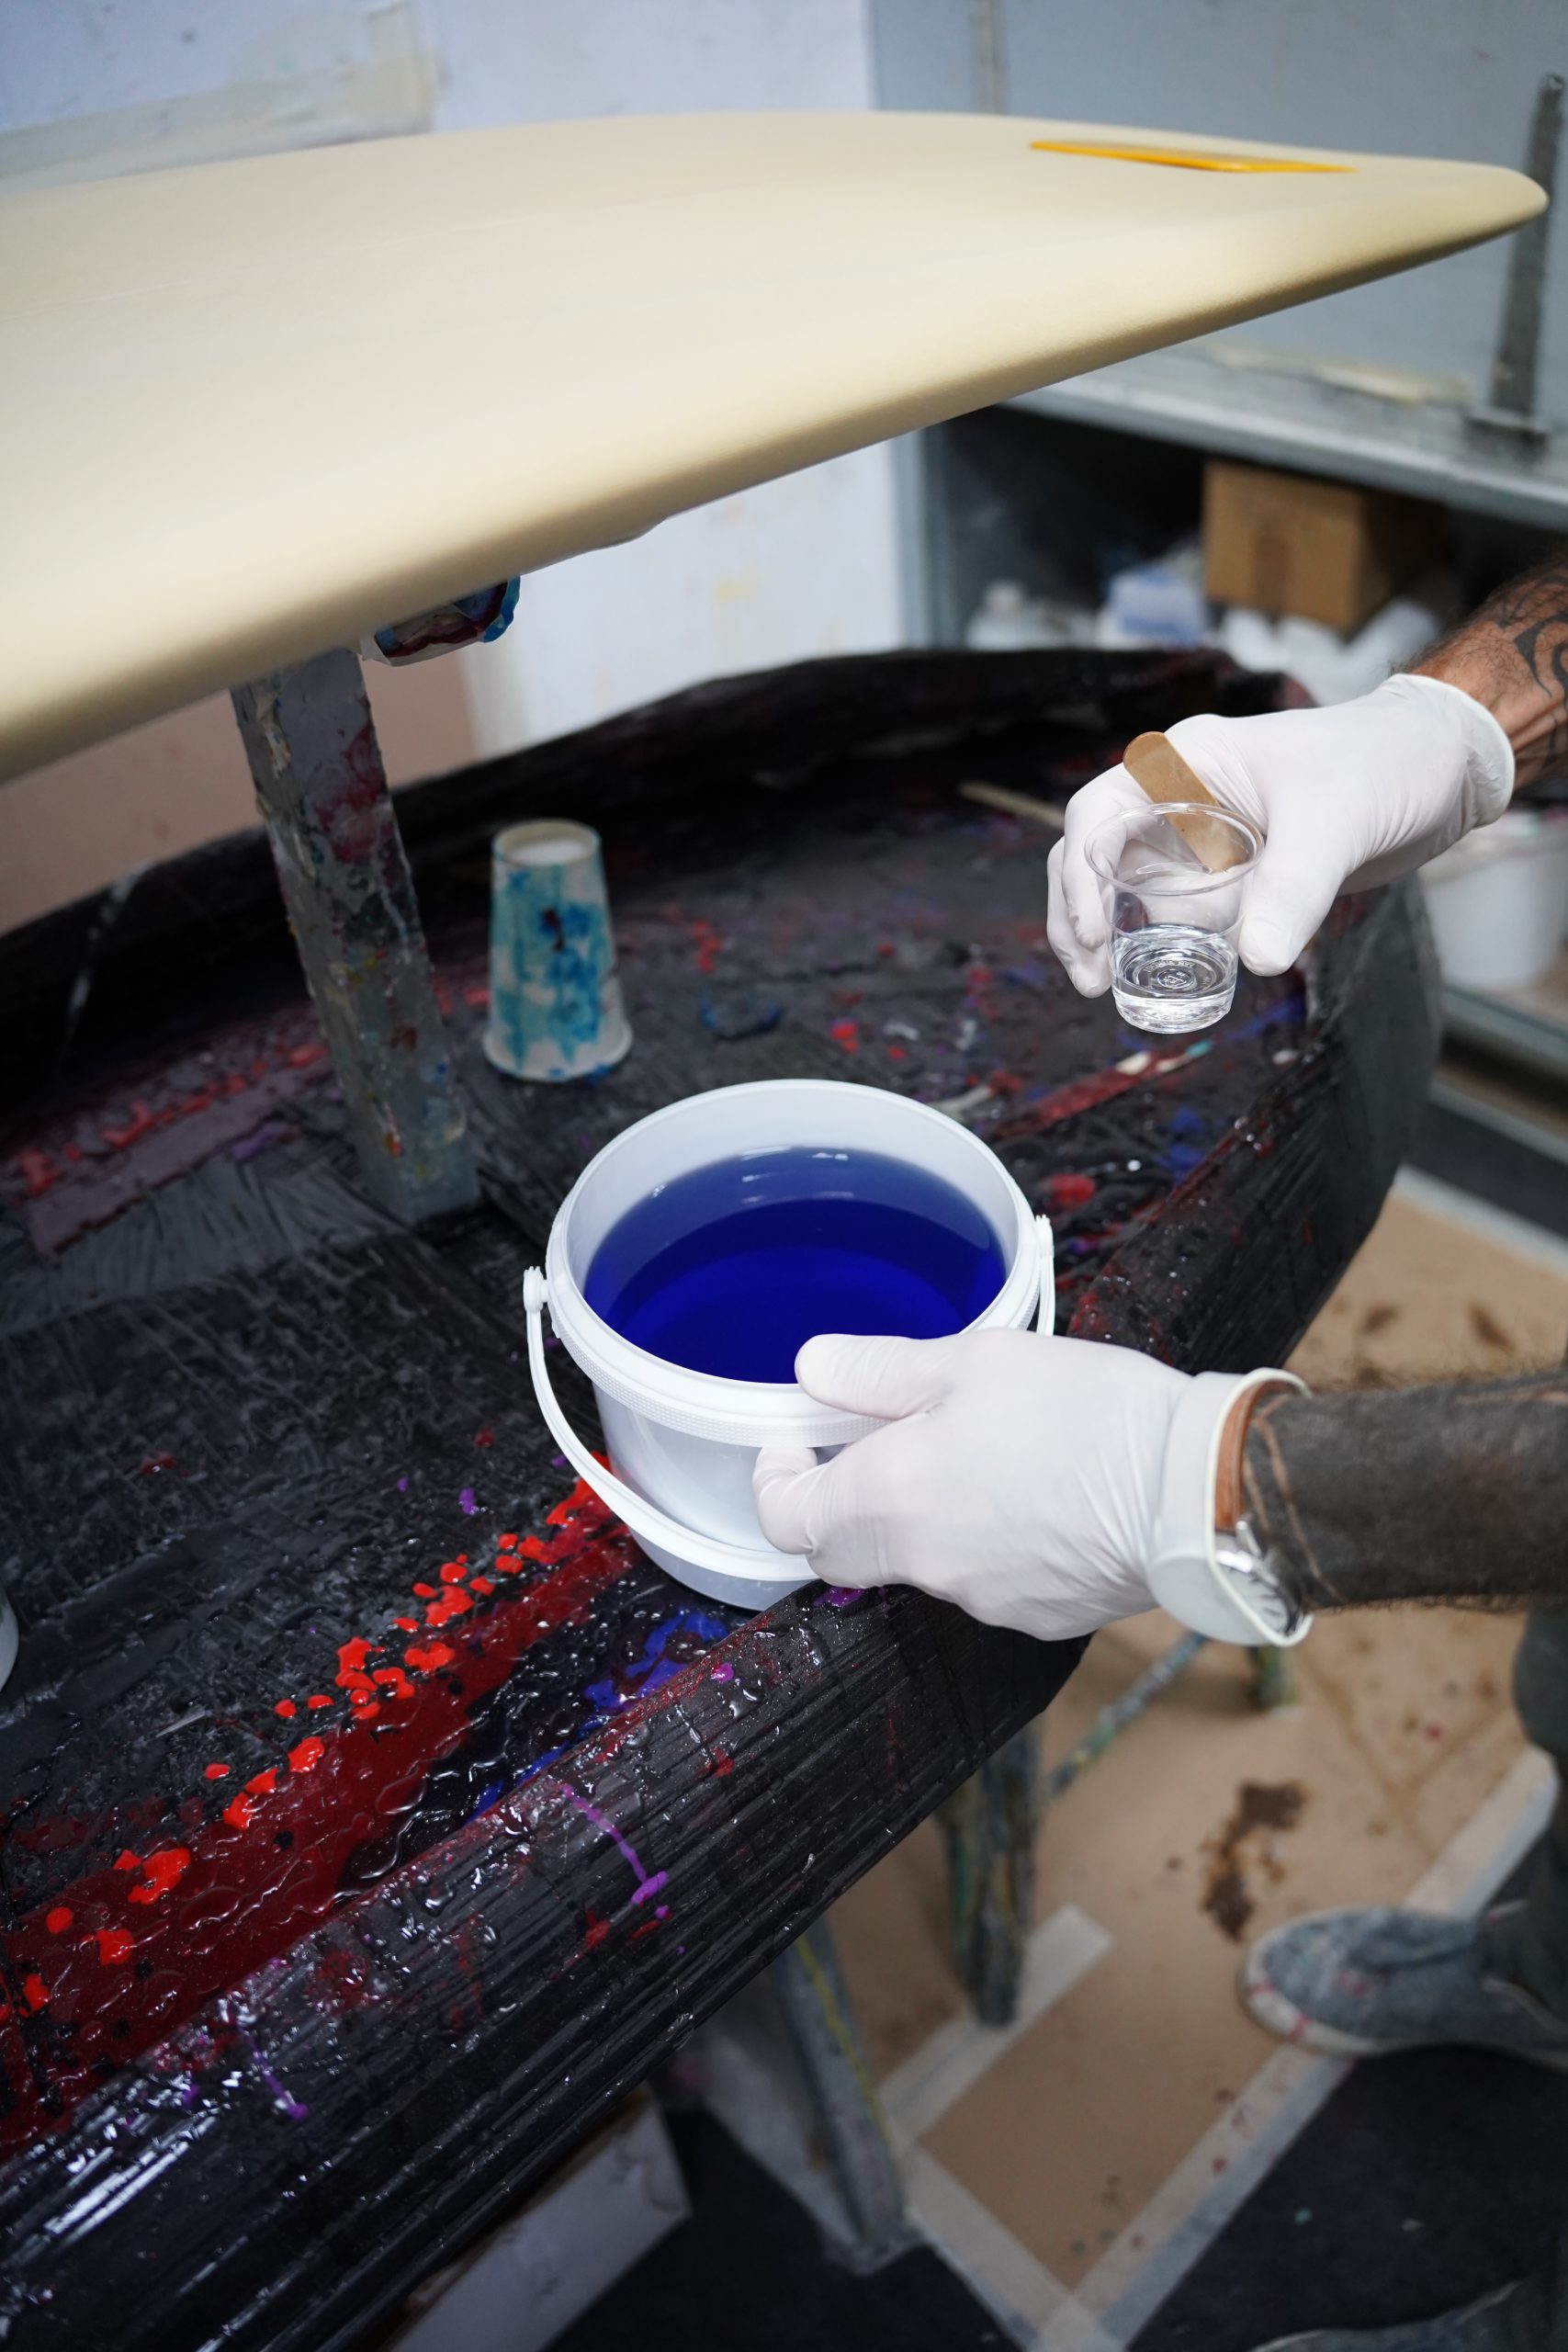
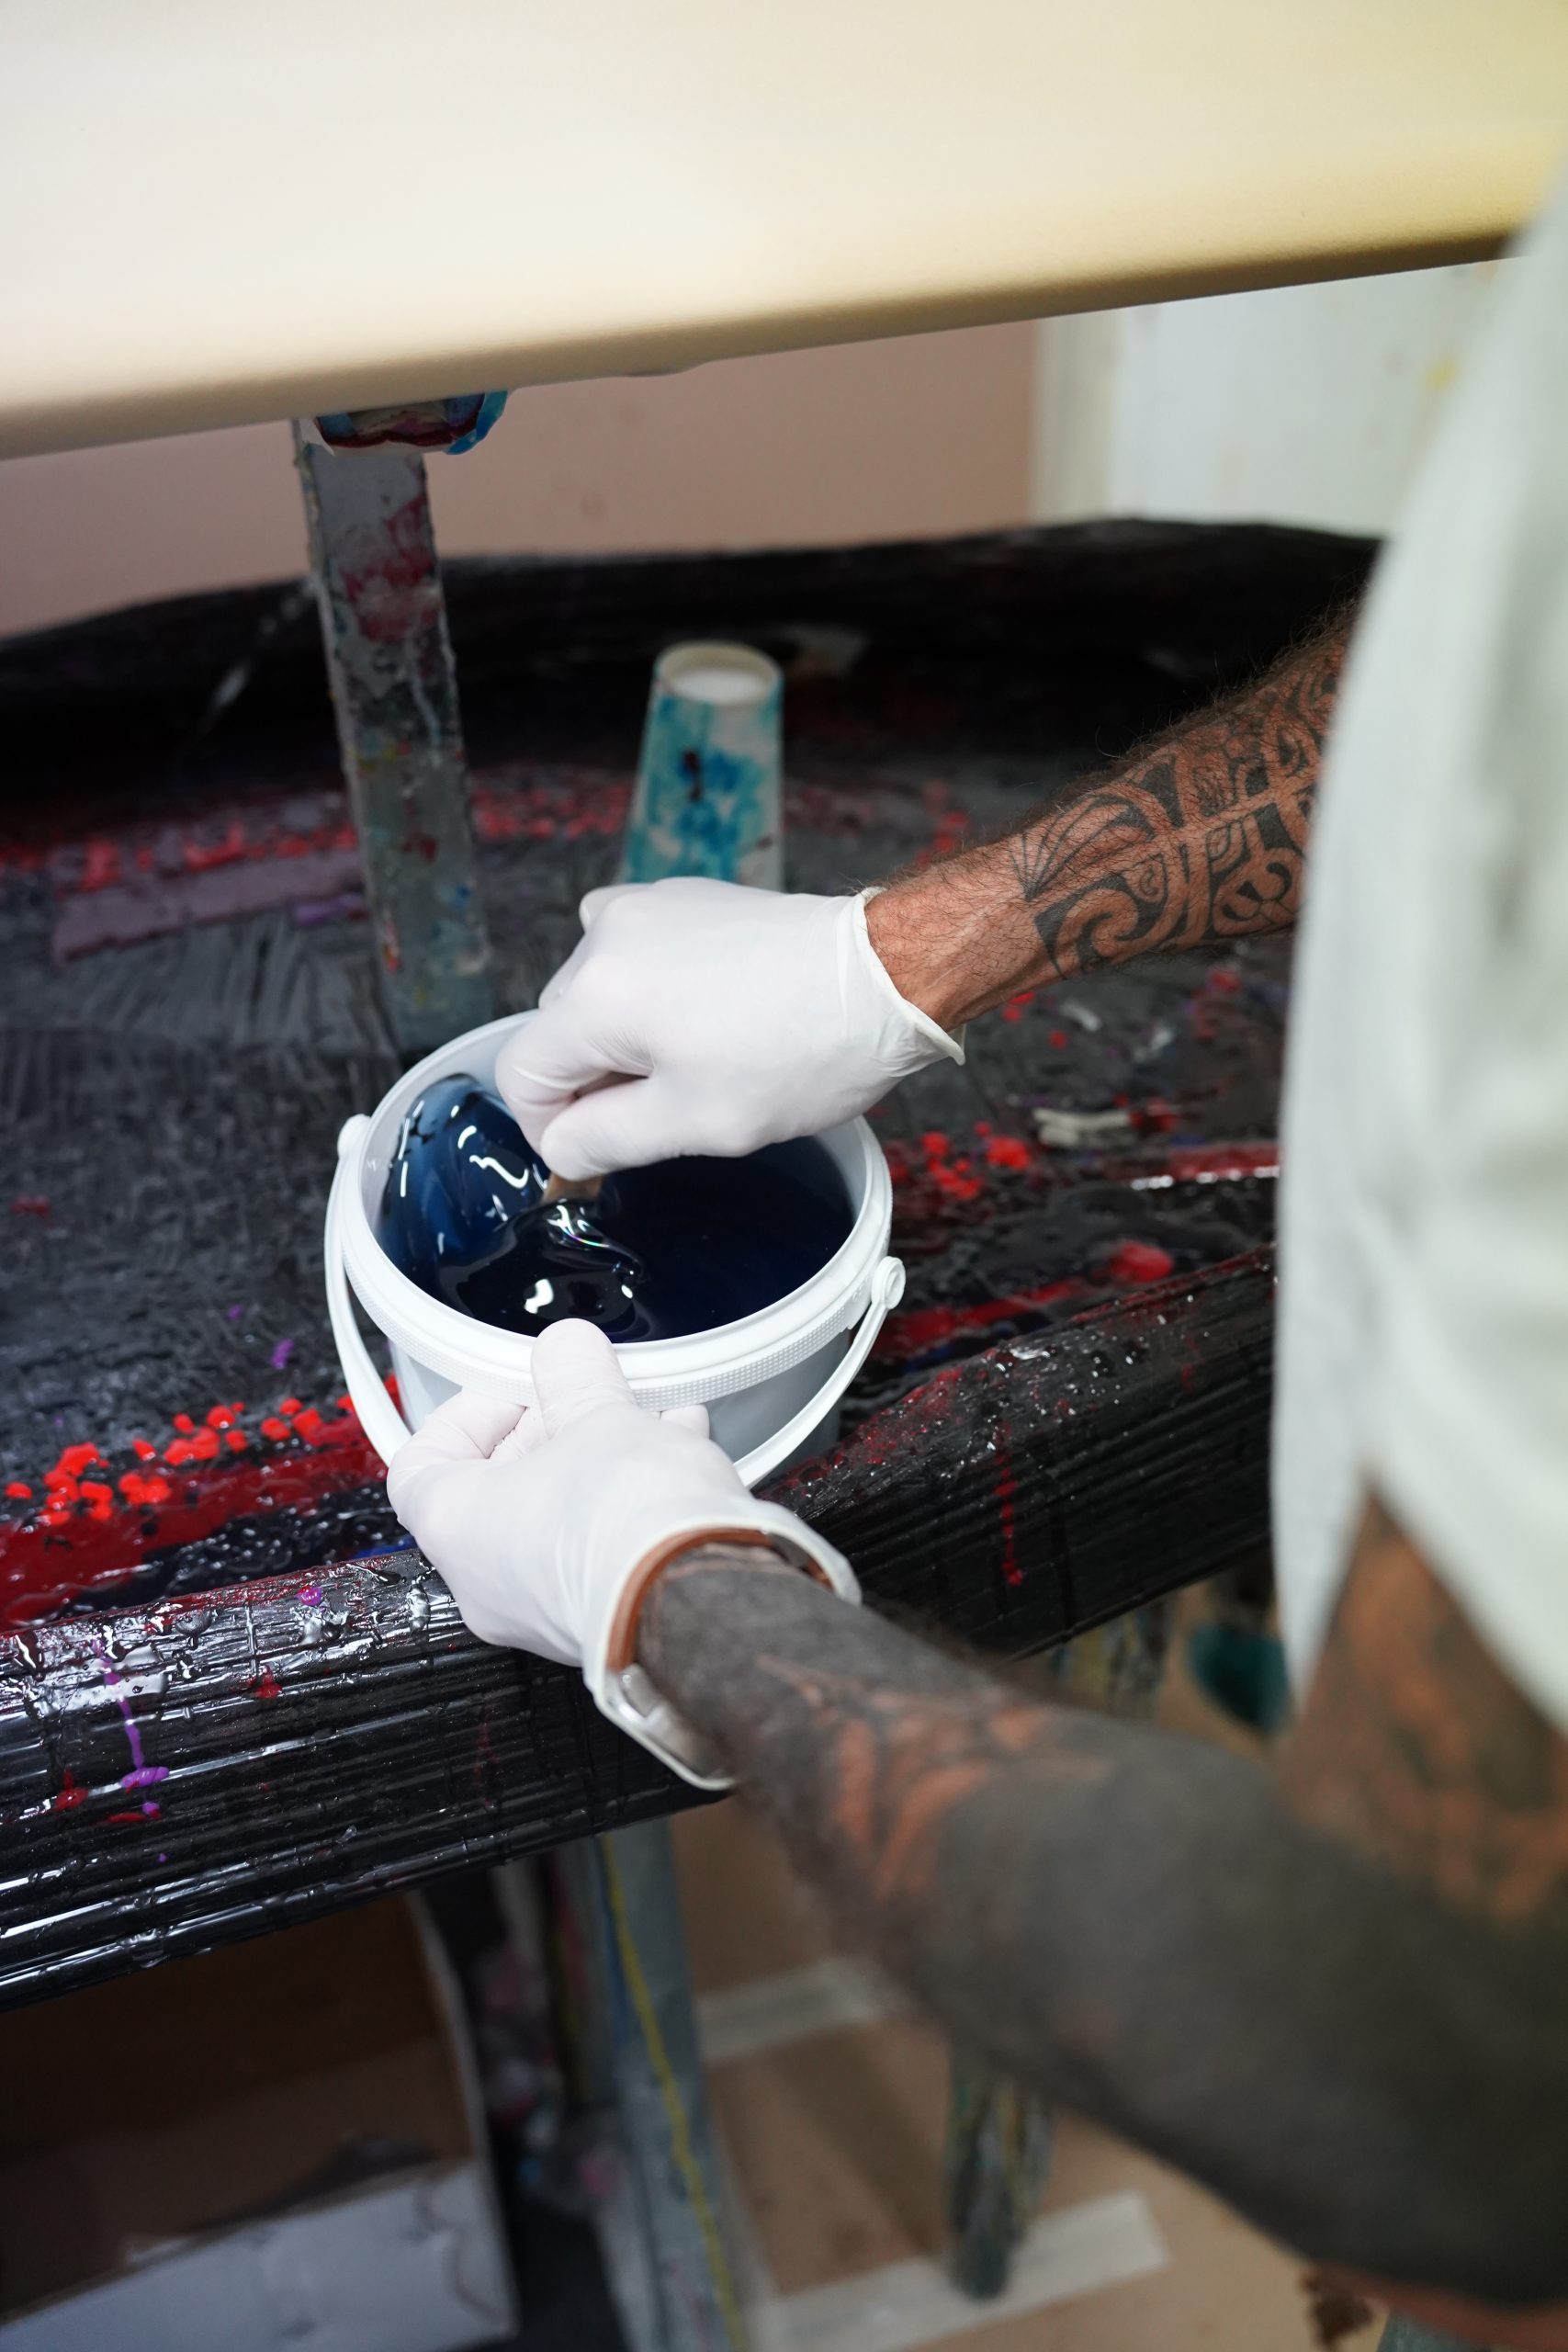
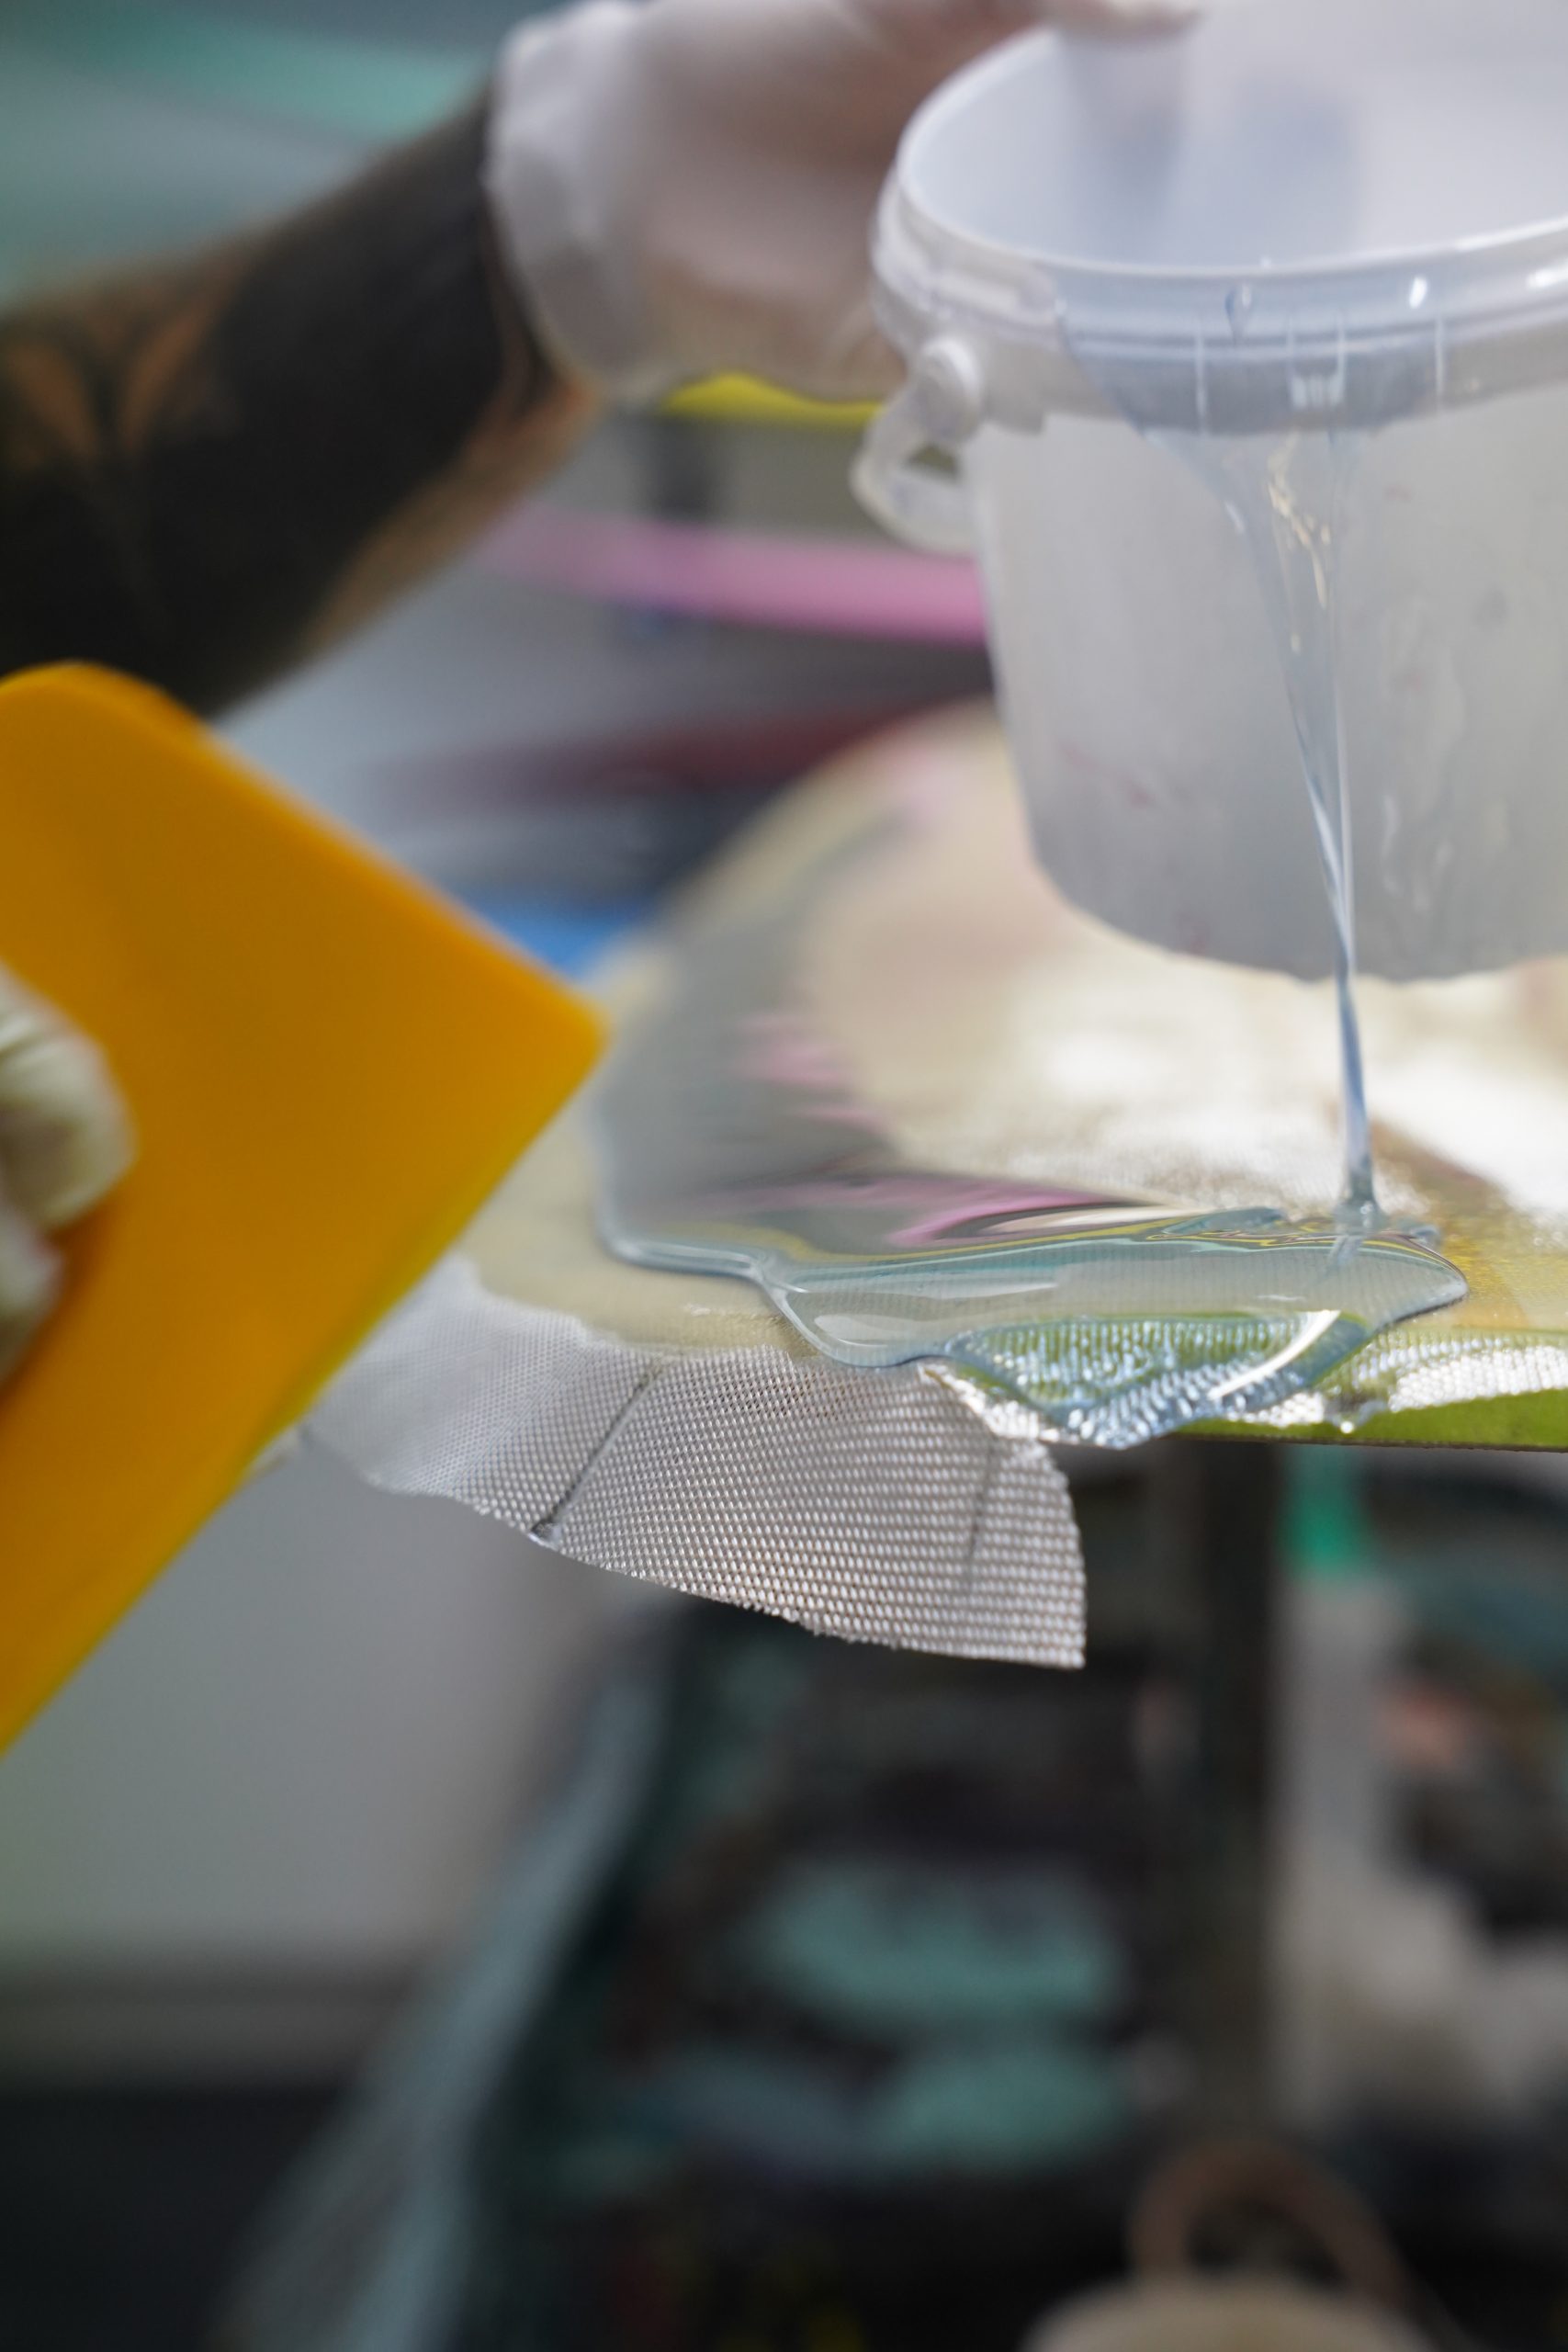
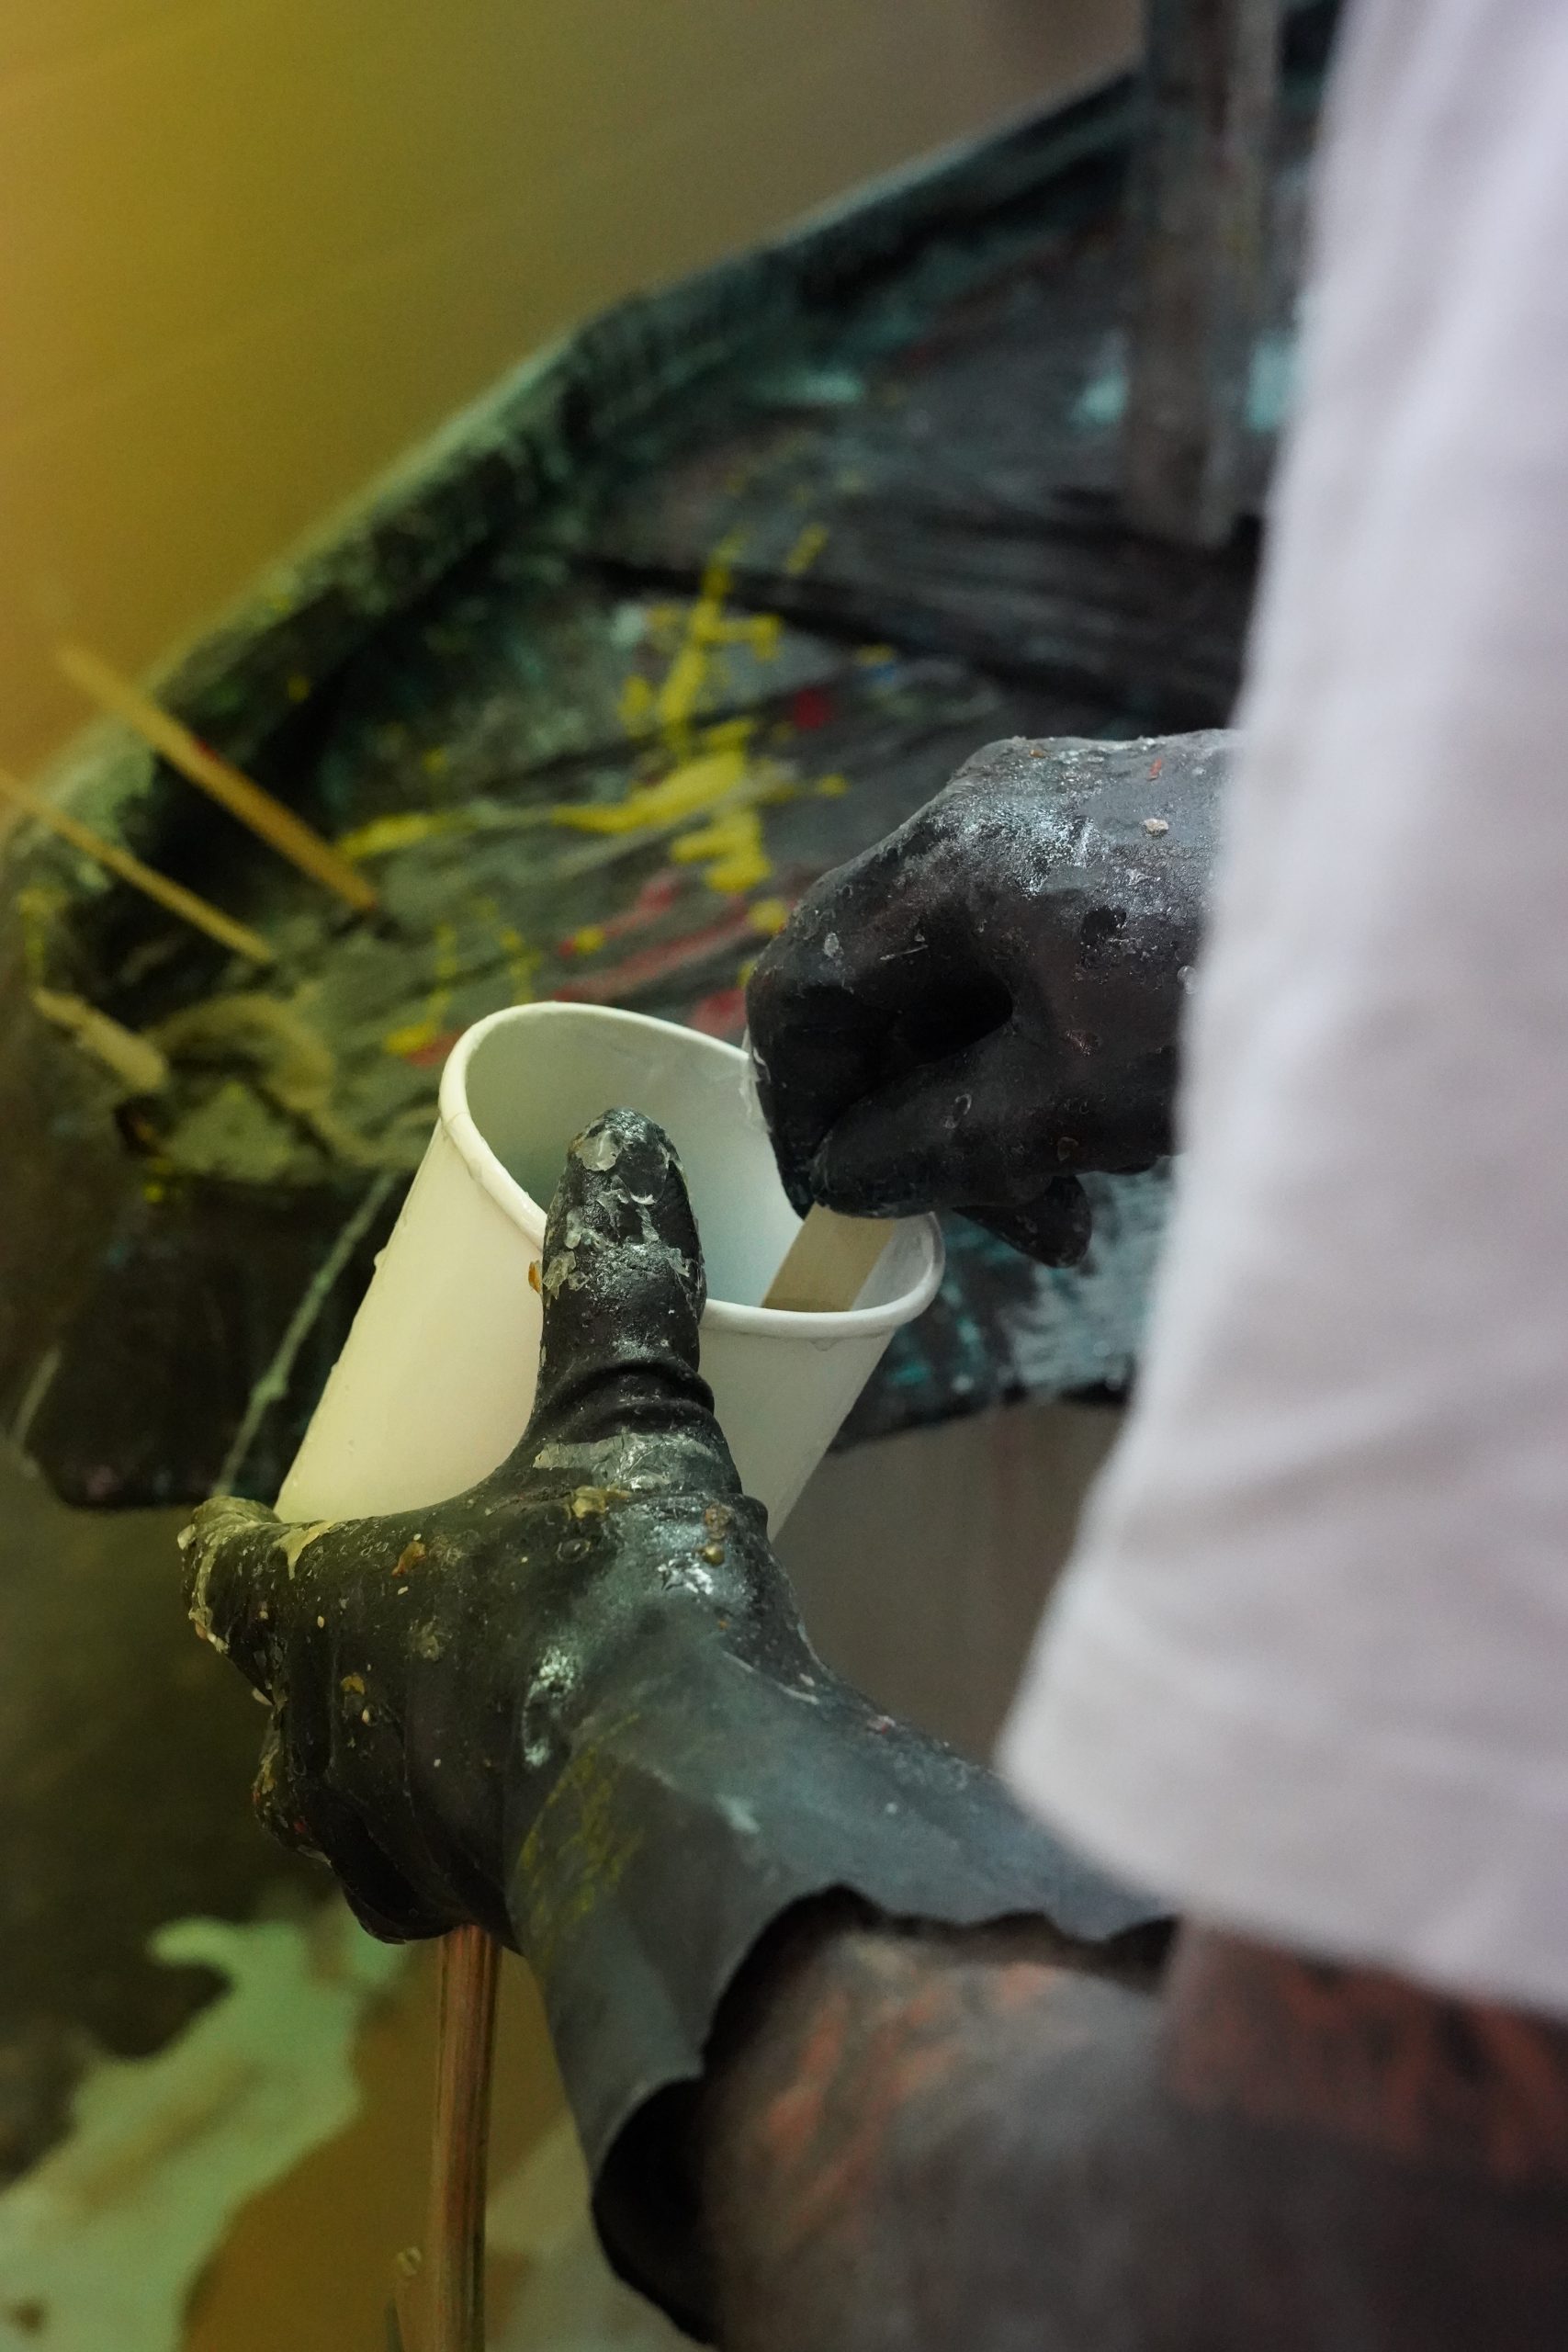
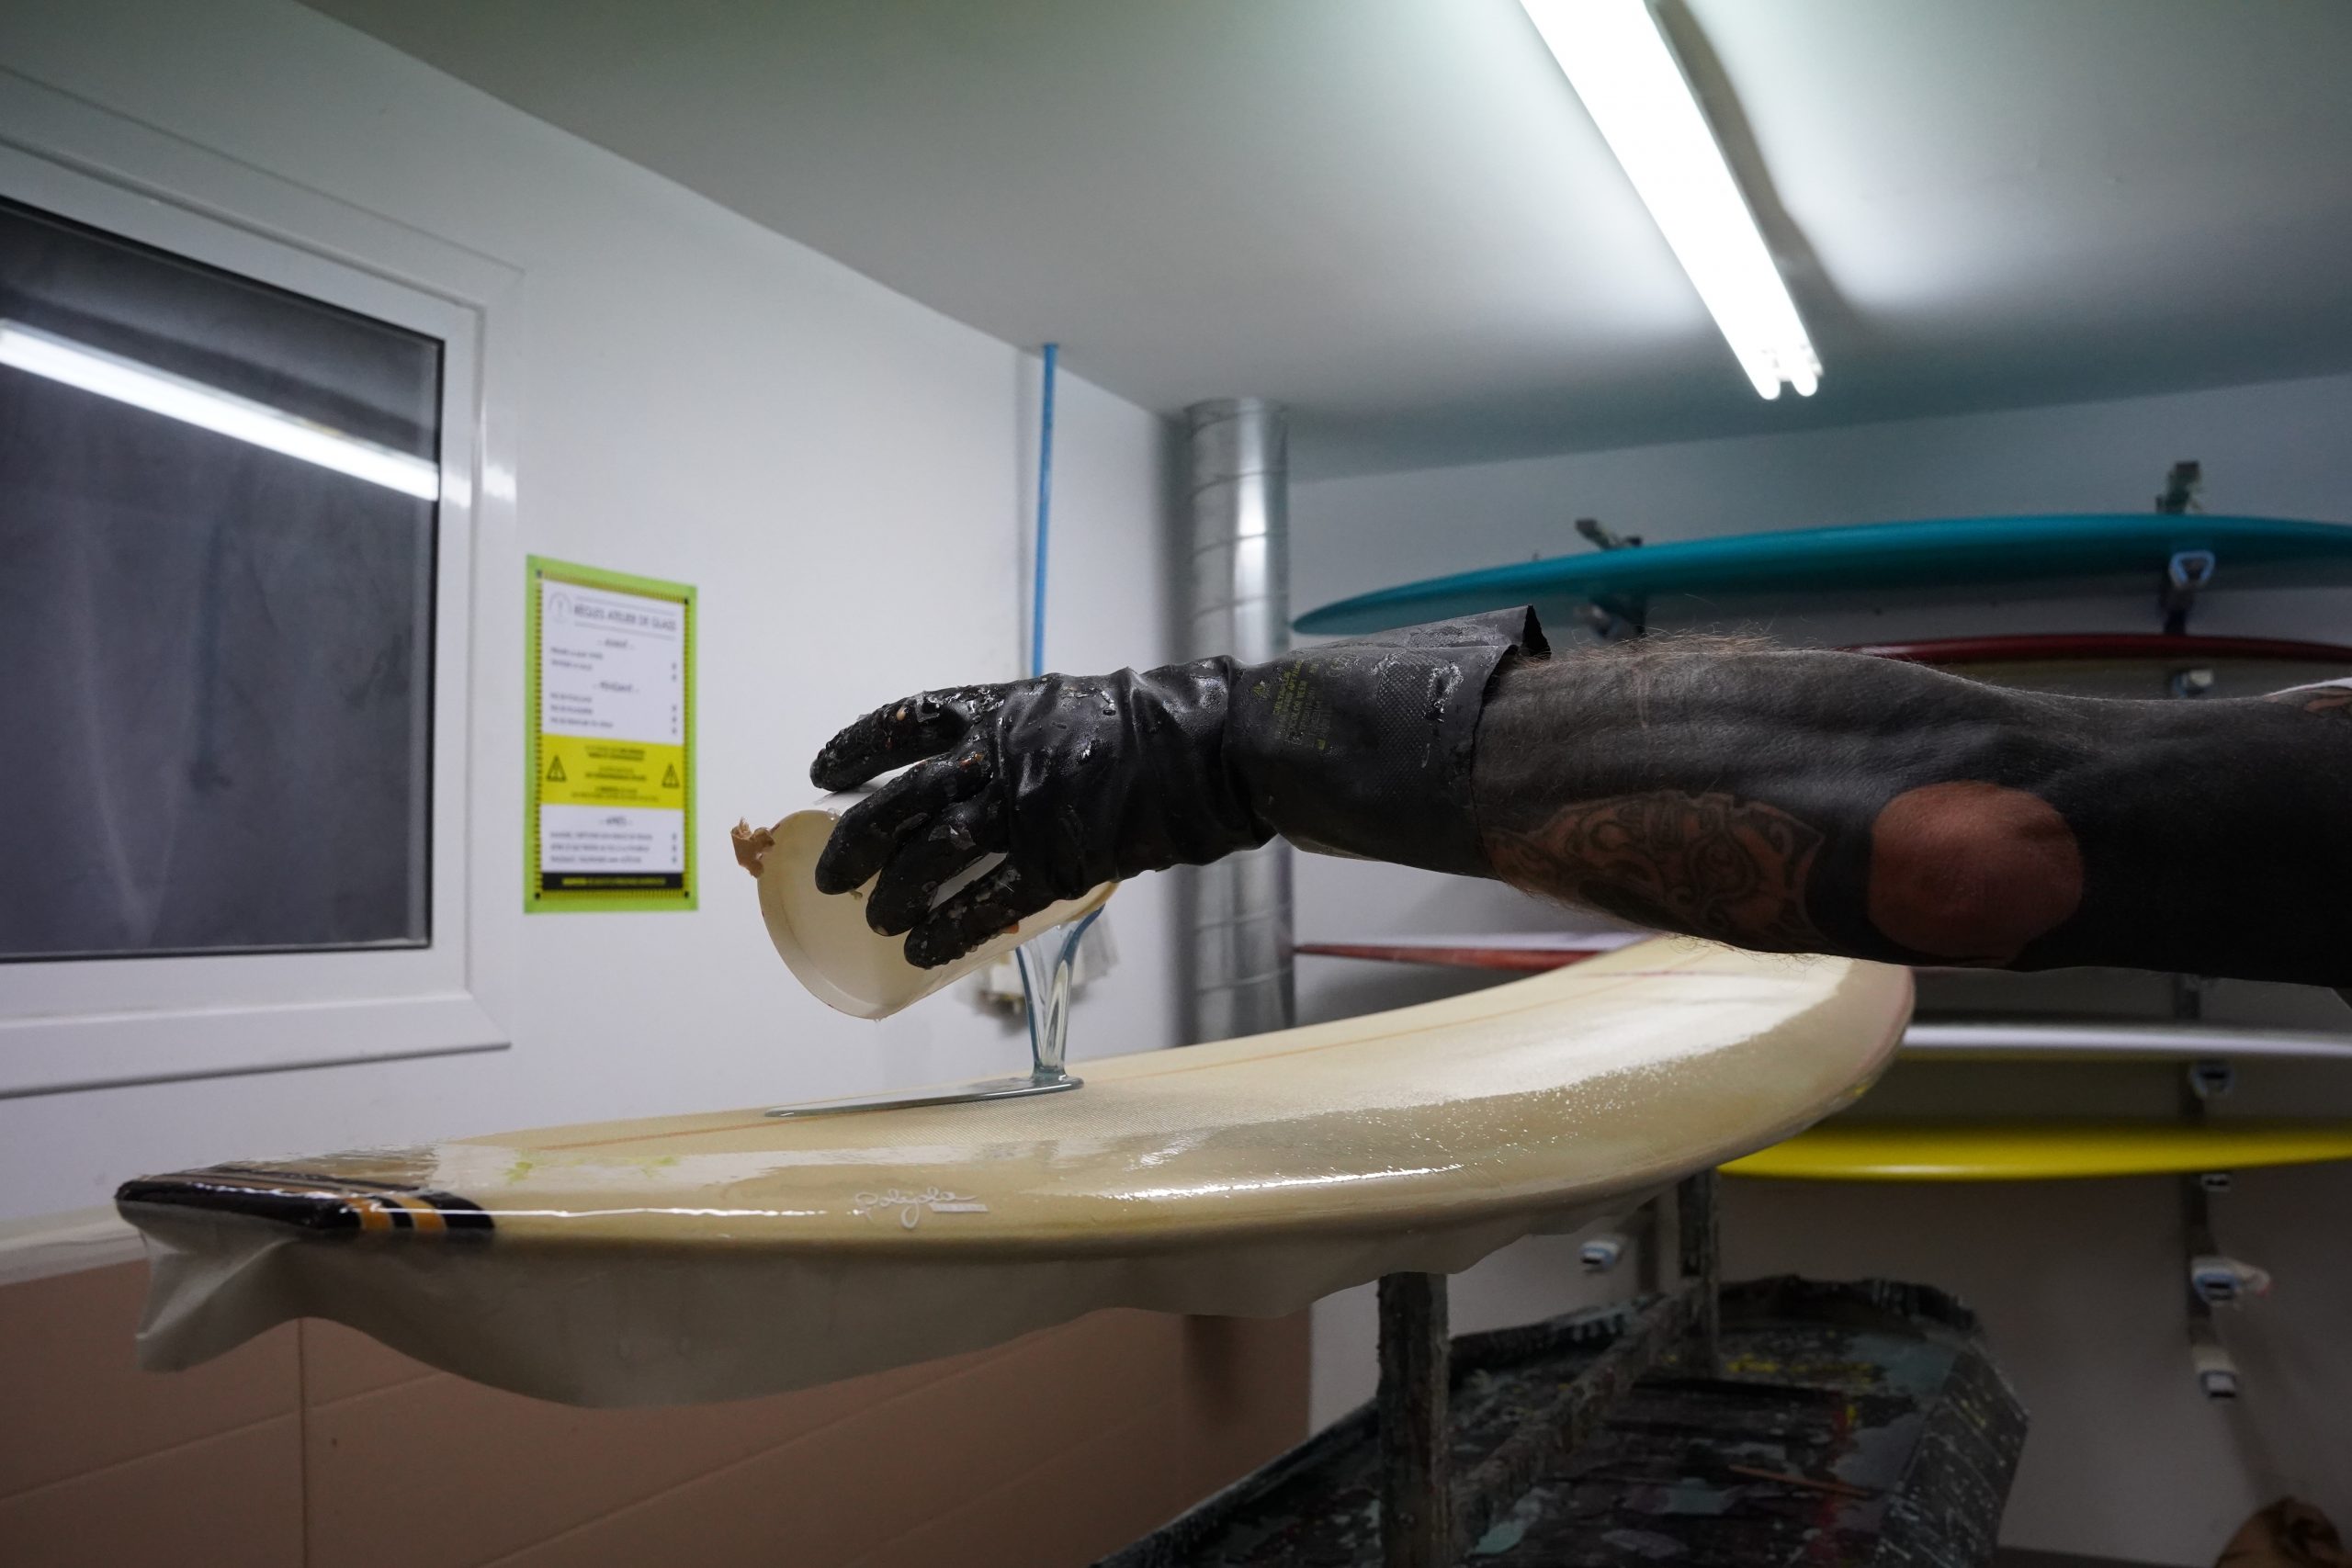
- Mix the resin and hardener according to the manufacturer’s instructions.
- Start glassing by pouring a portion of the resin along the stringer.
- Use a squeegee to evenly spread the resin in thin, long strokes.
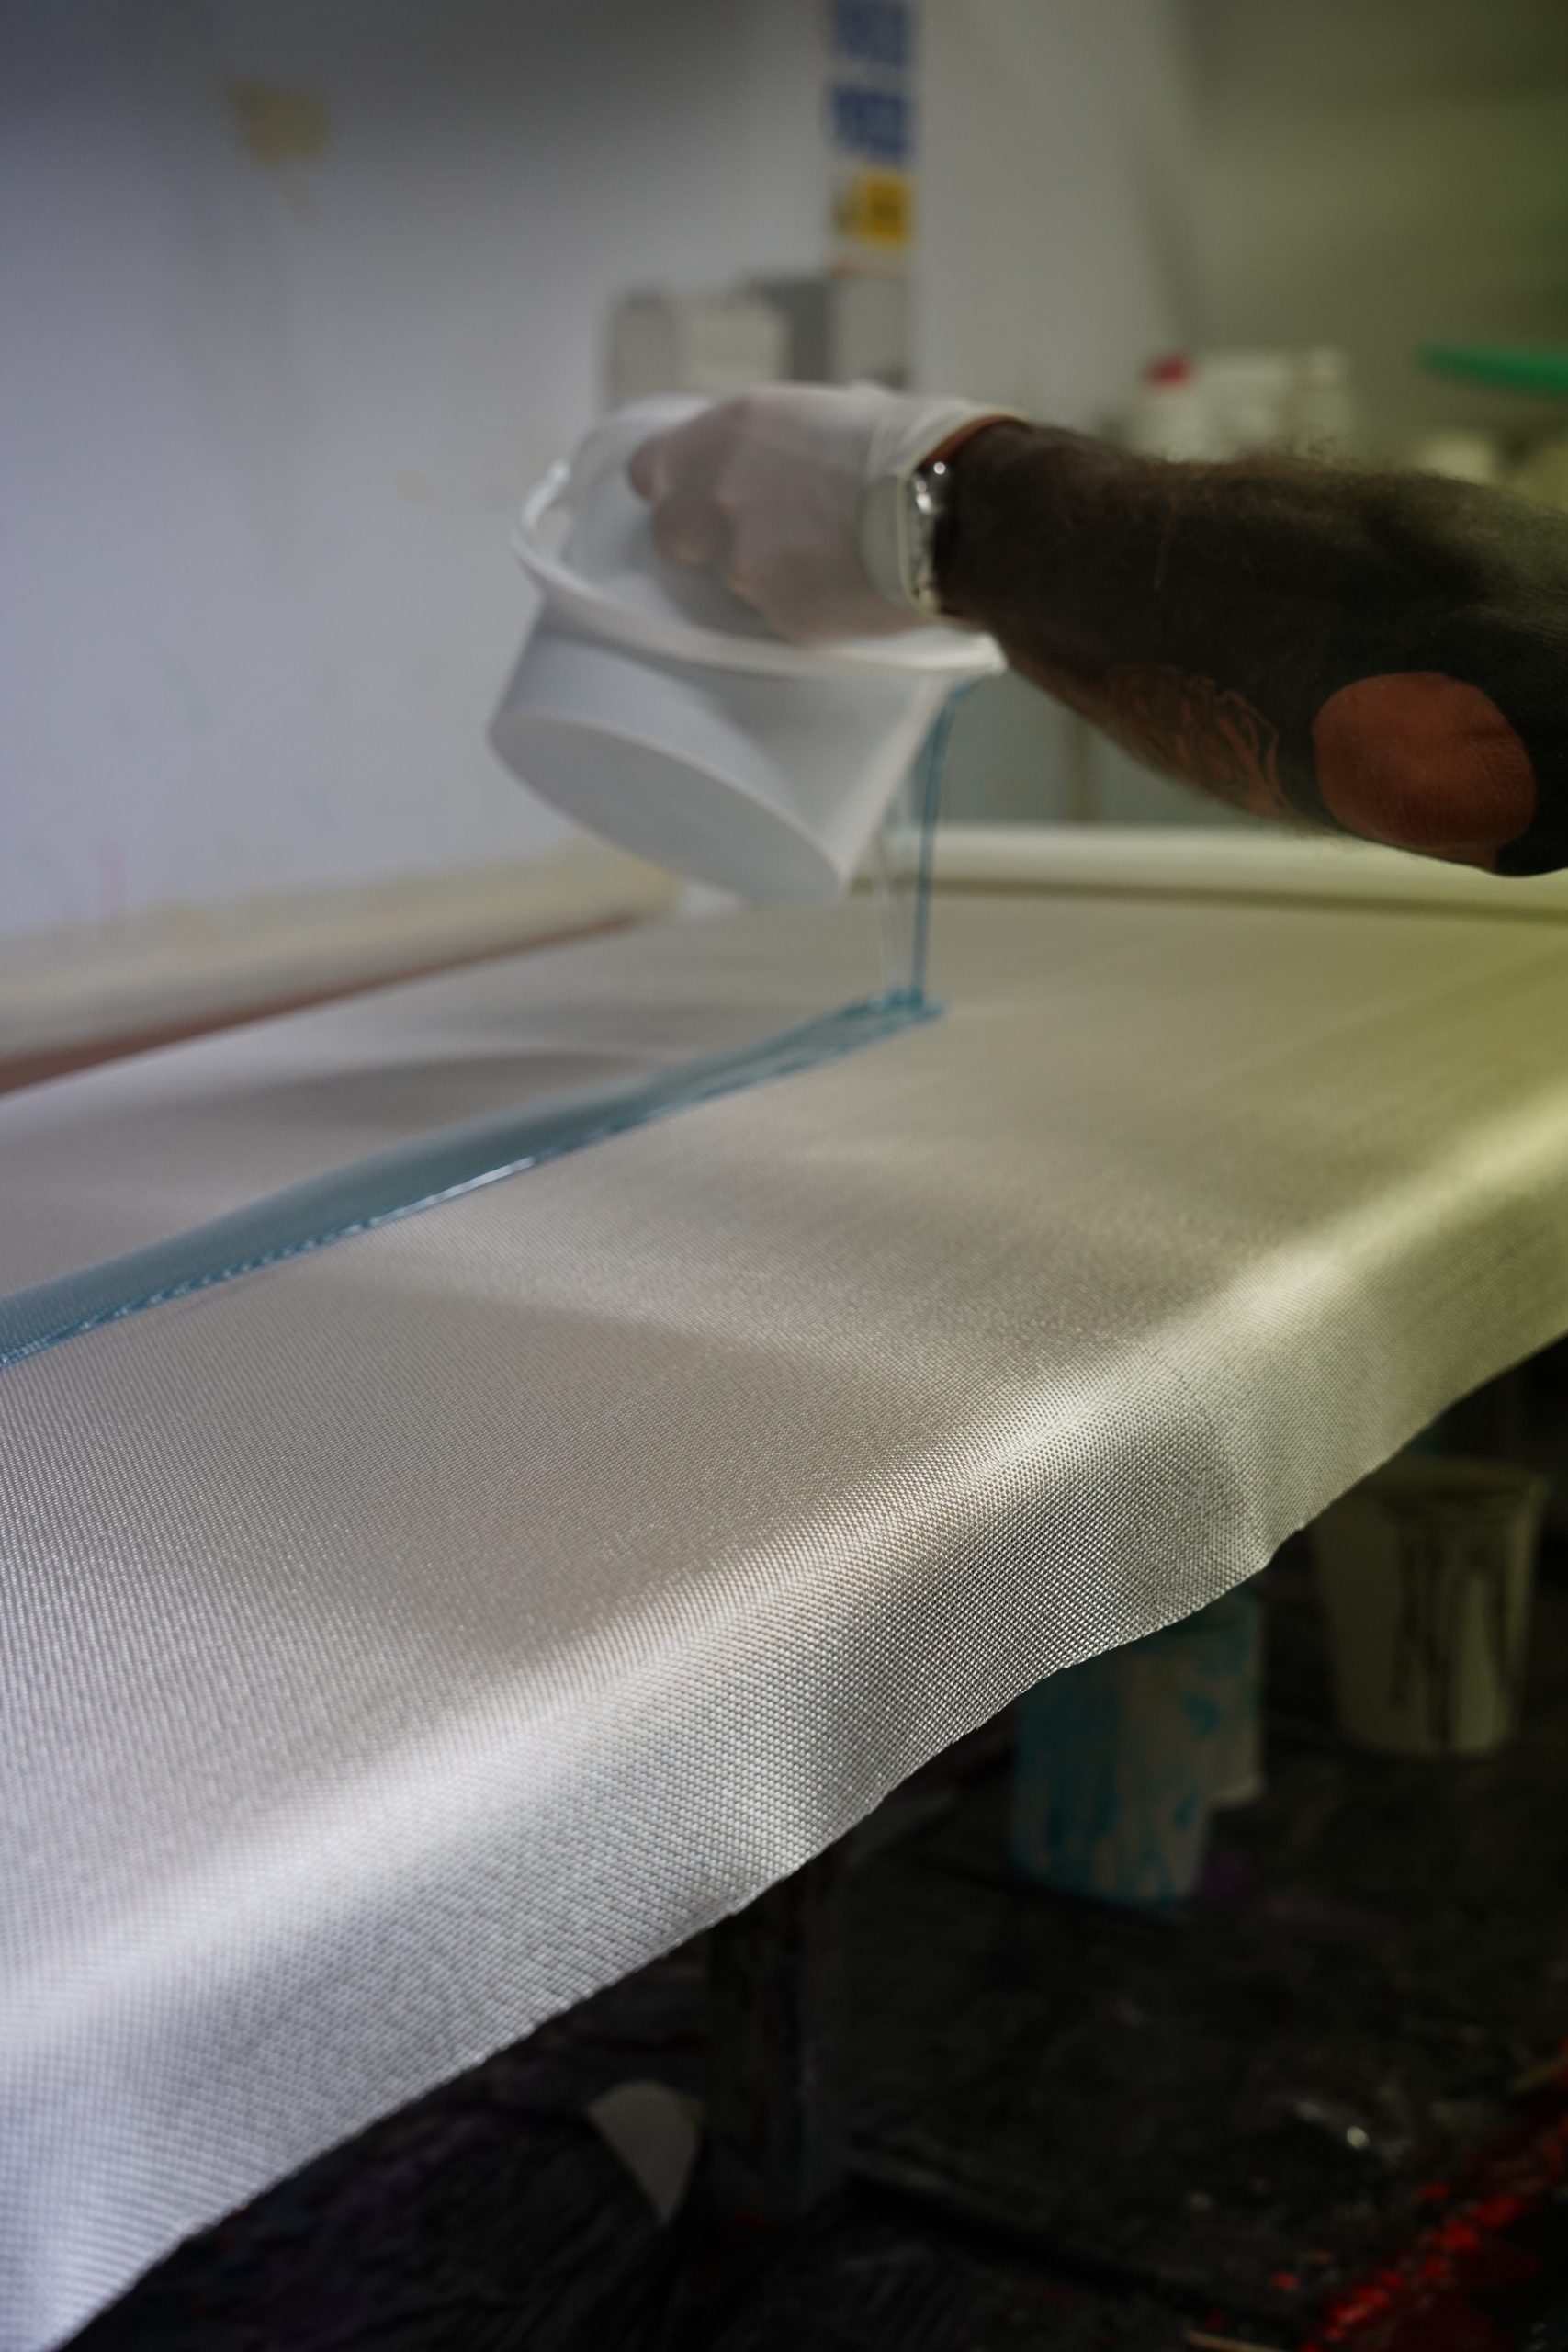
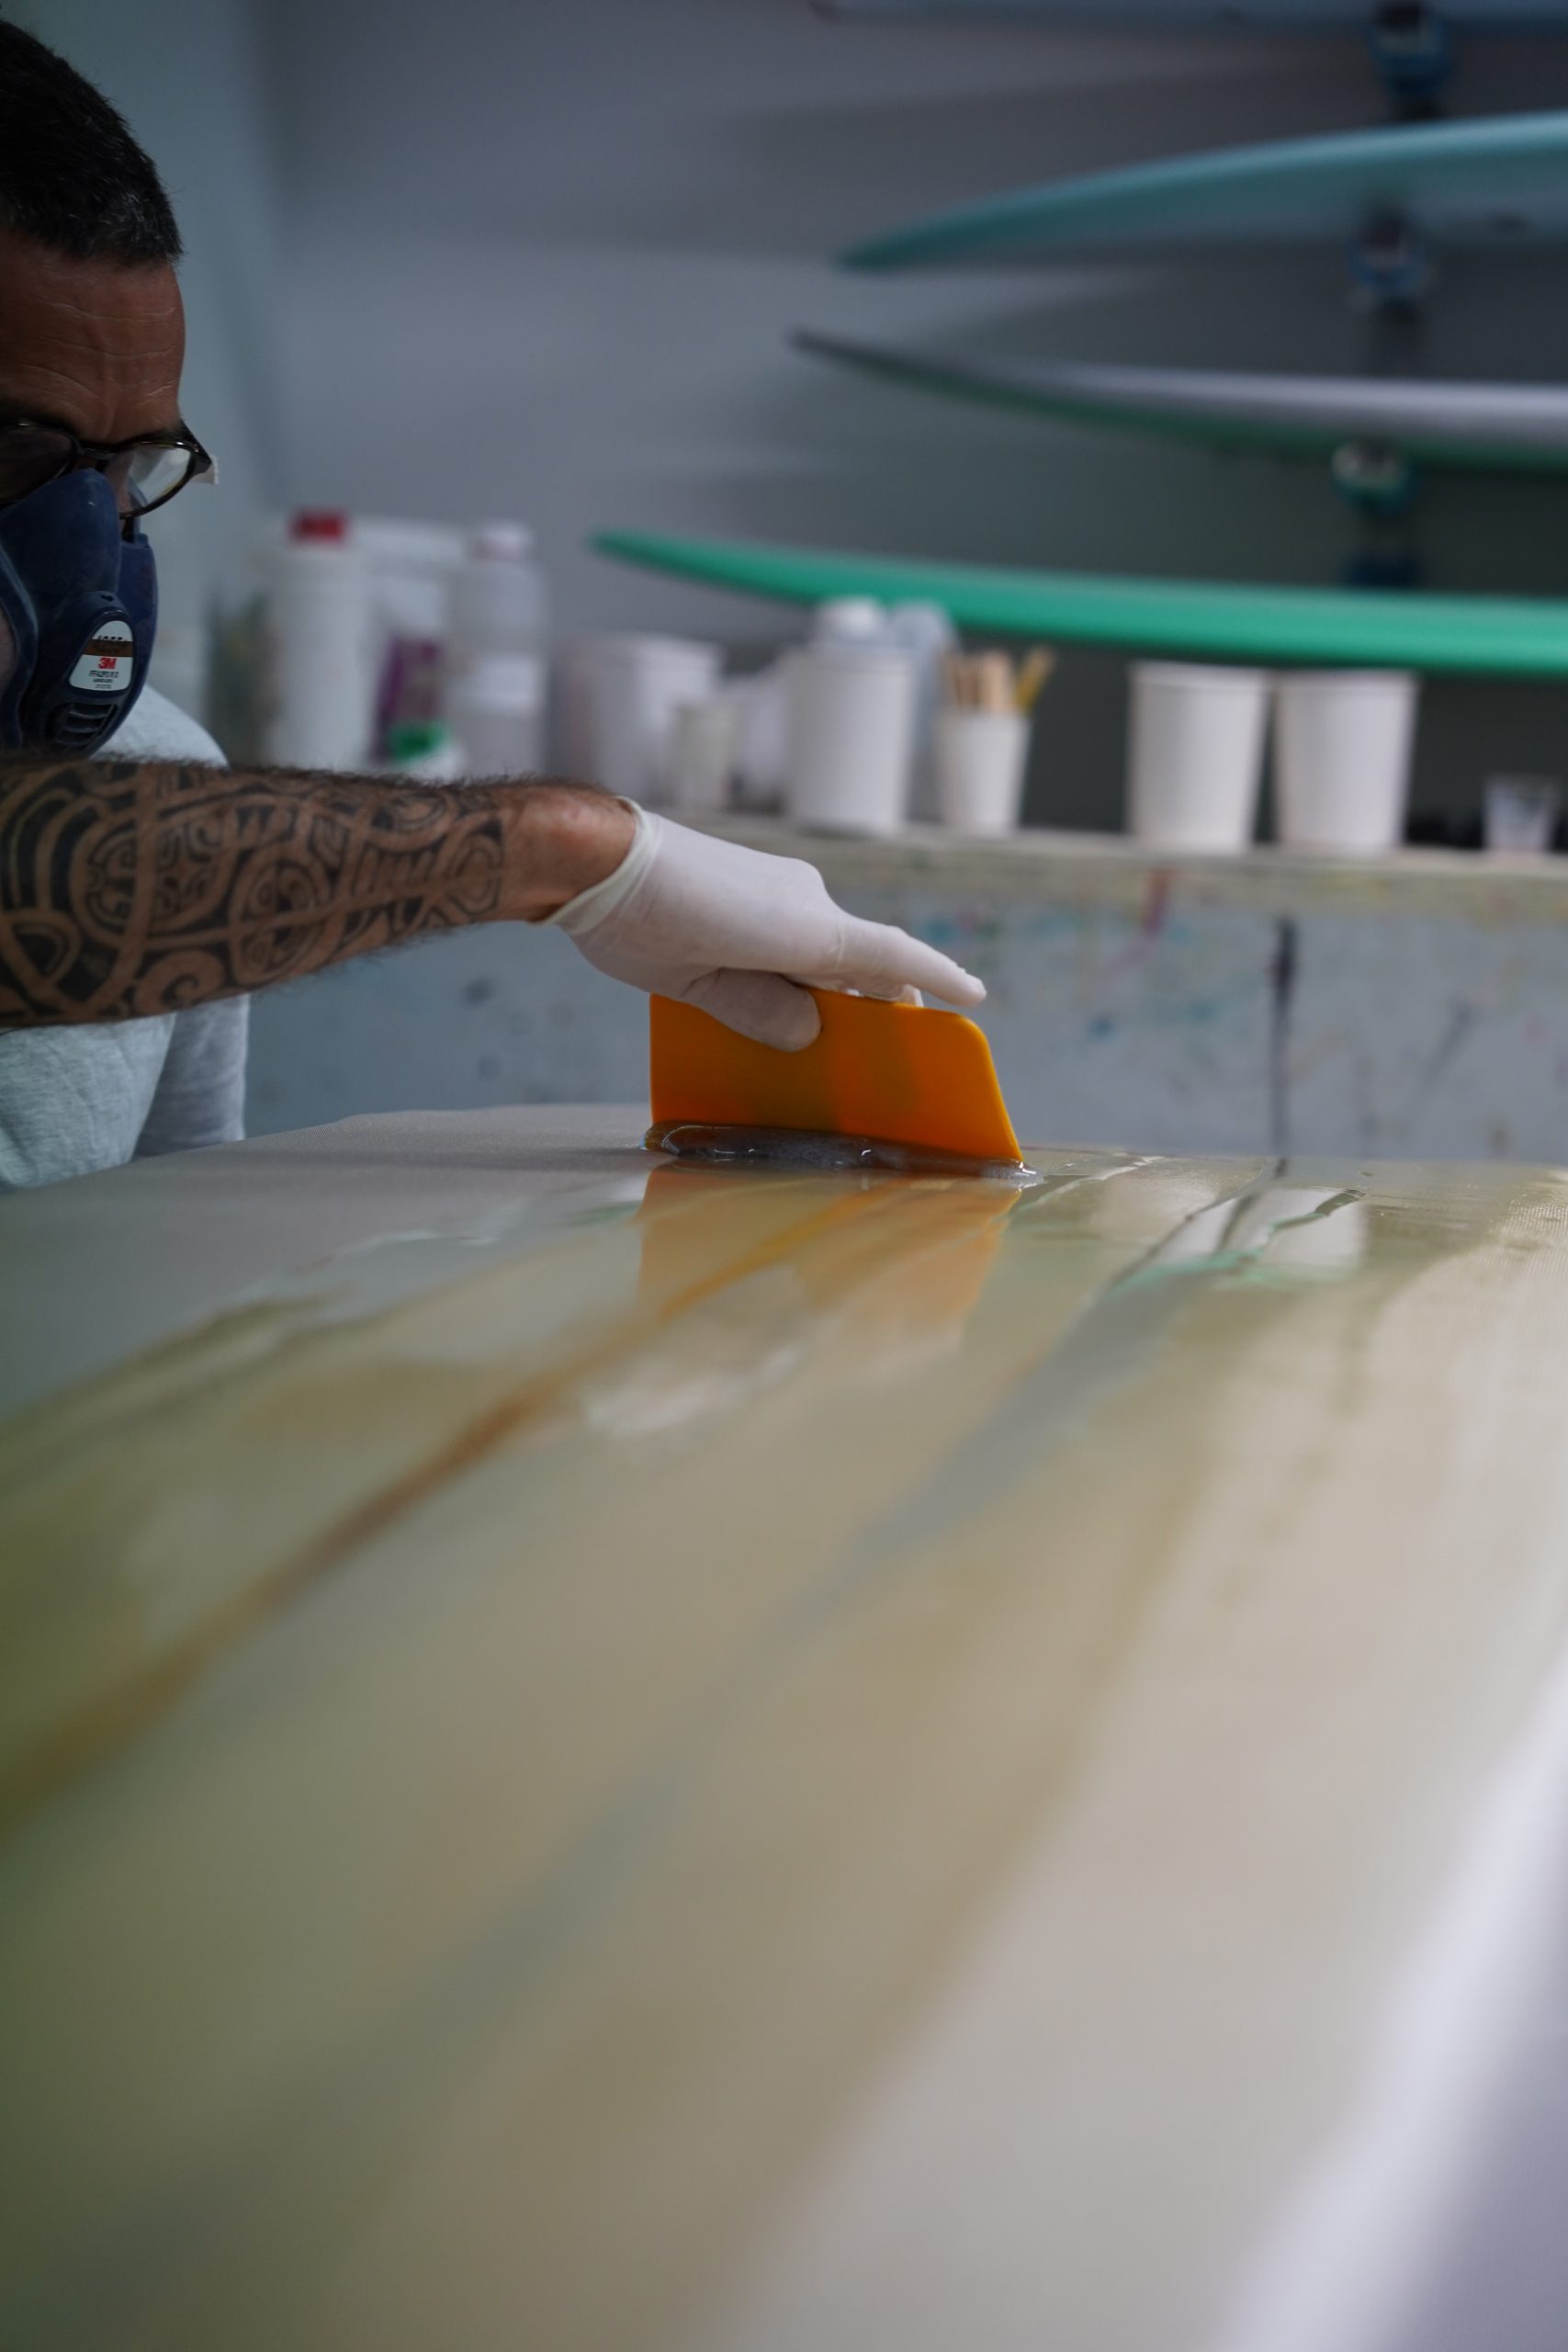
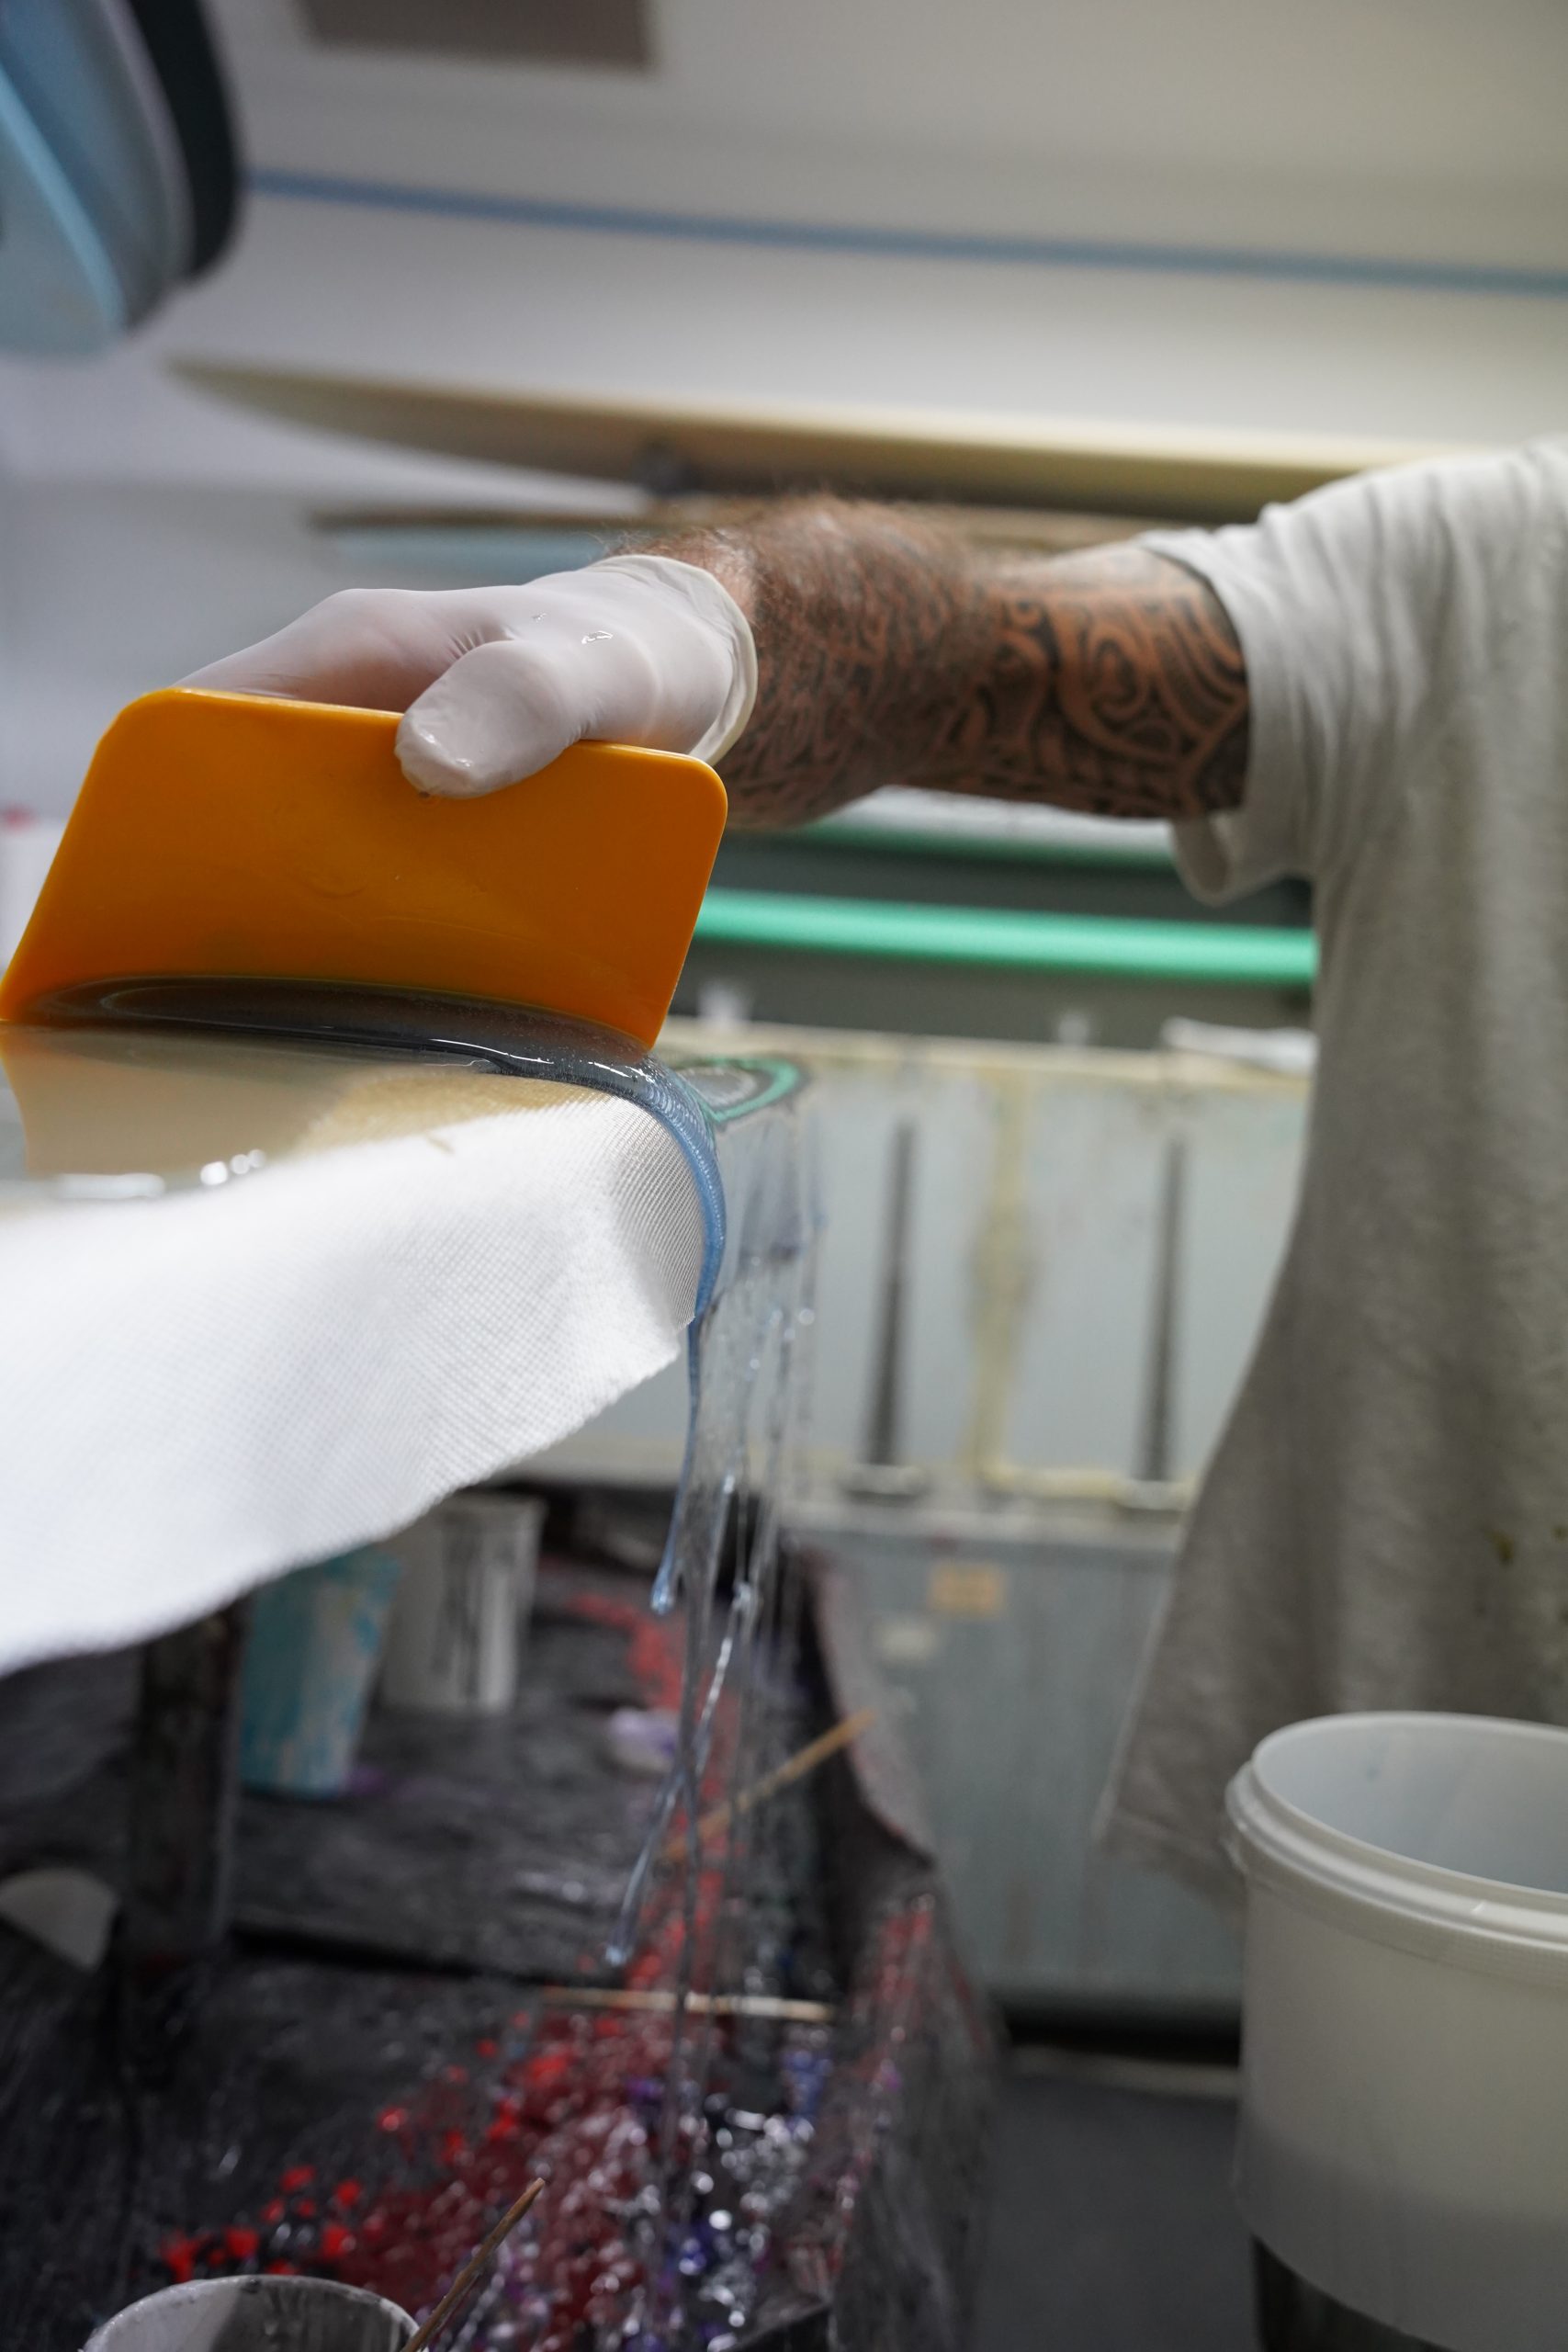
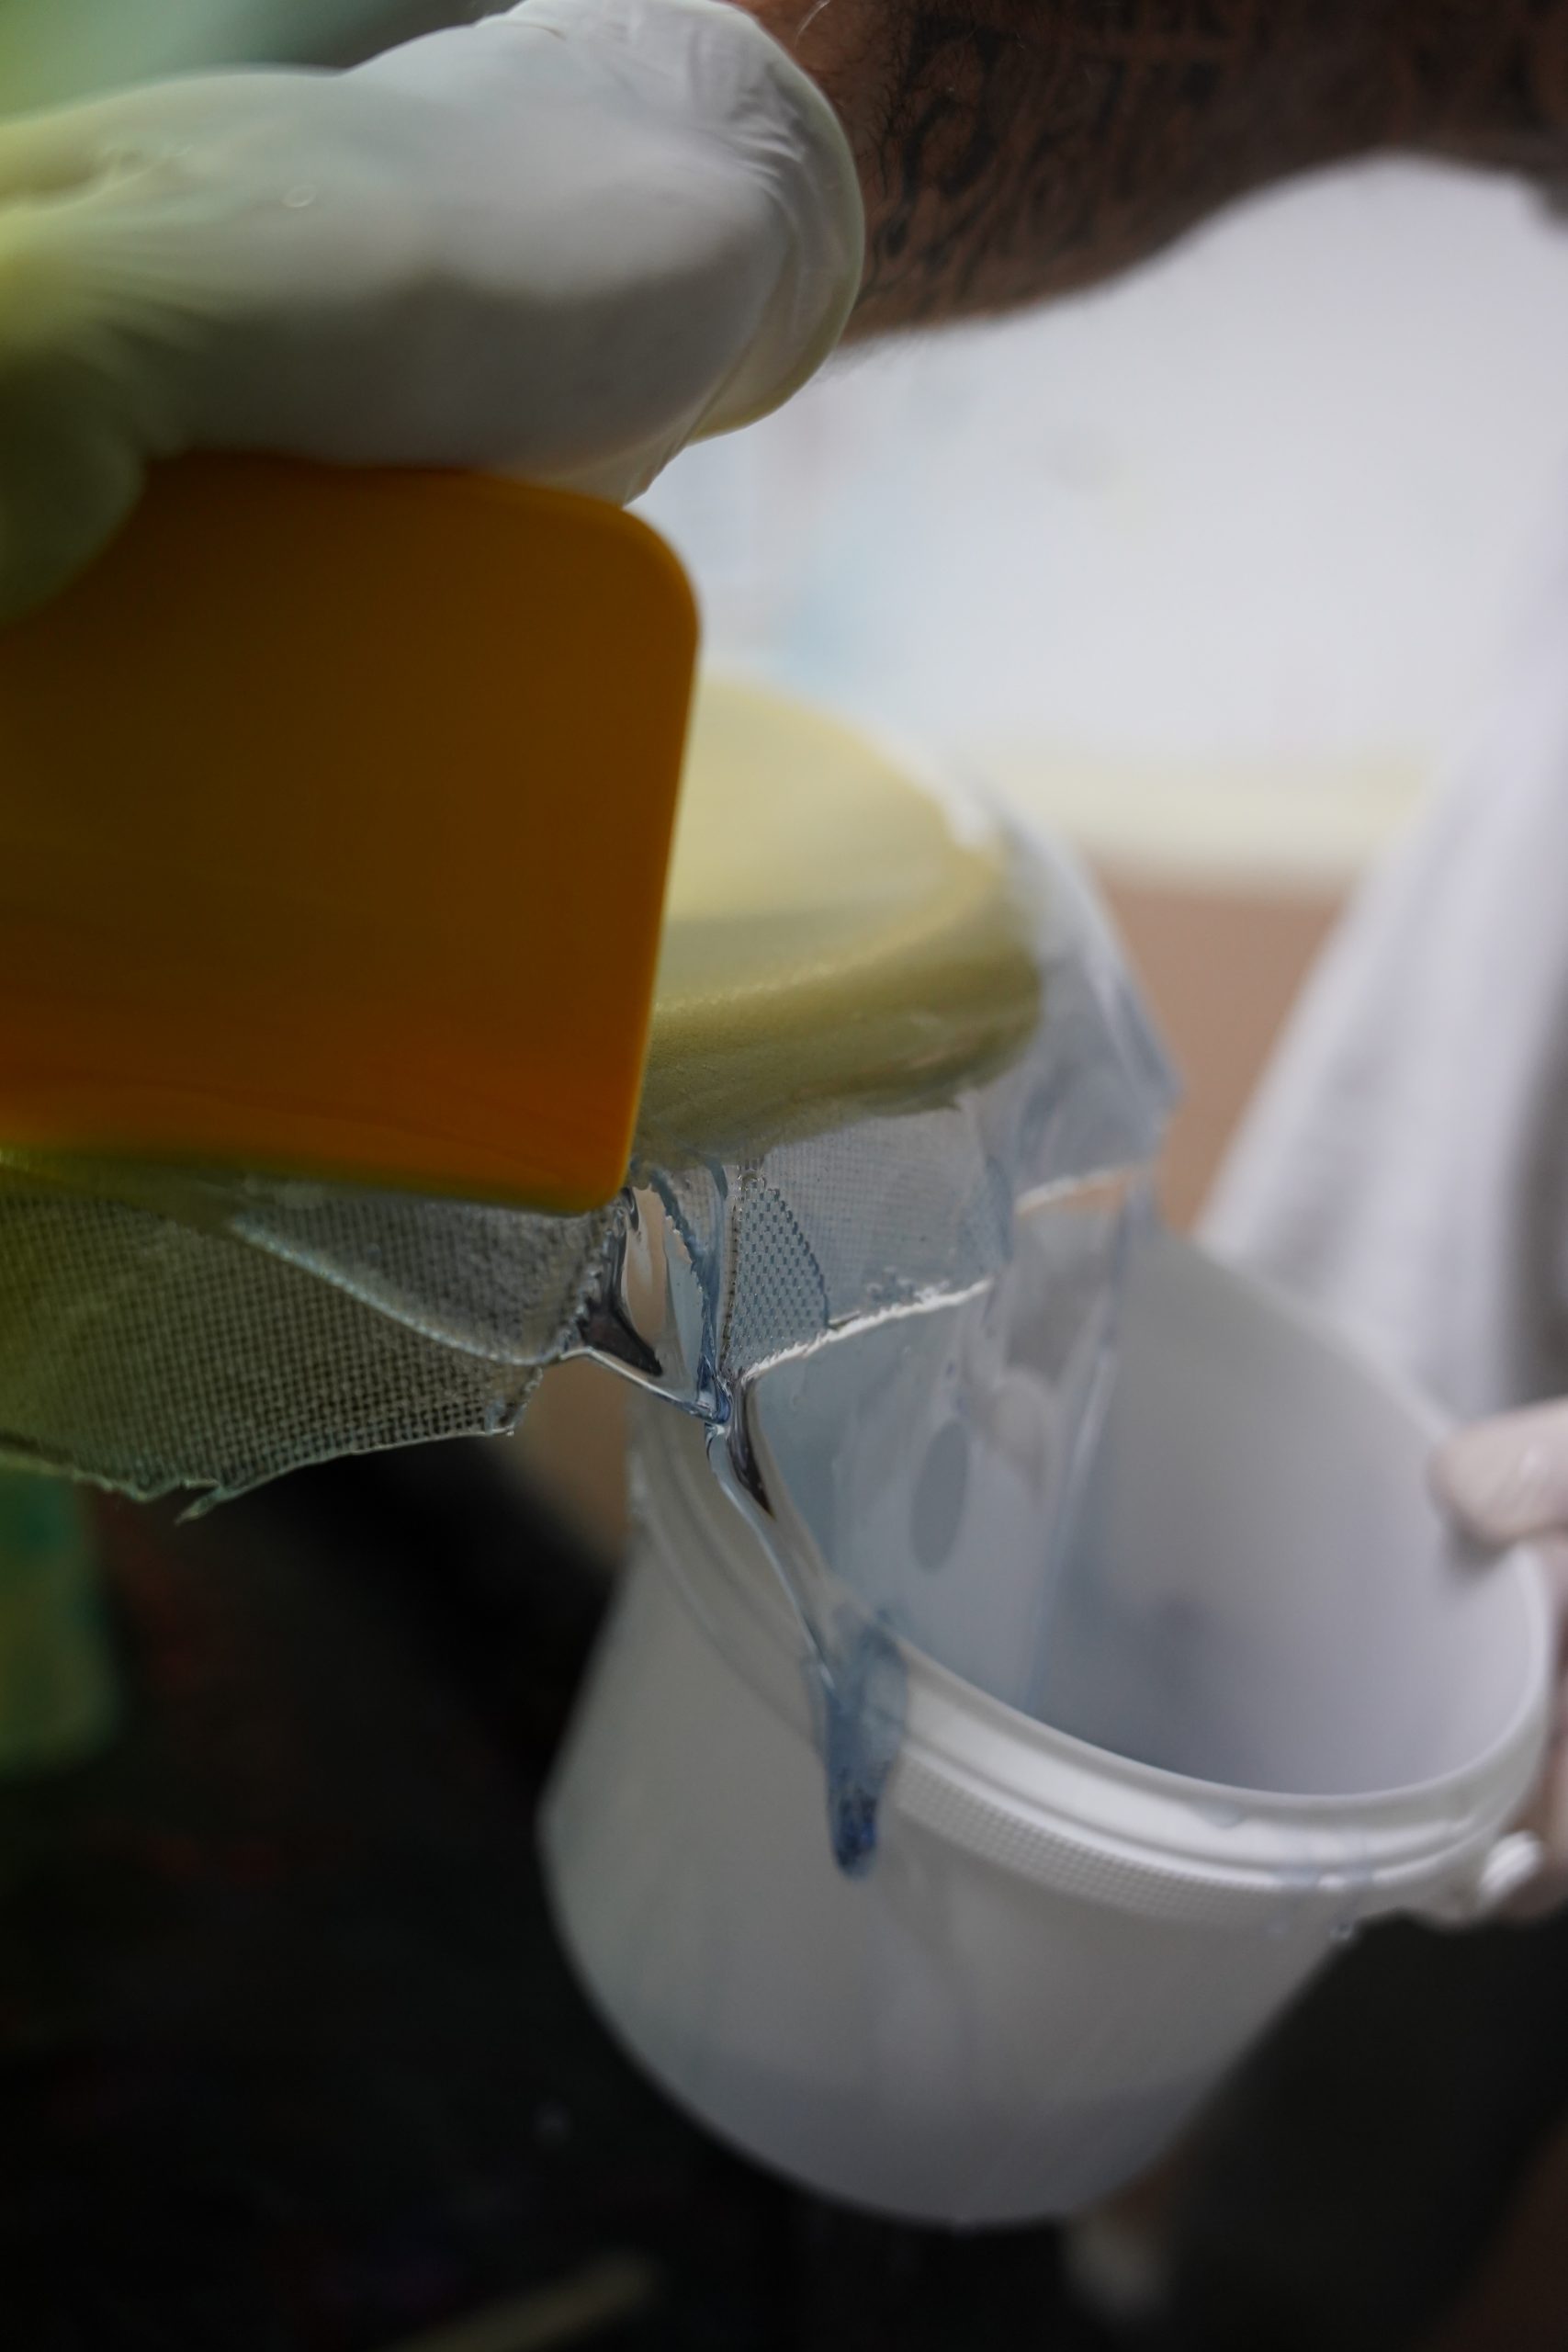
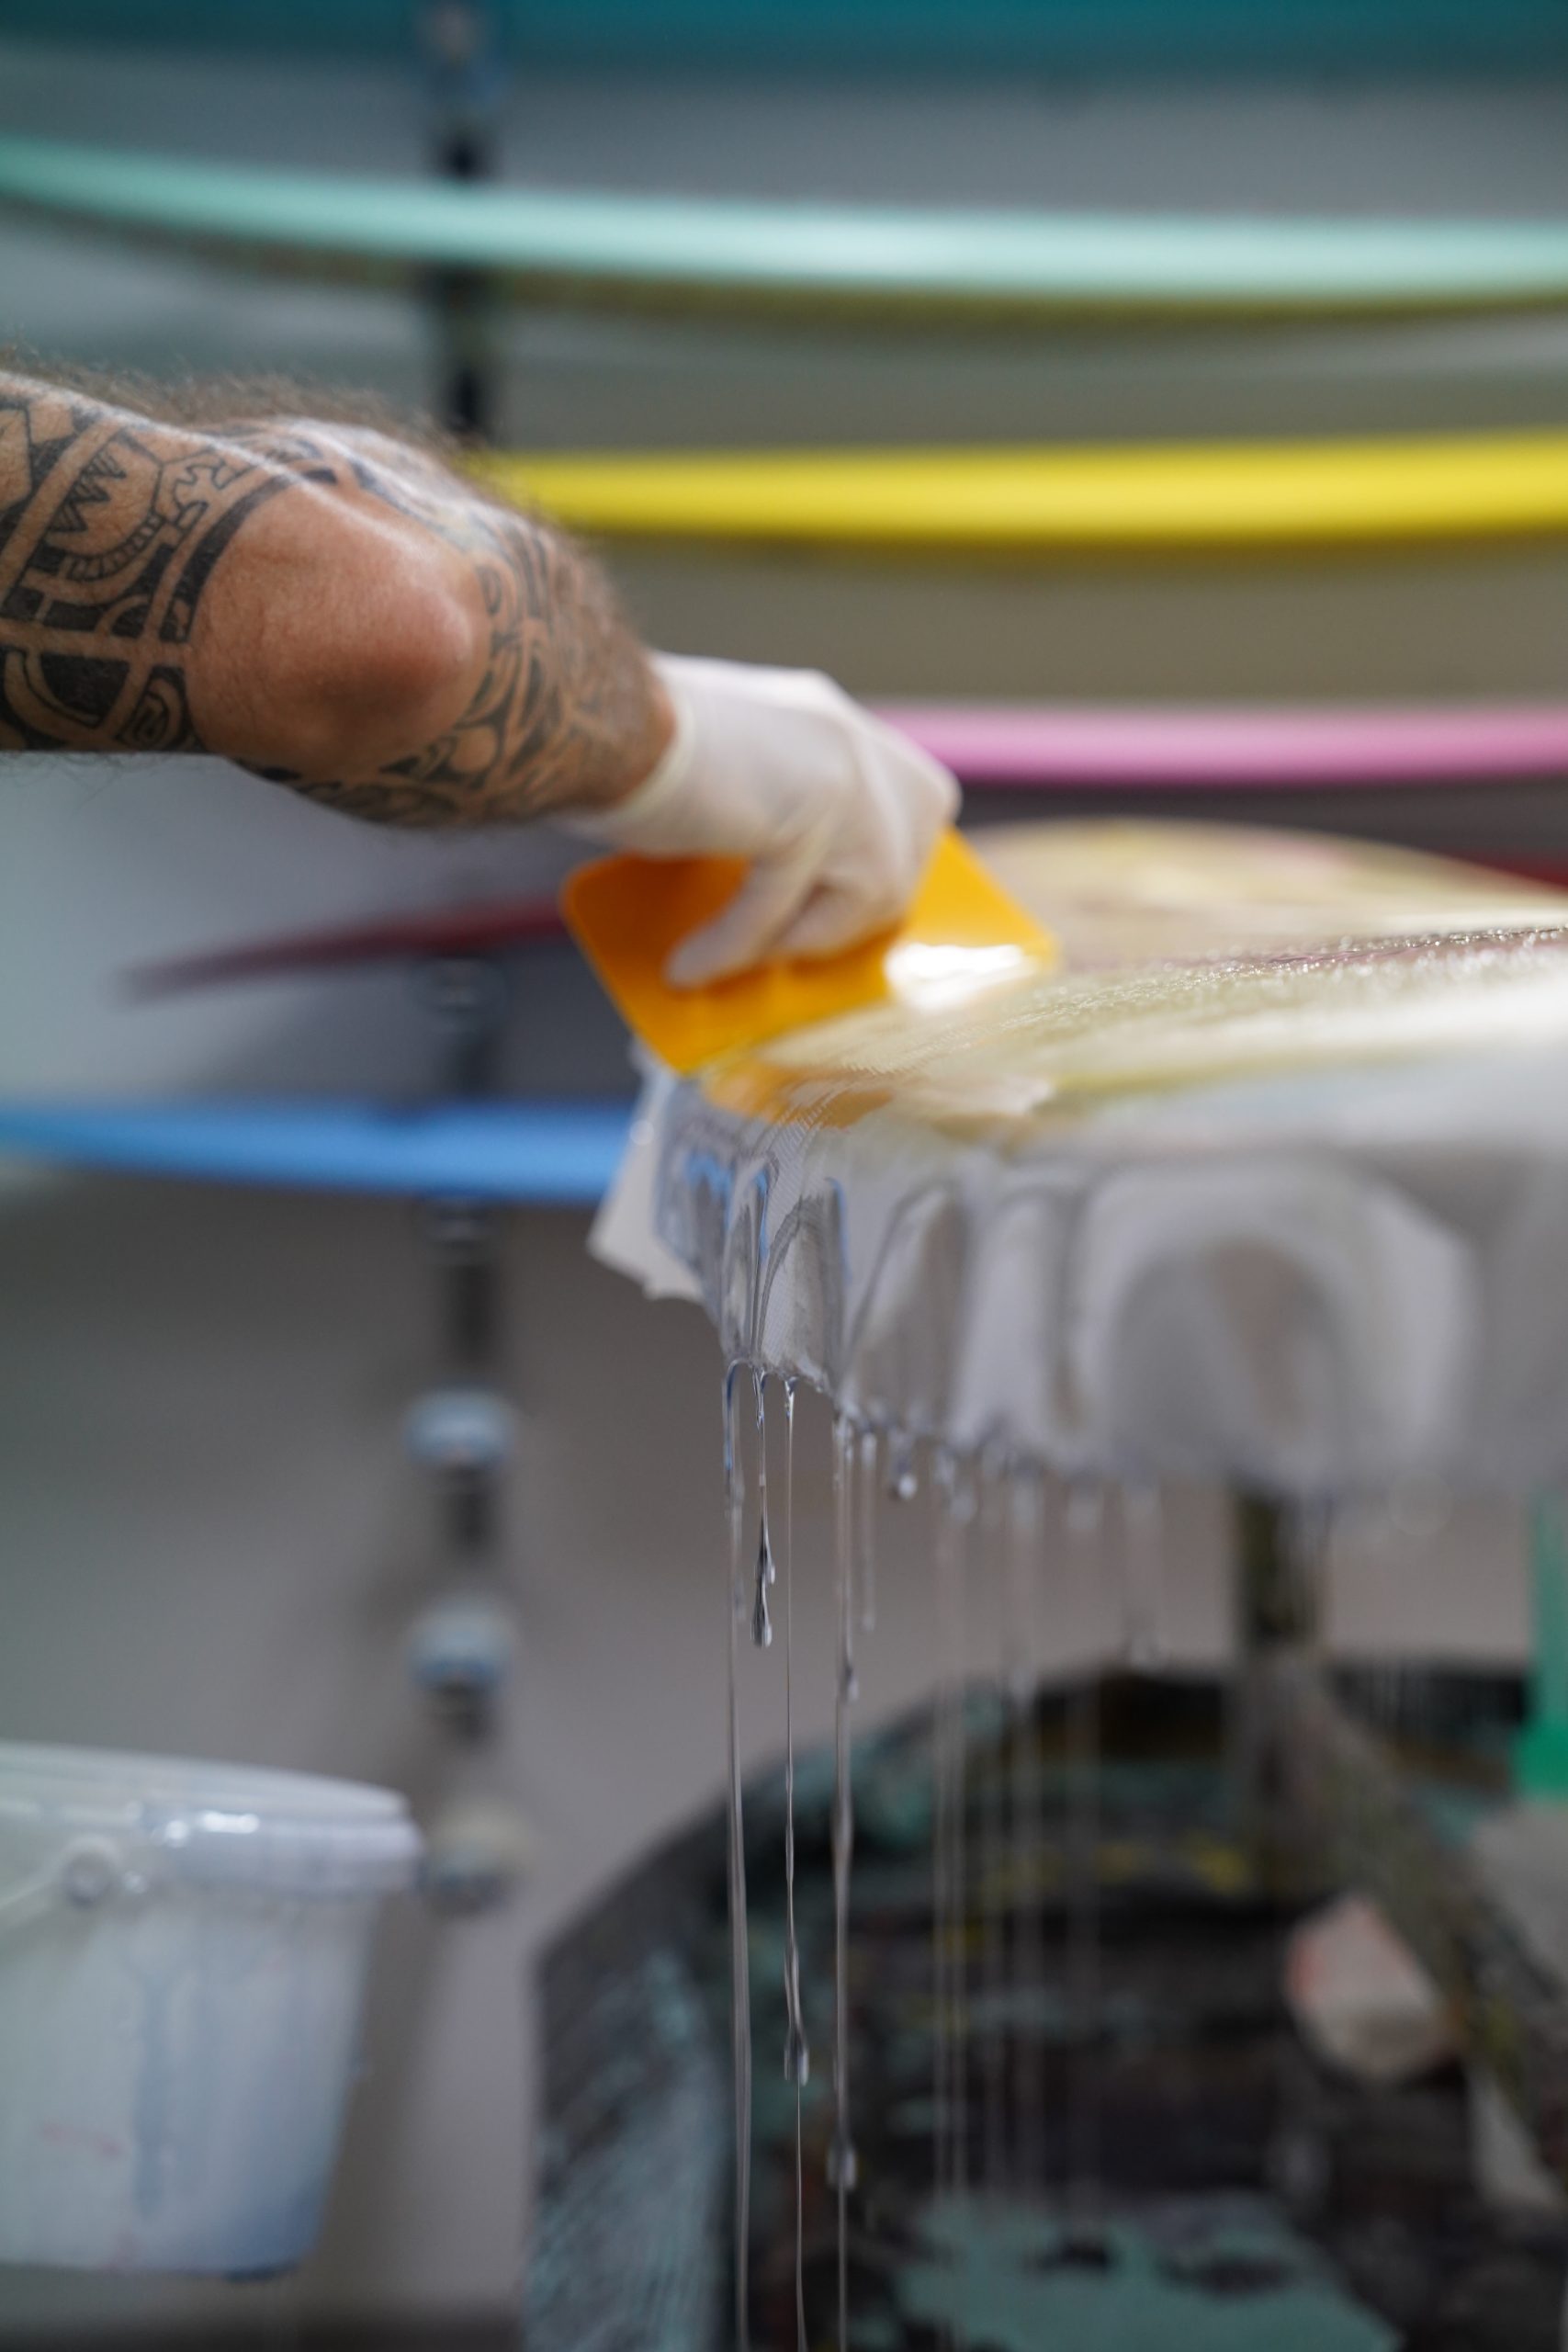
- Distribute the remaining resin along the sides/rails and saturate the overhanging fiberglass cloth using the squeegee (the resin should flow over the hanging part and completely saturate it).
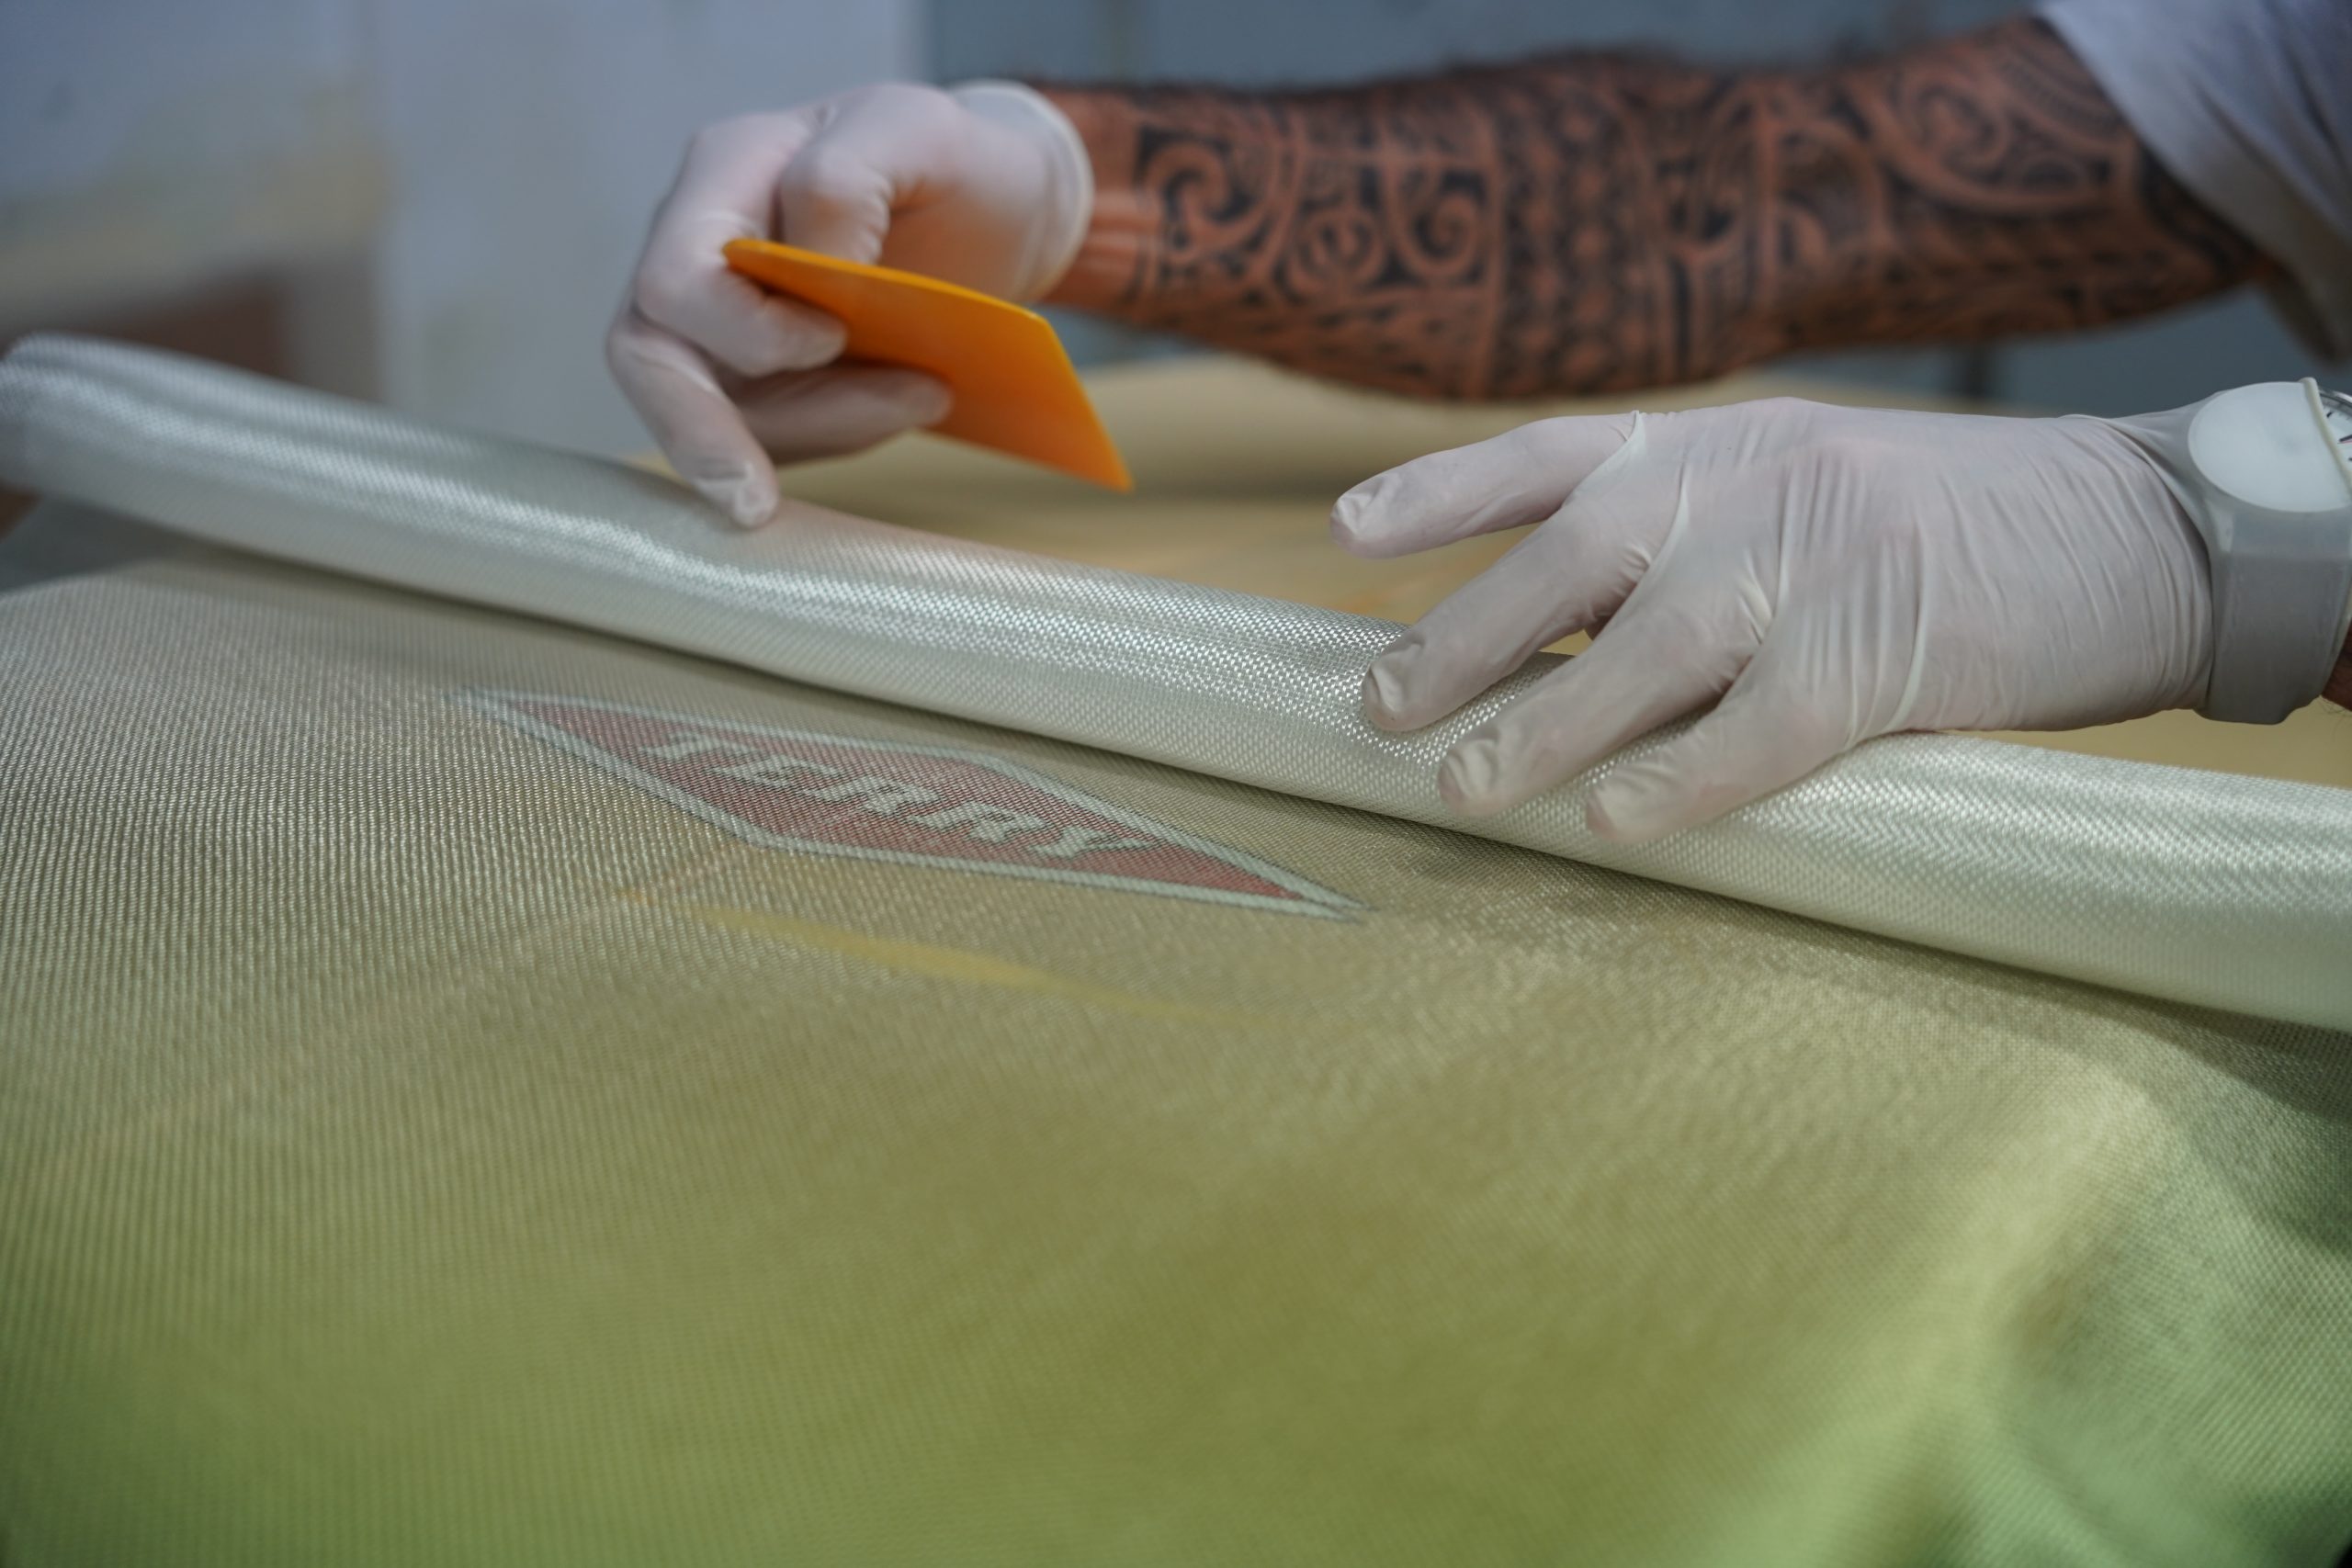
- Once the resin is evenly distributed on the board, the rails need to be wrapped.
- Start in the middle of the board, using the squeegee to wrap the fully saturated fiberglass cloth around the rail’s edge.
- Allow the resin to cure according to the instructions provided.
Glassing the Deck:
- Place the board deck-up.
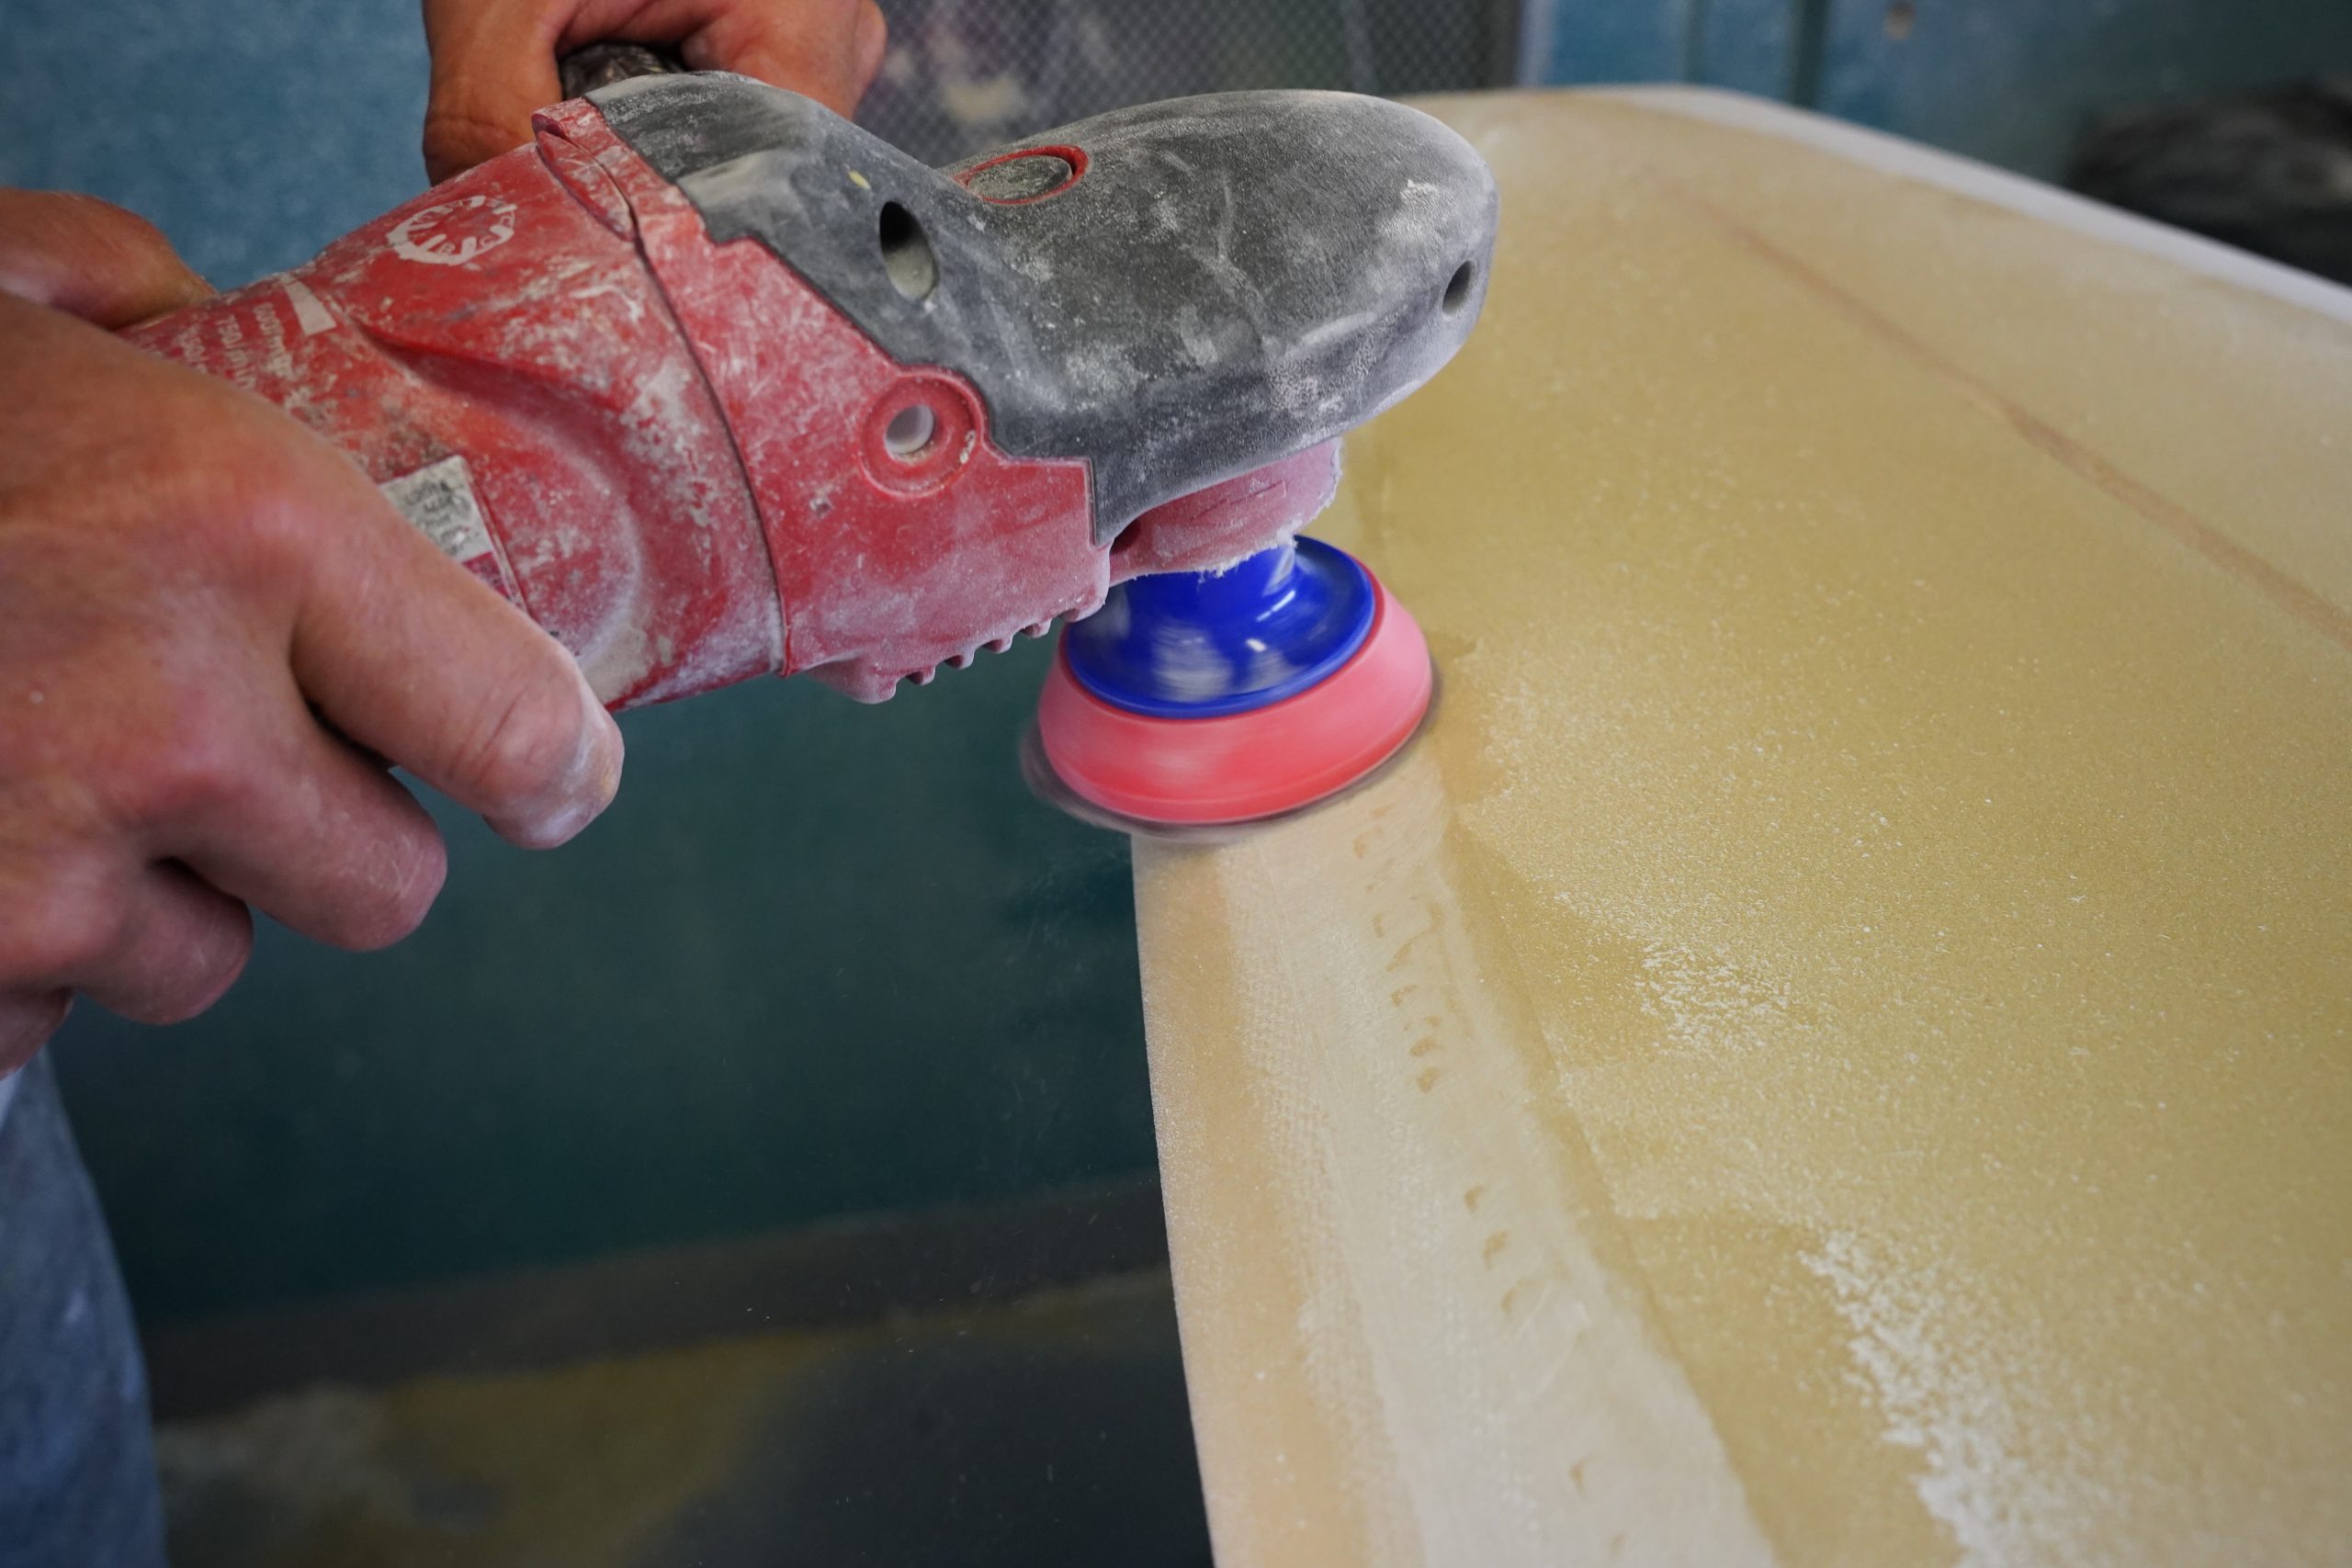
- Use a sanding machine or a soft sanding block to smooth out any irregularities along the lap line (the edge where the fiberglass cloth meets the foam), ensuring a smooth transition from fiberglass to foam. Be careful not to sand into the foam.

- Clean off any dust from the surface.
- Cut the first layer of fiberglass cloth directly along the rail’s edge, as it should not overlap the rails.
- Roll out the second layer of fiberglass cloth and trim the excess following the shape of the board. Make a “release cut” at the nose and tail as before.
- let hang min 3-4cm over the rails / edge.

- Follow the same glassing process as for the bottom.
- Important. Be careful not to apply too much pressure so that the two fiberglass mats do not slip apart.
- When the deck is completely covered and the “laps” are folded over, allow the resin to cure according to the (instructions for use).
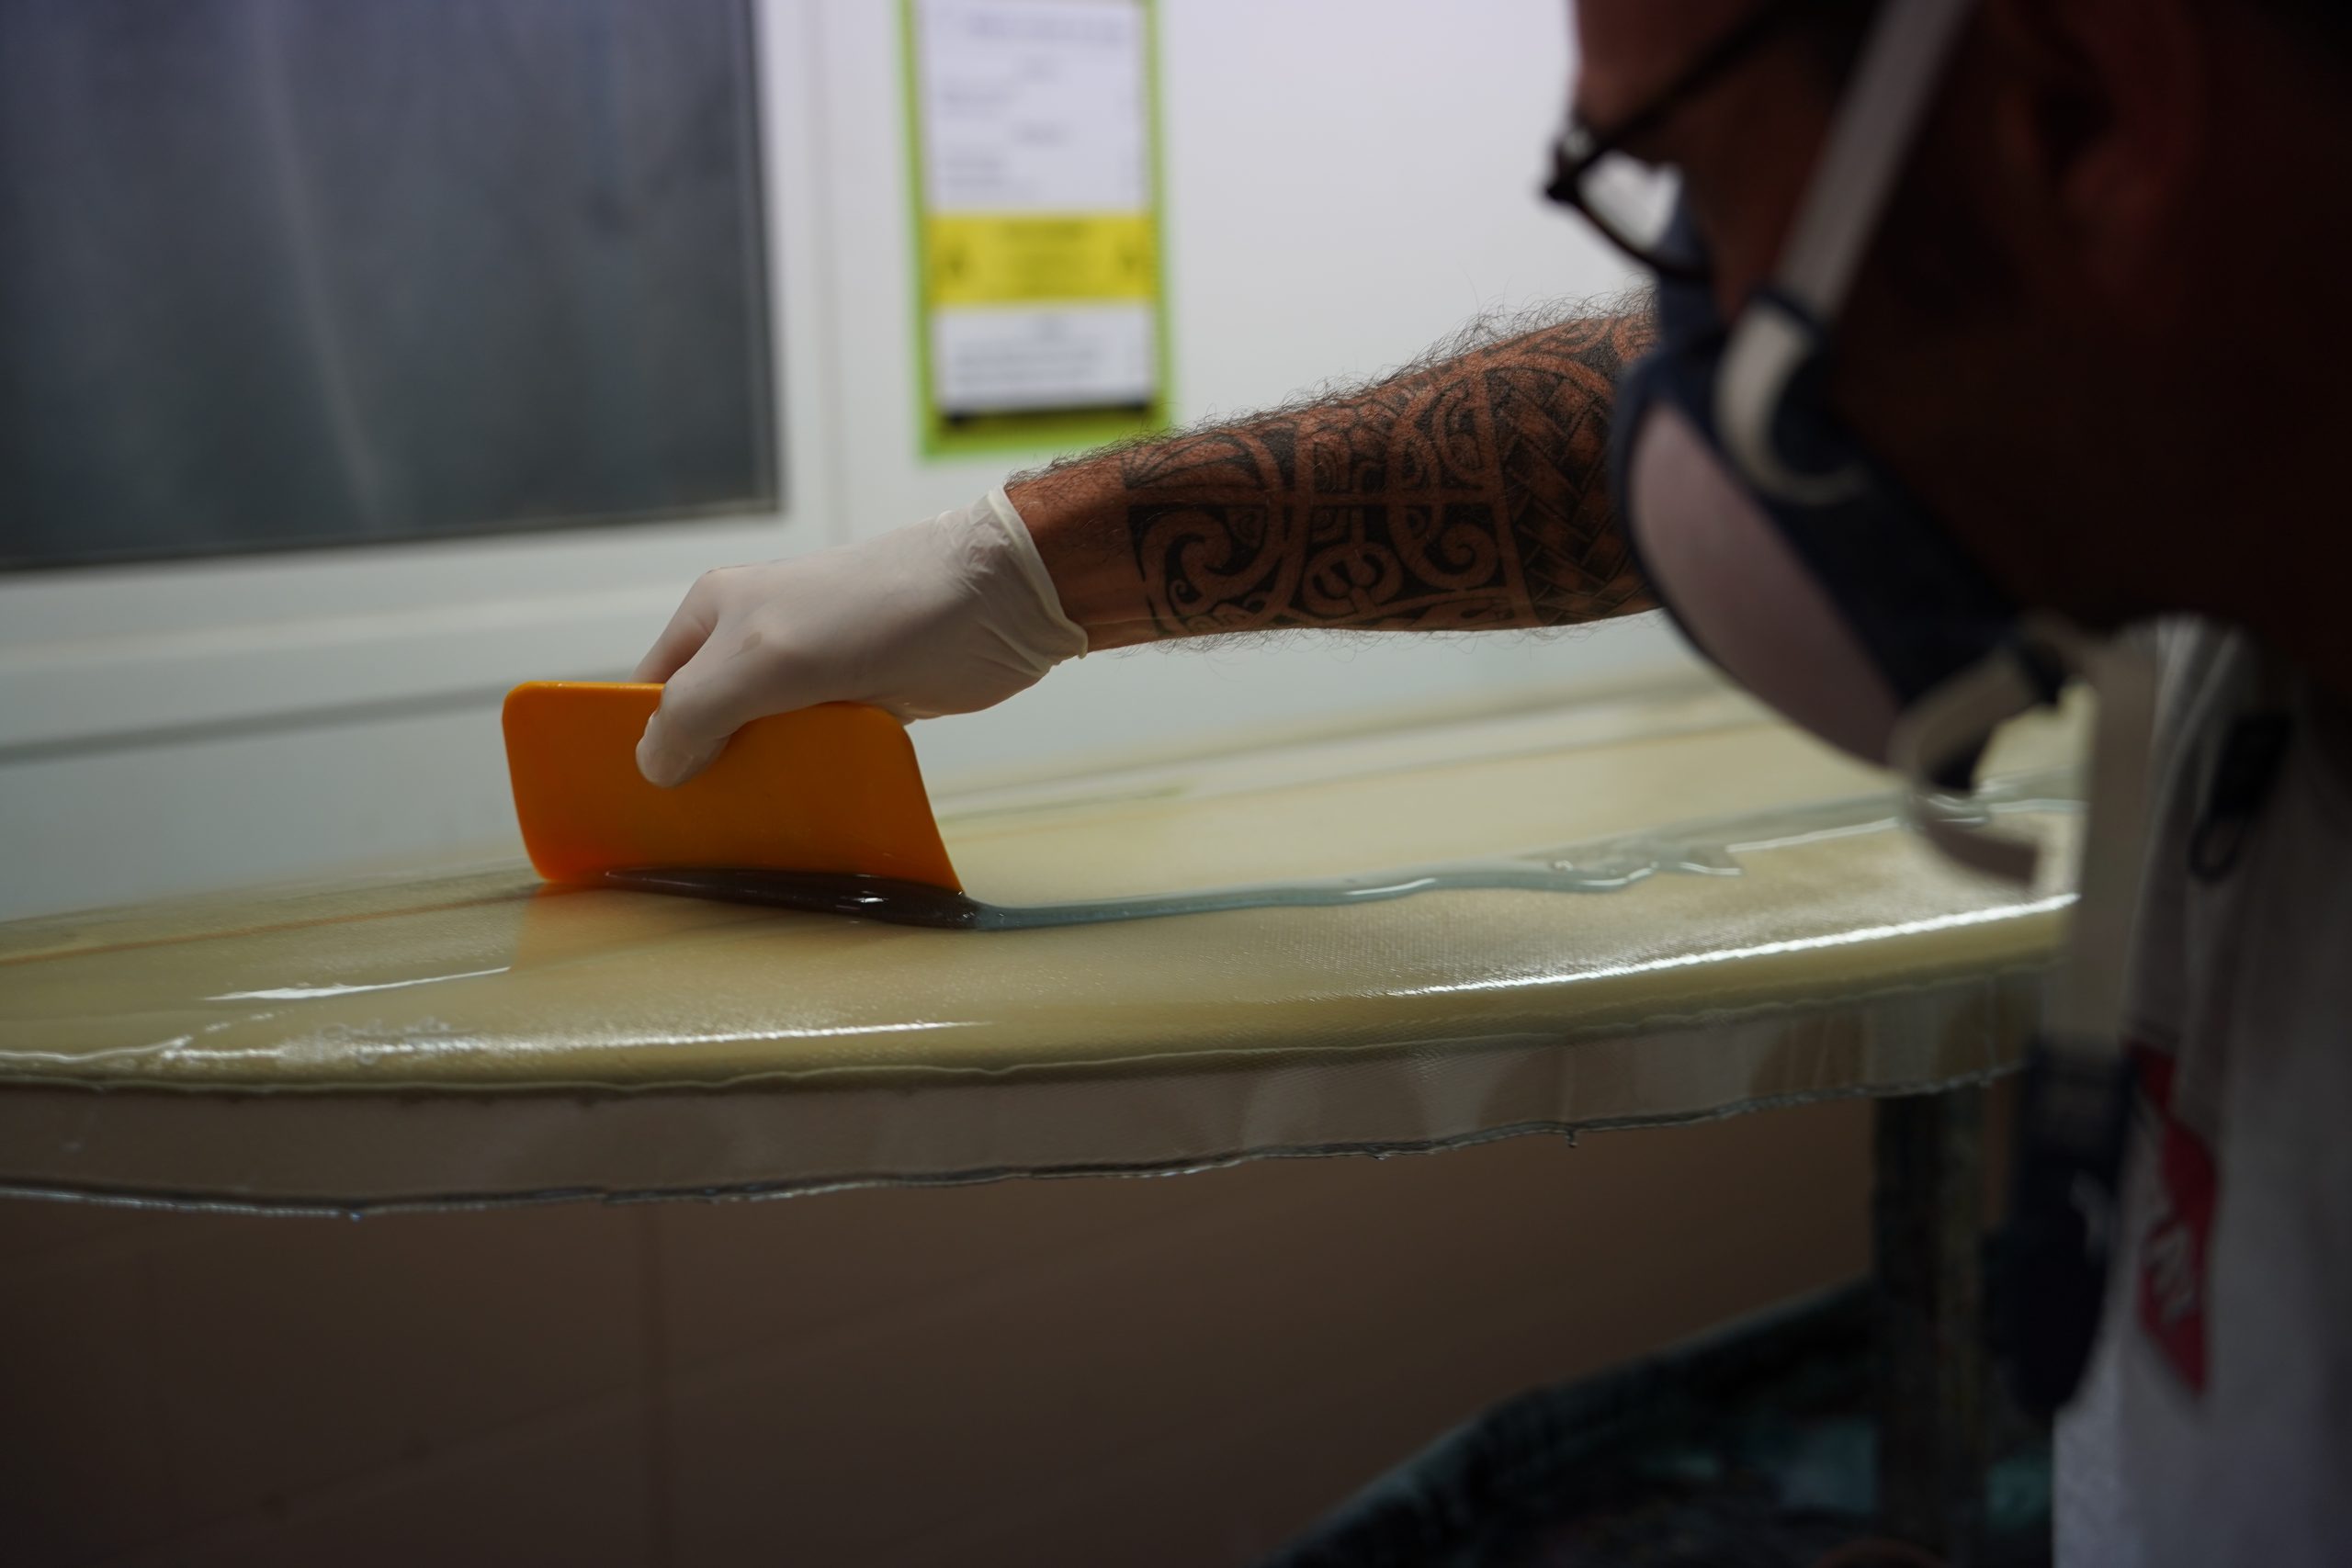
Hotcoat:
A hotcoat is a final thin layer of resin applied over the fiberglass lamination to fill any voids in the weave and create a smooth surface. The hotcoat should be thick enough to be sanded flat in the finishing stage.
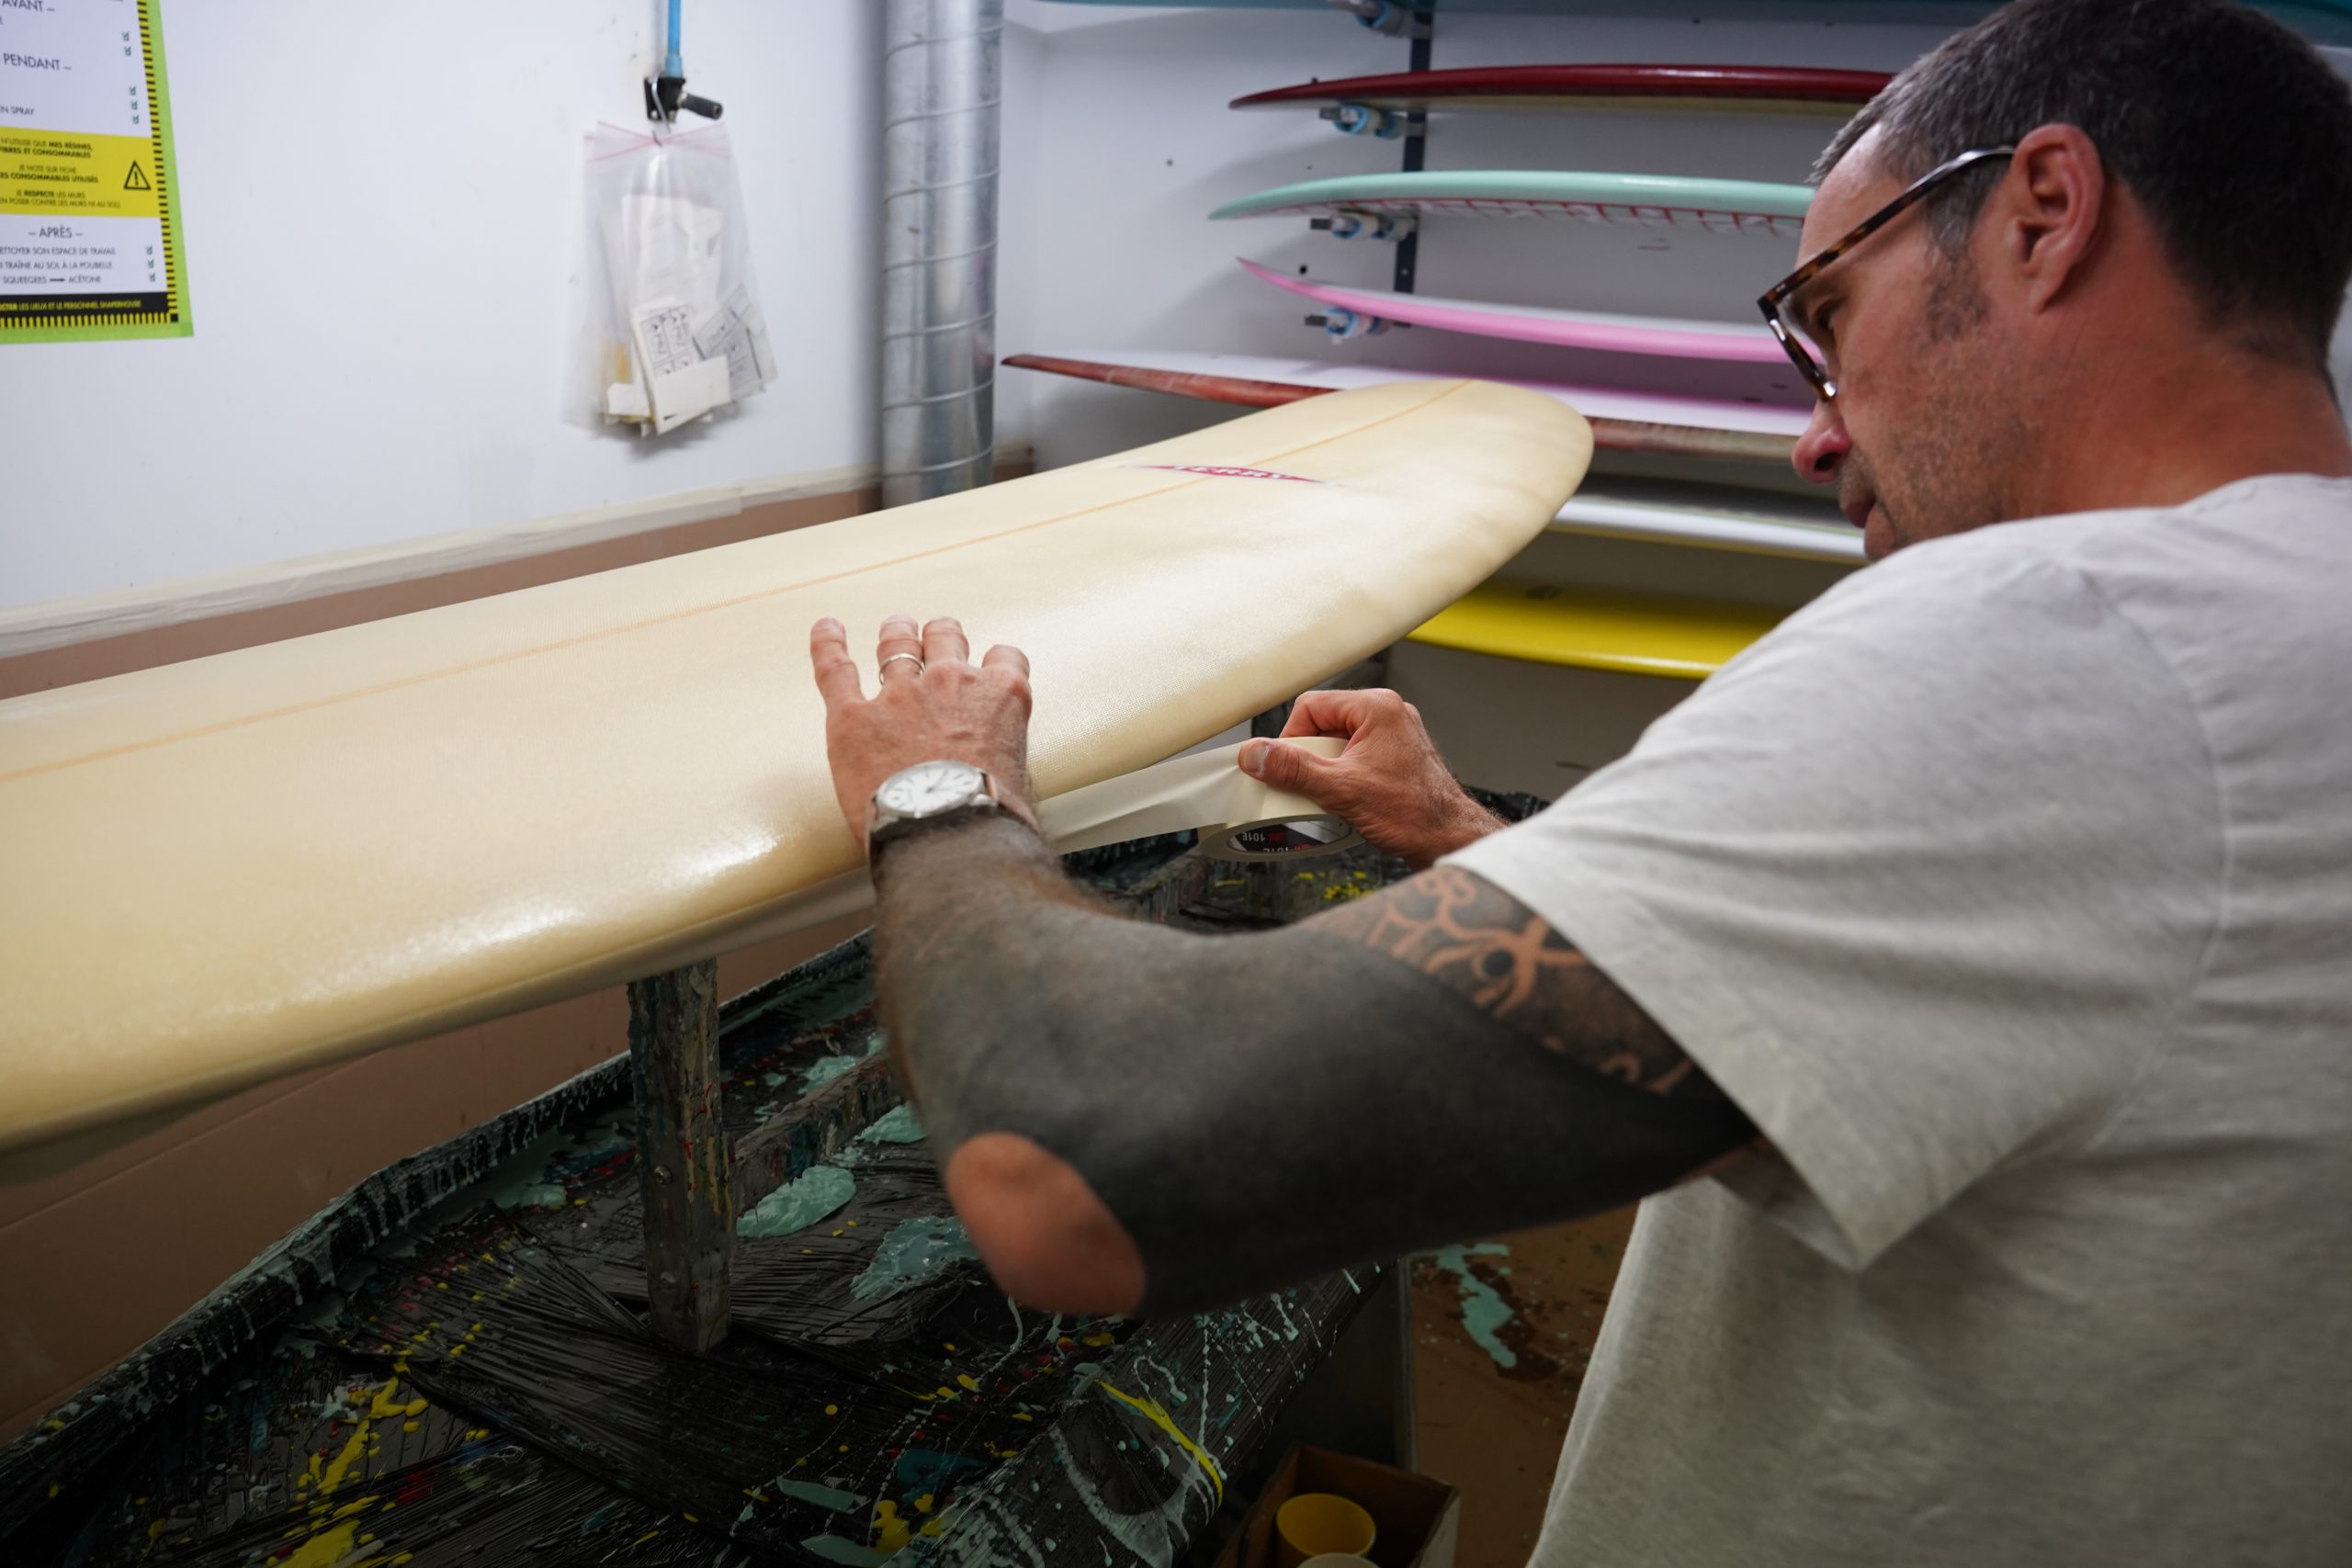
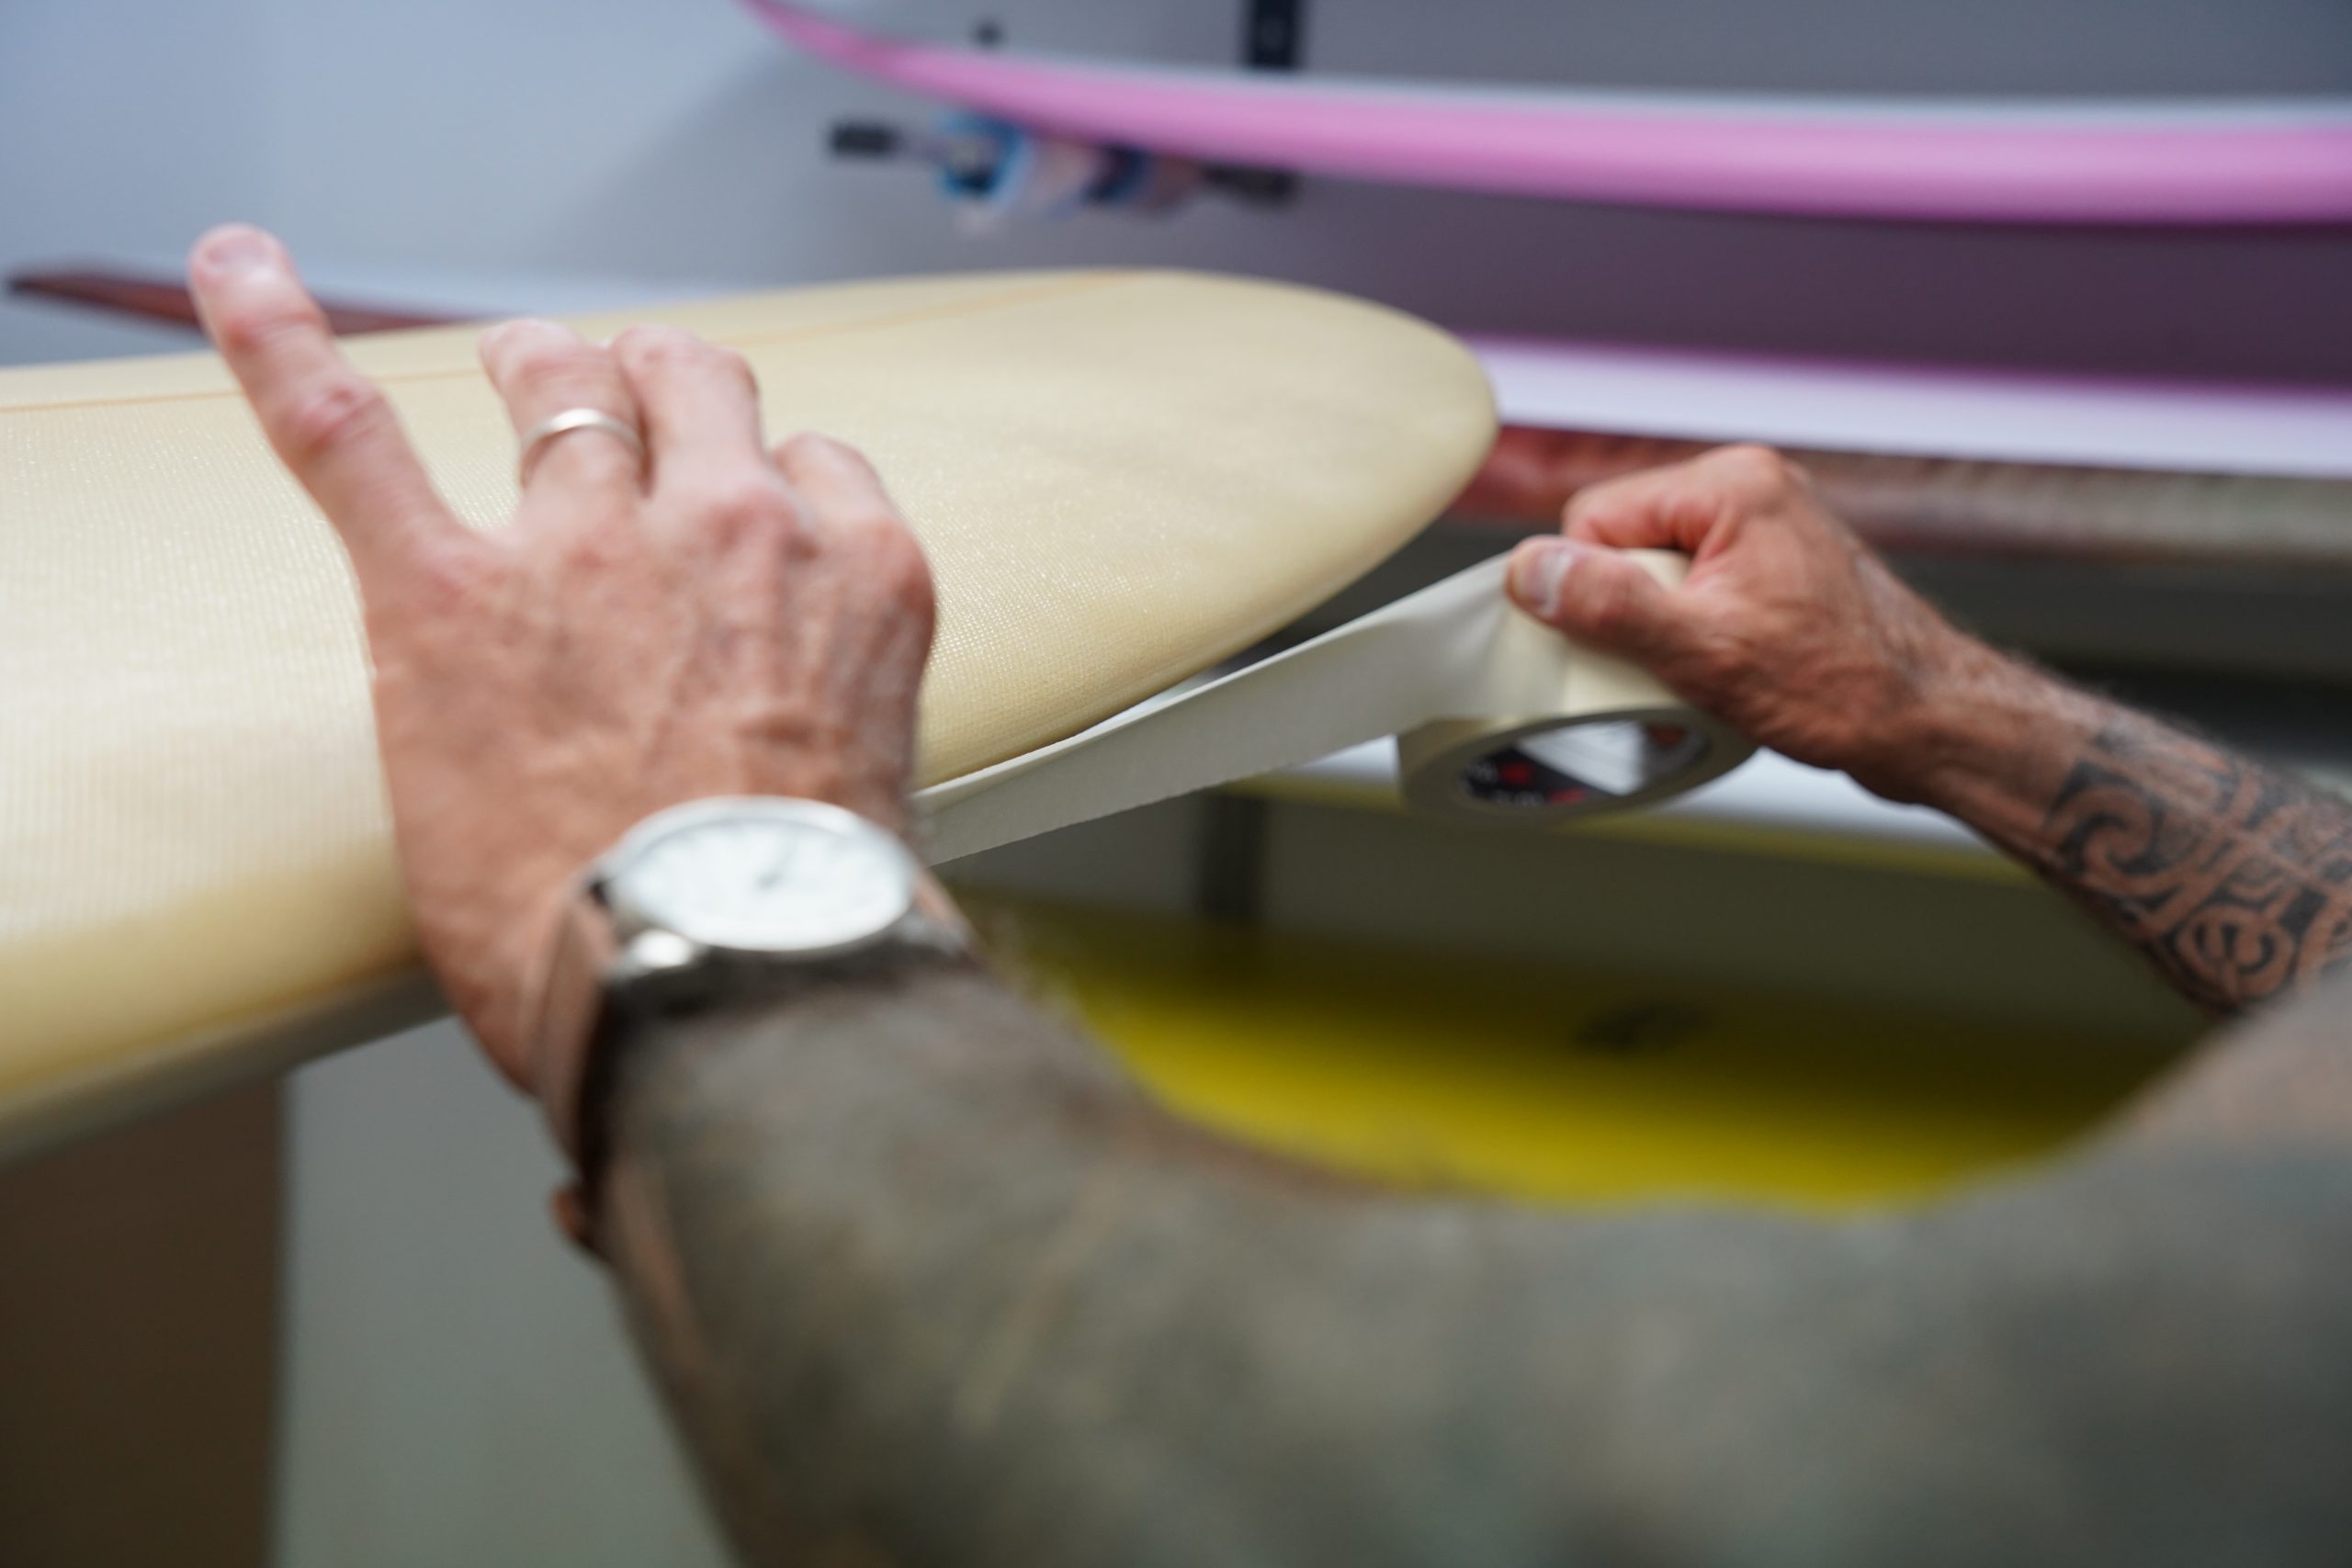
- Place the board deck-up.
- Use tape to mask off the centerline of the rail, preventing the resin from getting onto the bottom of the board. One strip of tape should be sufficient, leaving a protruding edge facing downward.
- Put on your respirator mask.
- Mix the resin, hardener, and styrene paraffin (only for polyester resins) according to the manufacturer’s instructions.
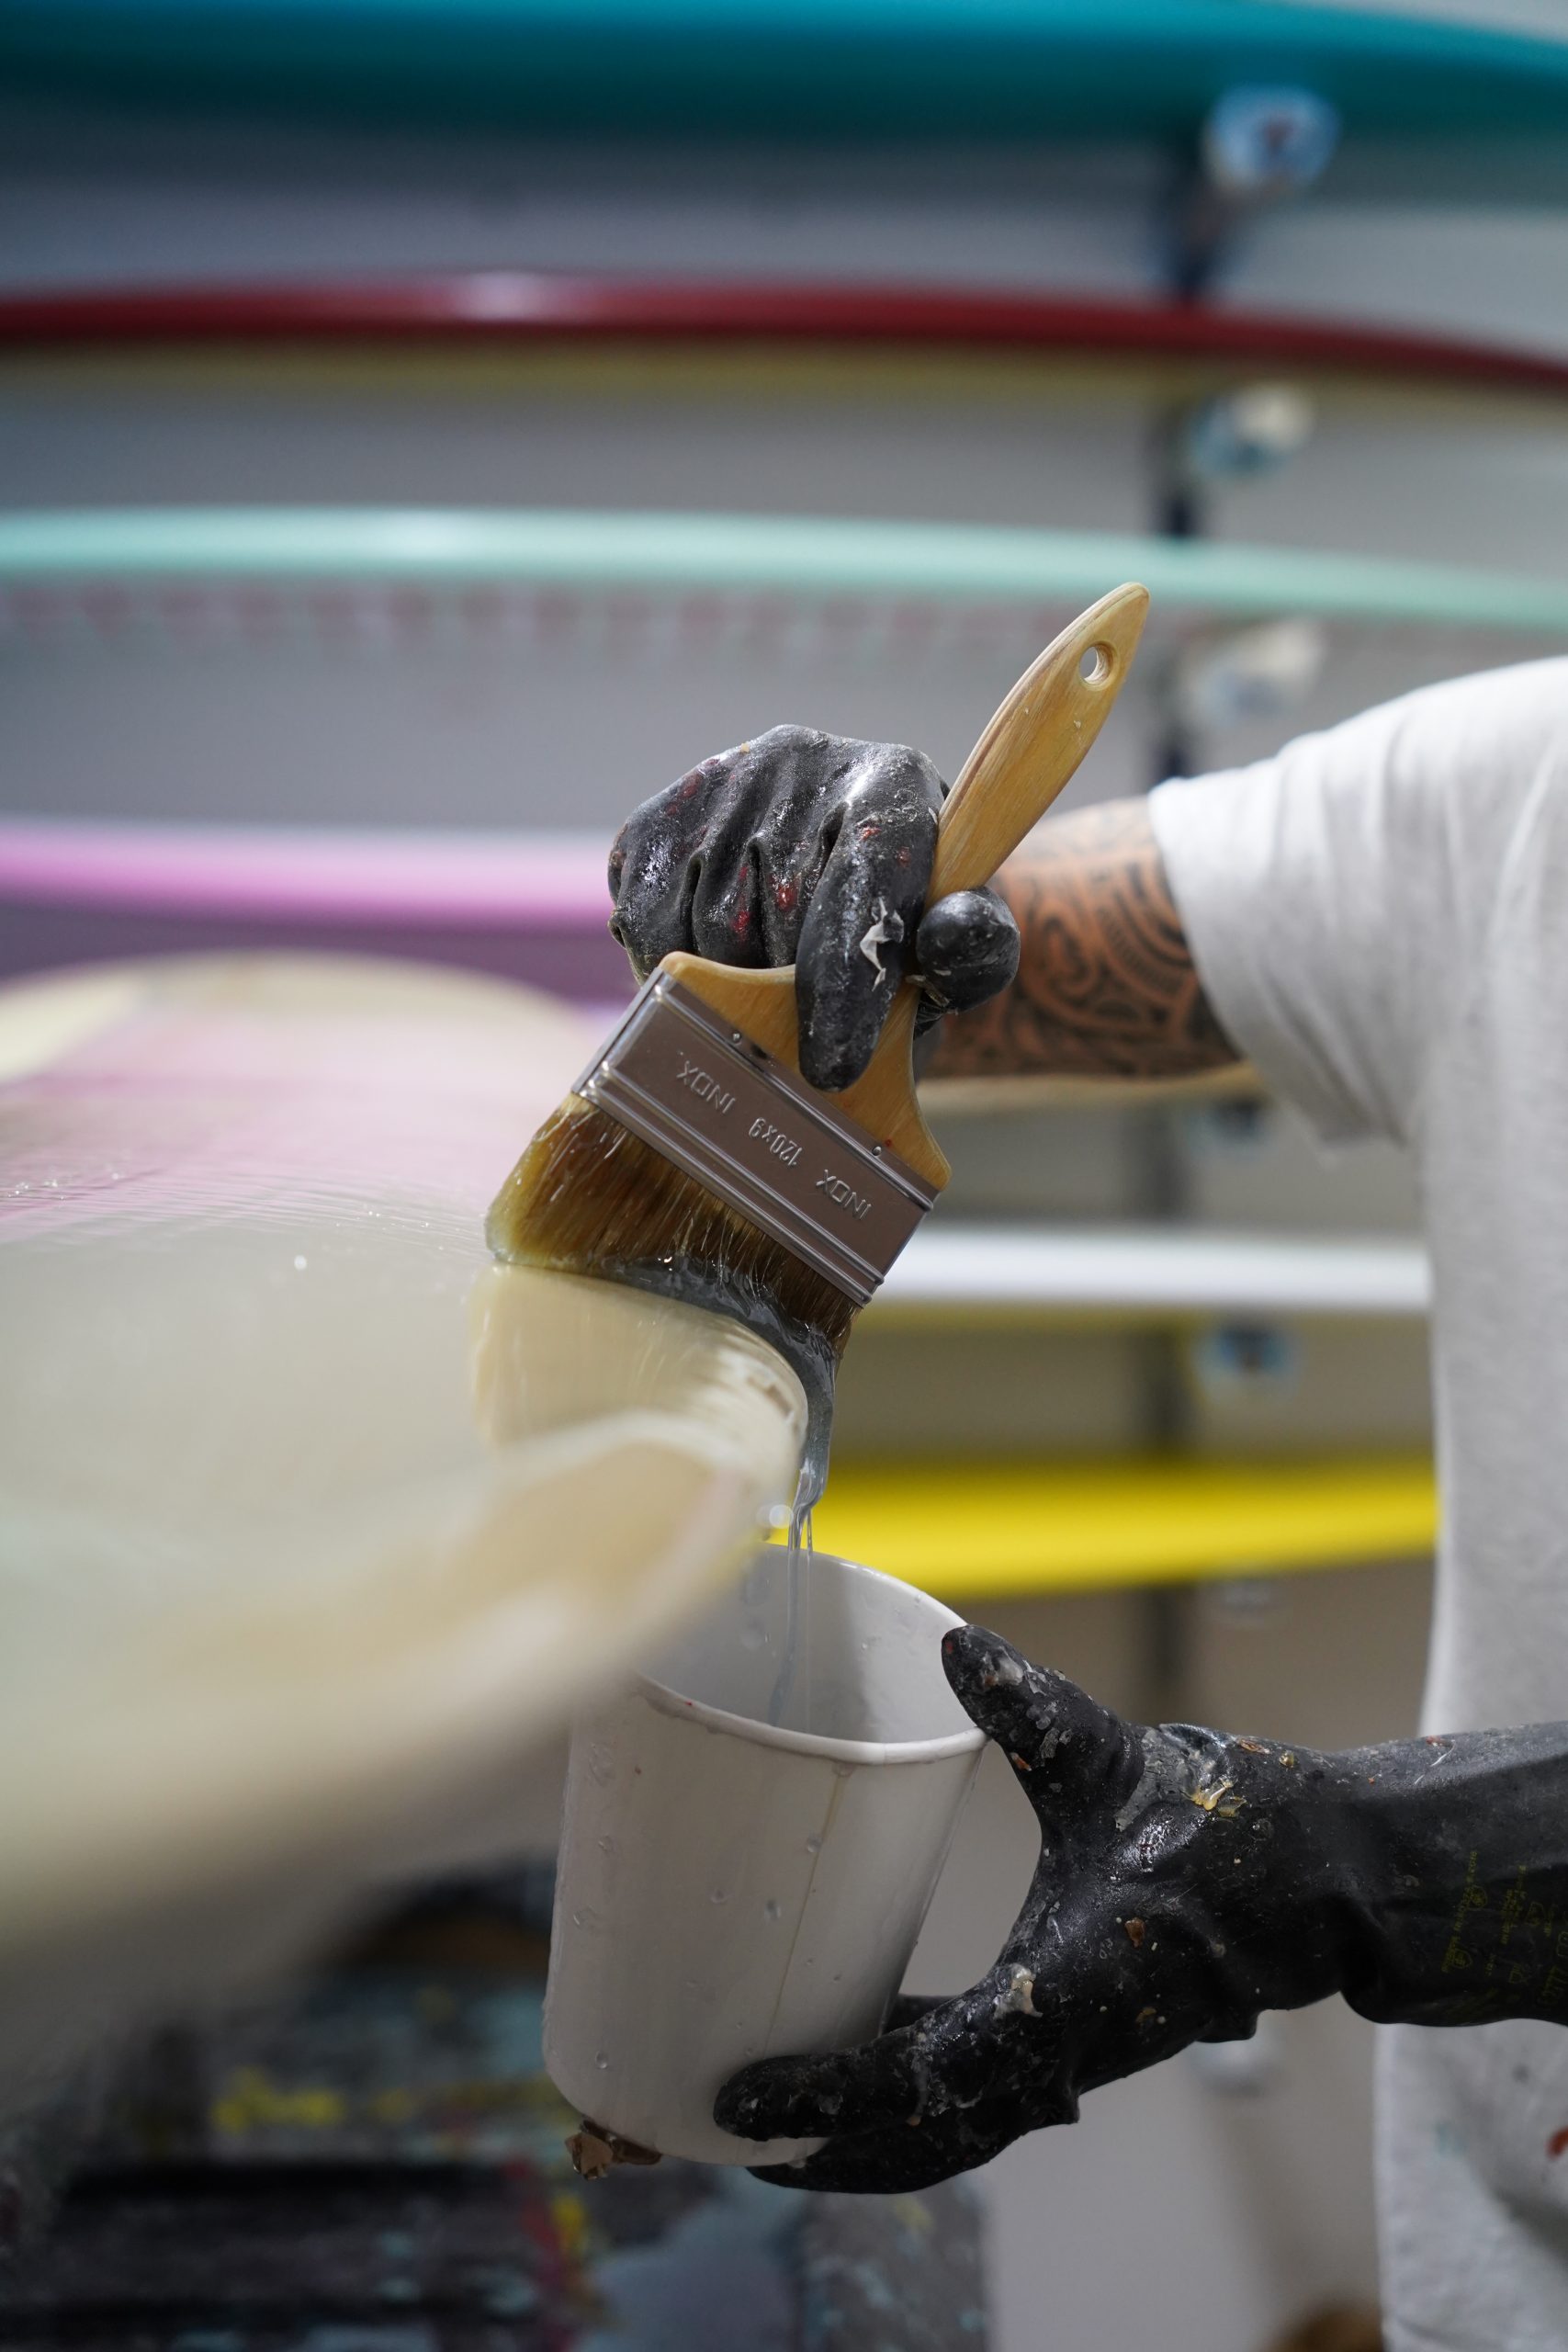
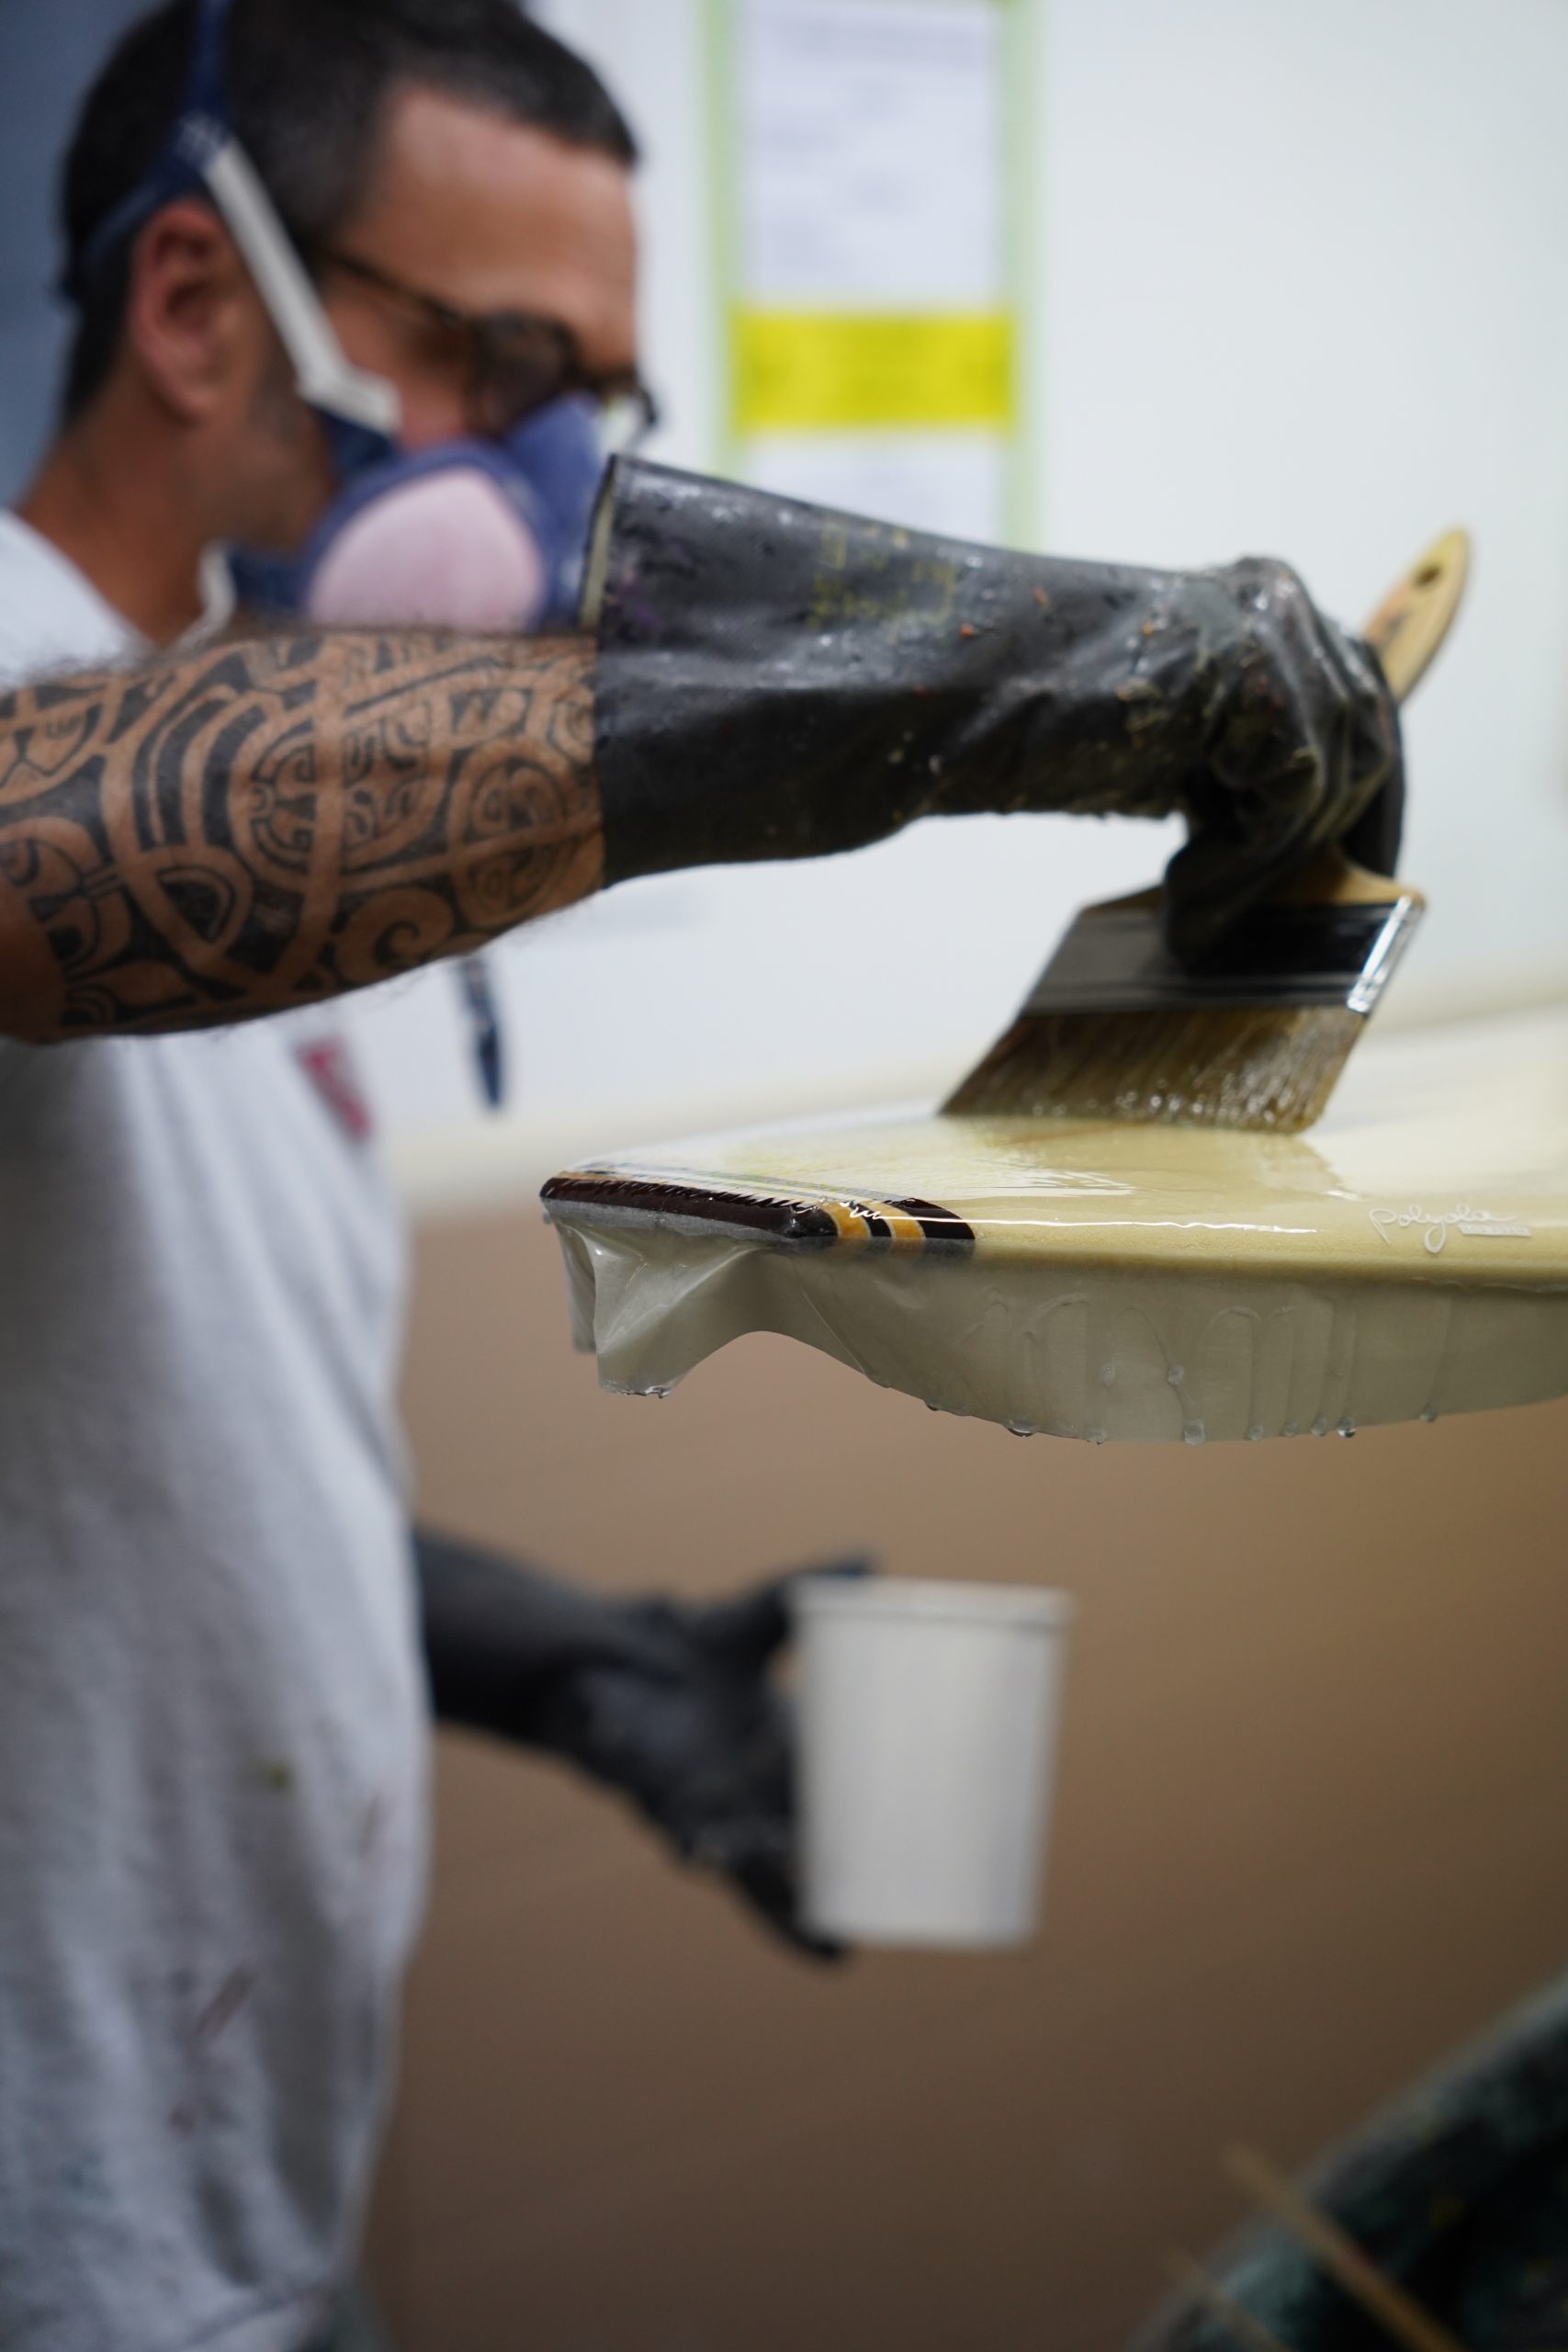
- Pour the resin mixture along the stringer.
- Use a fine brush to evenly and thinly spread the resin in long strokes.
- Once the resin starts to gel and no longer drips, remove the tape (usually after about 20-30 minutes).
- Allow the deck to cure completely.
- Repeat the same process on the bottom of the board.

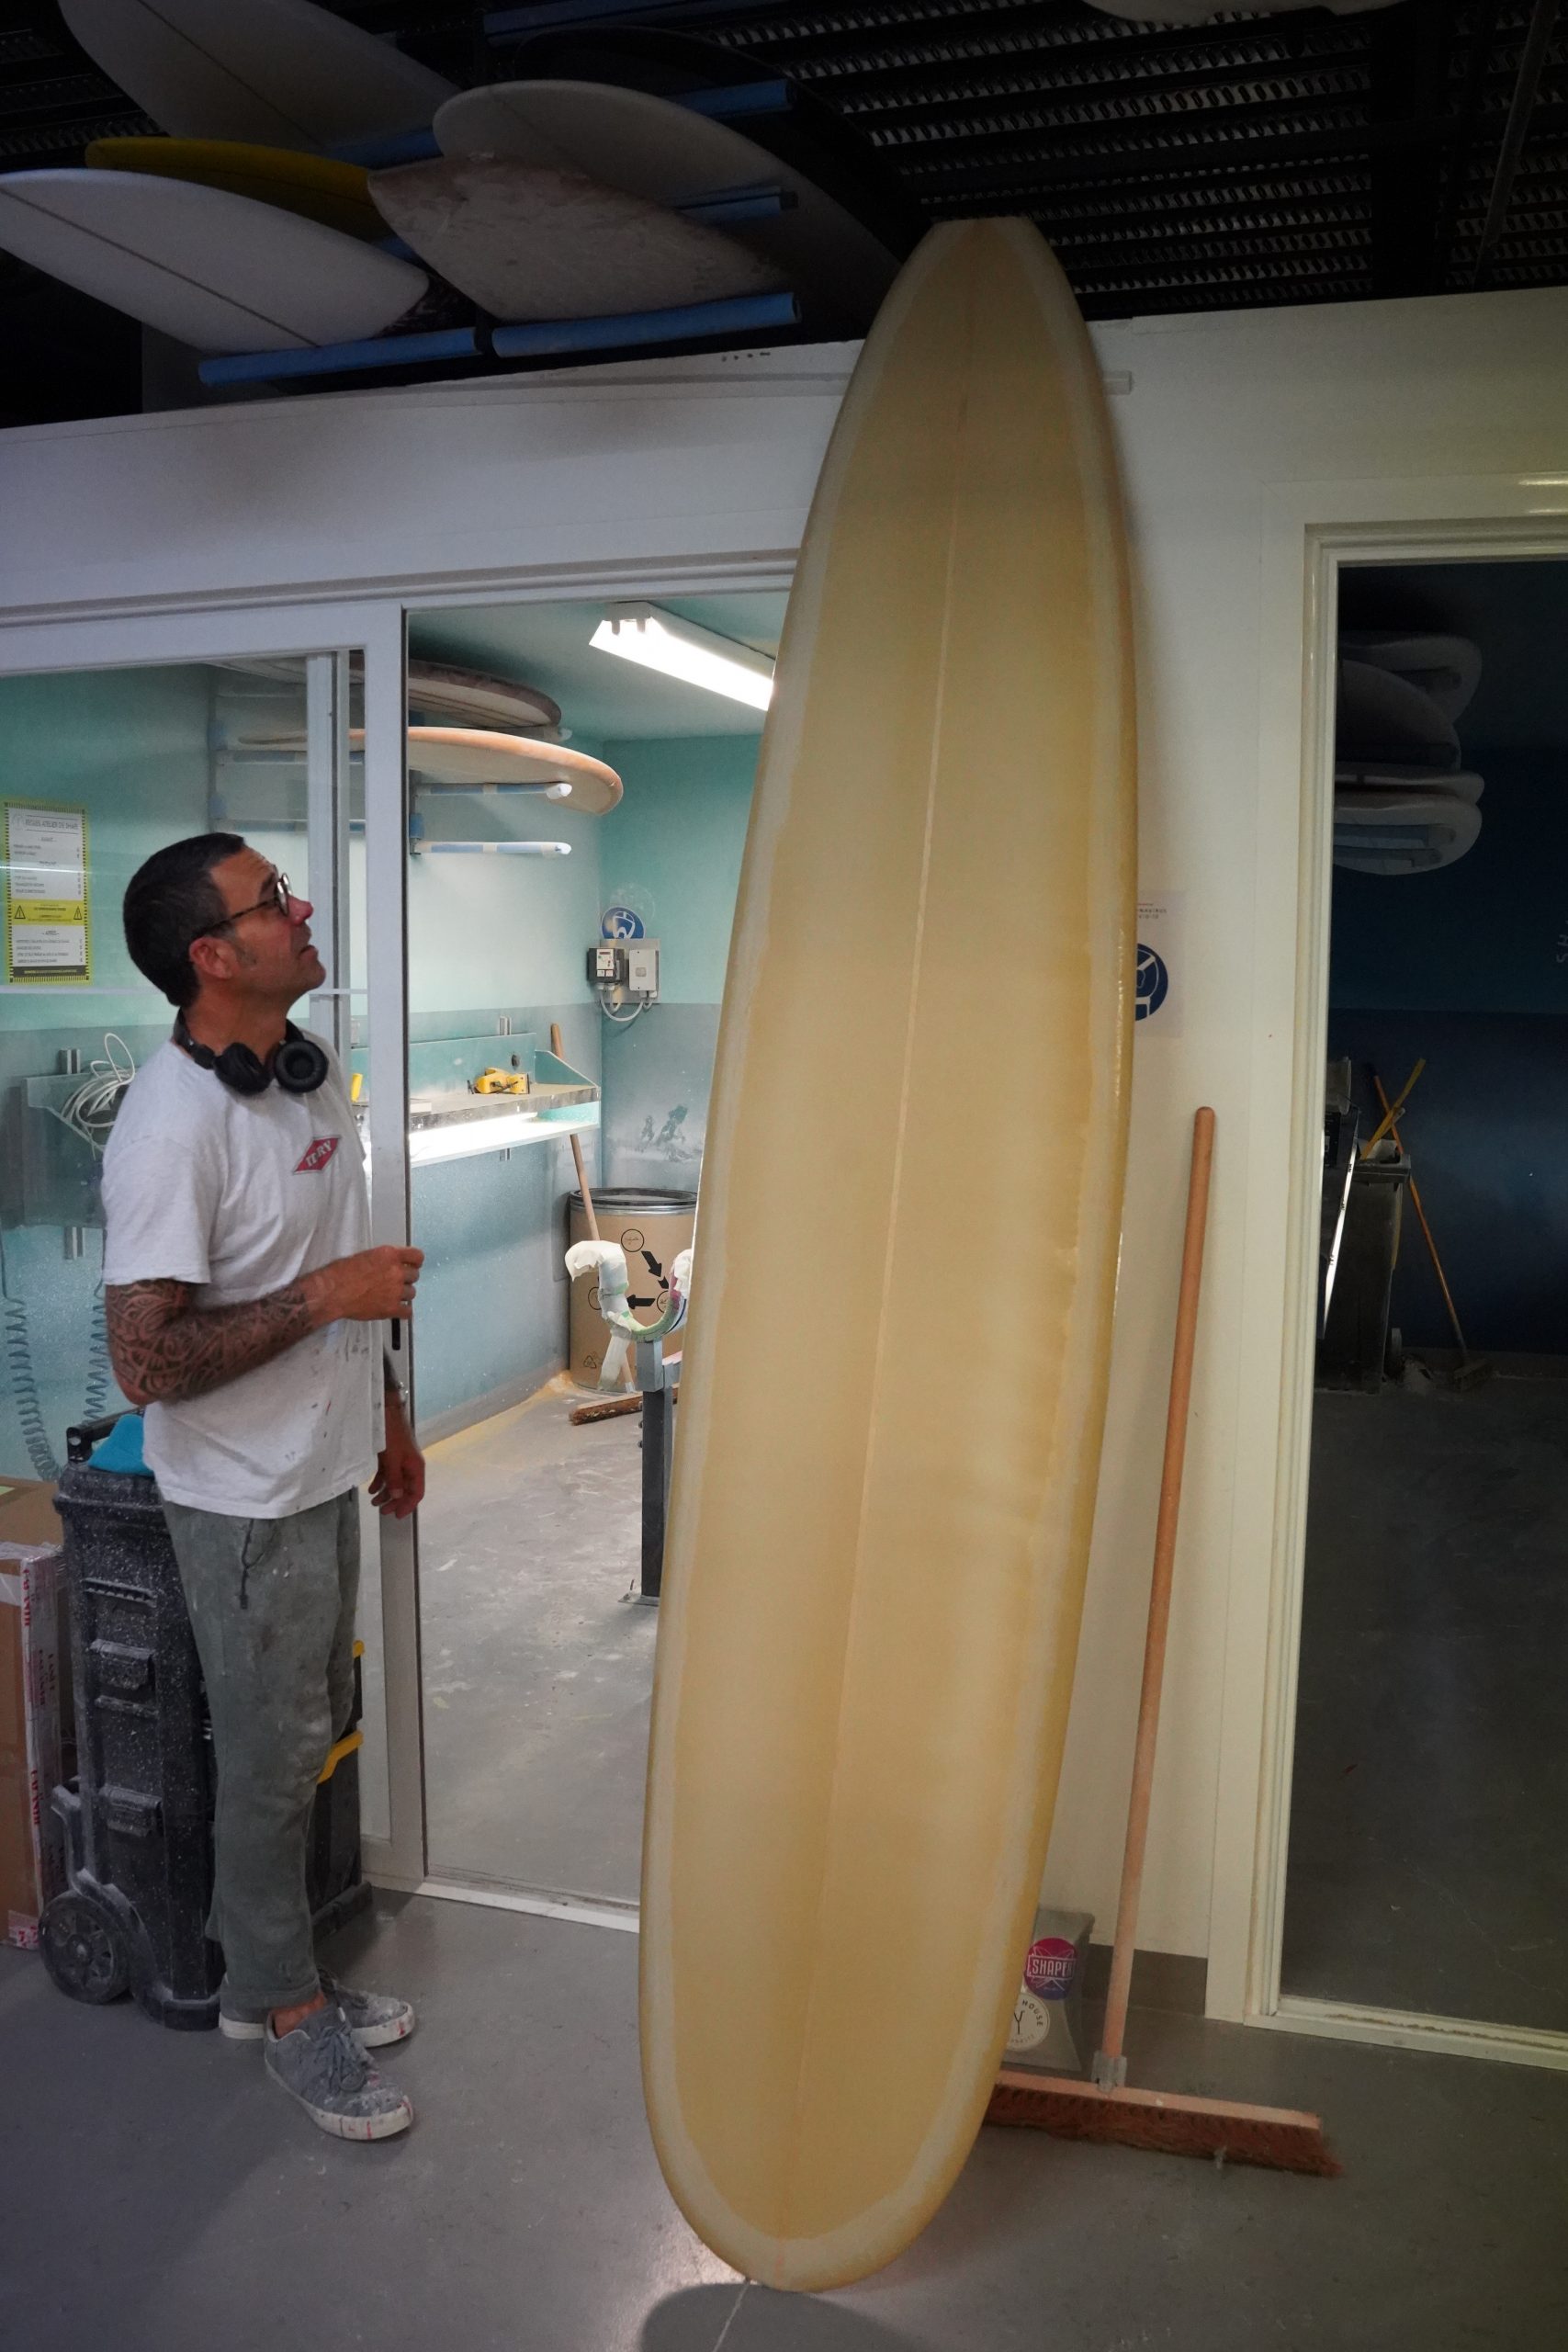
After completing these steps, the surfboard can proceed to the finishing stage, which involves sanding, applying a gloss coat, and adding fin boxes or other hardware. Stay tuned for next weeks part 4!